Network & Camera Setup Guide
This guide walks you through the complete process of setting up your Arvist station at a trade show, conference, or new deployment — from physically connecting the hardware to getting all cameras live and named. Follow the steps in order and you'll be up and running quickly, even if this is your first time.
What You'll Need
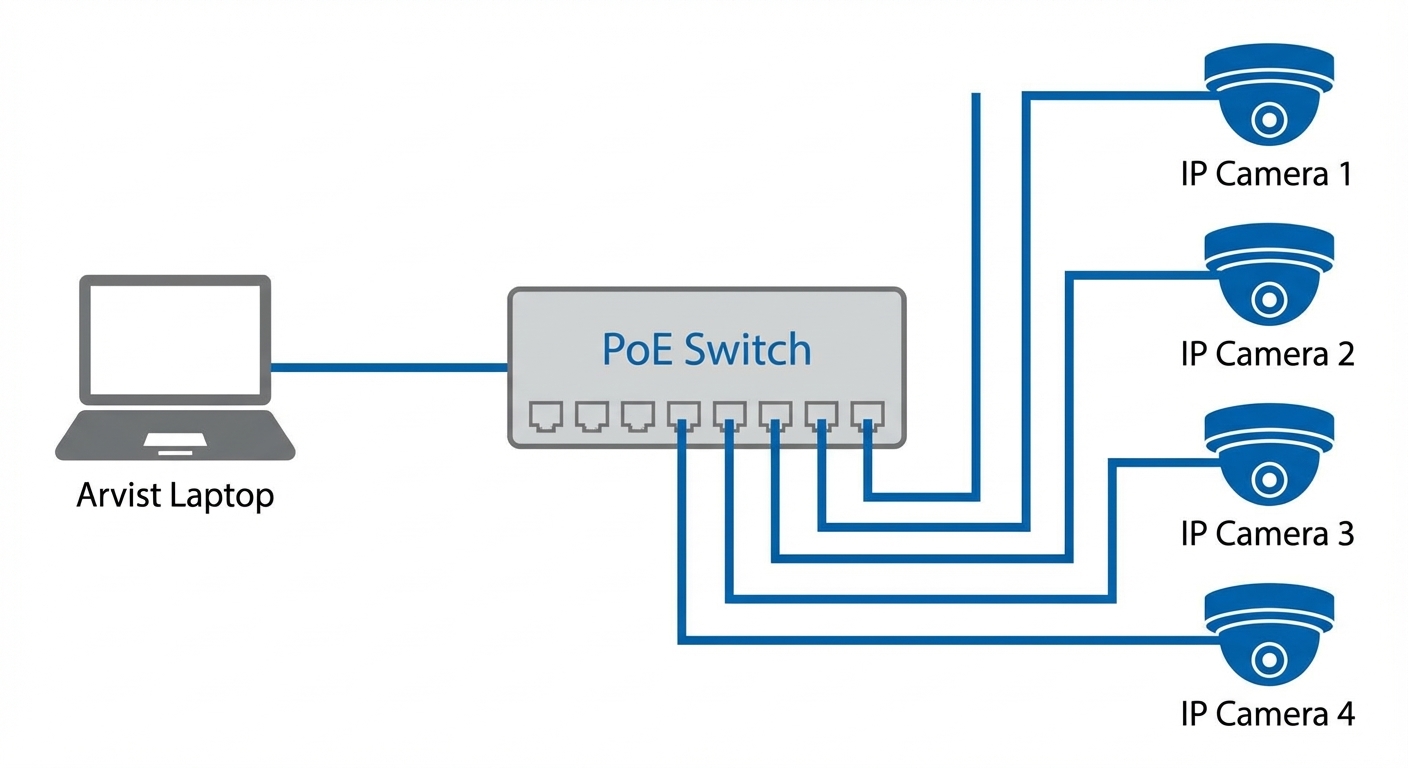
- Arvist Laptop (the server running all Arvist services)
- Network Switch (unmanaged or managed, PoE recommended for IP cameras)
- IP Cameras (e.g. Hanwha, Hikvision, Dahua, or other RTSP-capable cameras)
- Ethernet cable connecting the laptop to the switch
- Power over Ethernet (PoE) cables or injectors for each camera
- WiFi access for the laptop (optional, but required for remote access from other devices)
Phase 1 — Physical Setup
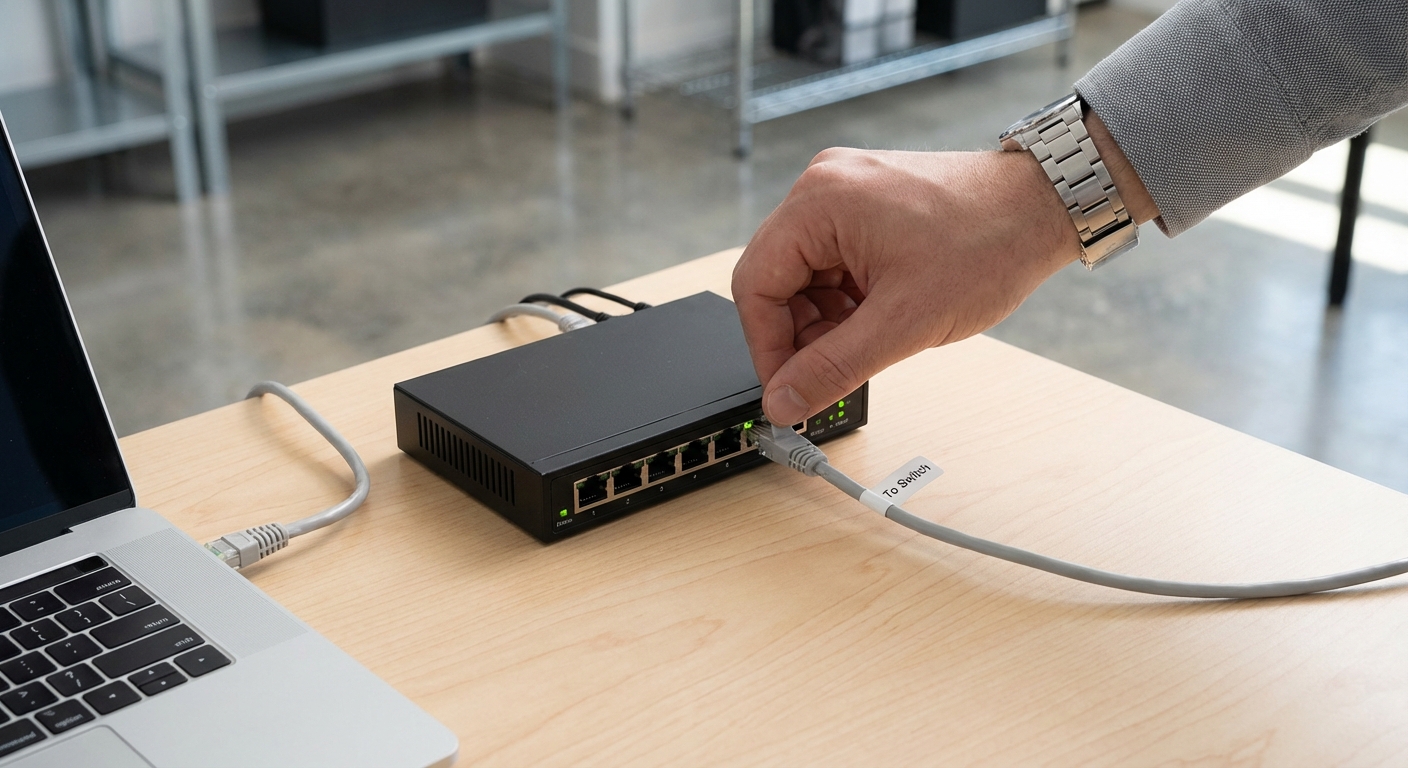
Step 1: Connect the Arvist Laptop to the Switch
Plug an ethernet cable from the laptop's ethernet port directly into the switch. This is the dedicated camera network.
Note: You are creating a separate subnet for cameras on the ethernet interface. The laptop's WiFi remains connected to your regular network/internet.
The ethernet port on most laptops is labeled enp3s0 or similar. You'll select this in the software later.
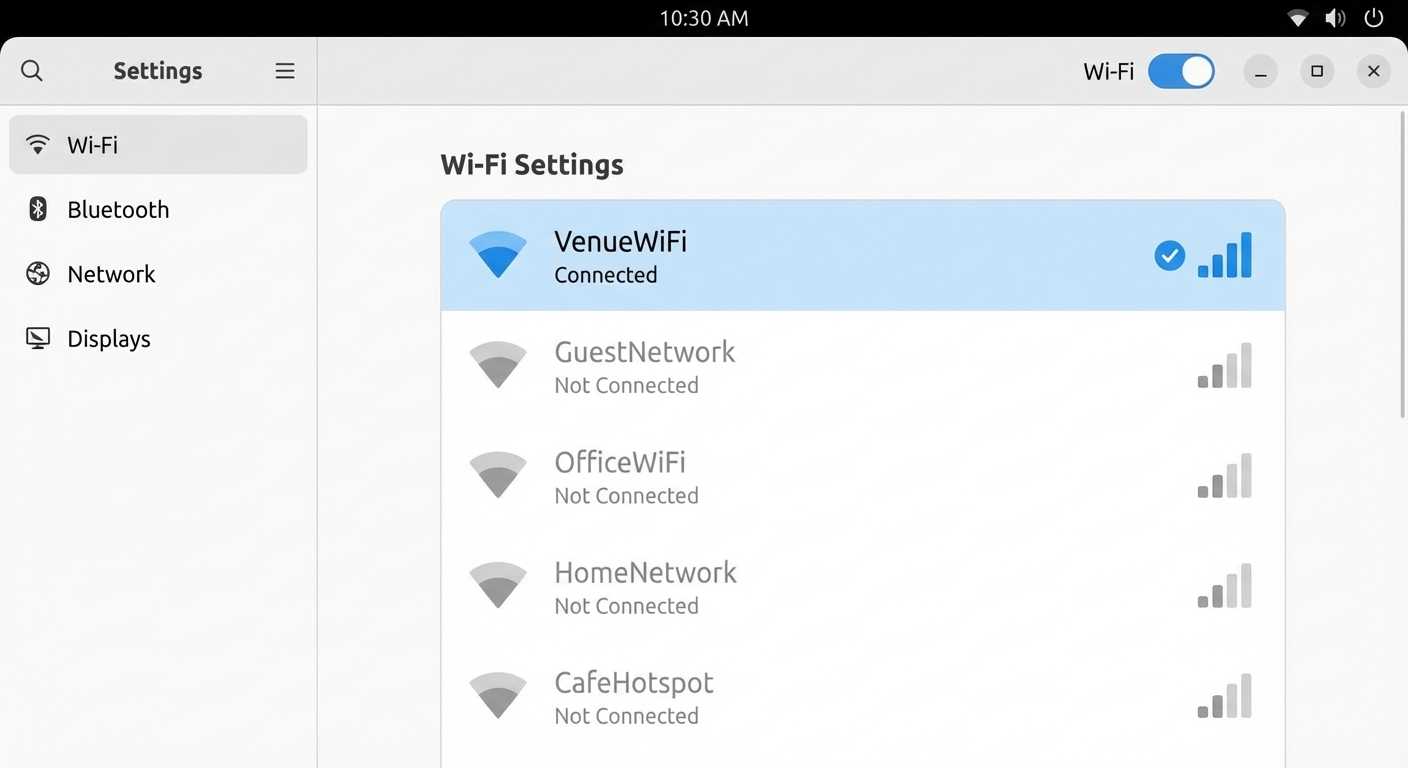
Step 2: Connect the Laptop to WiFi
Connect the Arvist laptop to your venue WiFi (or mobile hotspot). This allows you and your team to access the Arvist dashboard from other devices like a Chromebook or phone on the same network.
Phase 2 — Start the Arvist System
Step 3: Run the Start Script
On the laptop's desktop, double-click the Start Arvist script (or launch it from the terminal if instructed). This will:
- Start all Docker containers (NVR, API, frontend, etc.)
- Display the IP address assigned to the WiFi interface (
wlan0orwlo1)
Example output:
  ✓ All services started
  Access Arvist at: http://192.168.1.42
Write down or remember this IP address — you'll use it to access the dashboard from any device on the same WiFi.
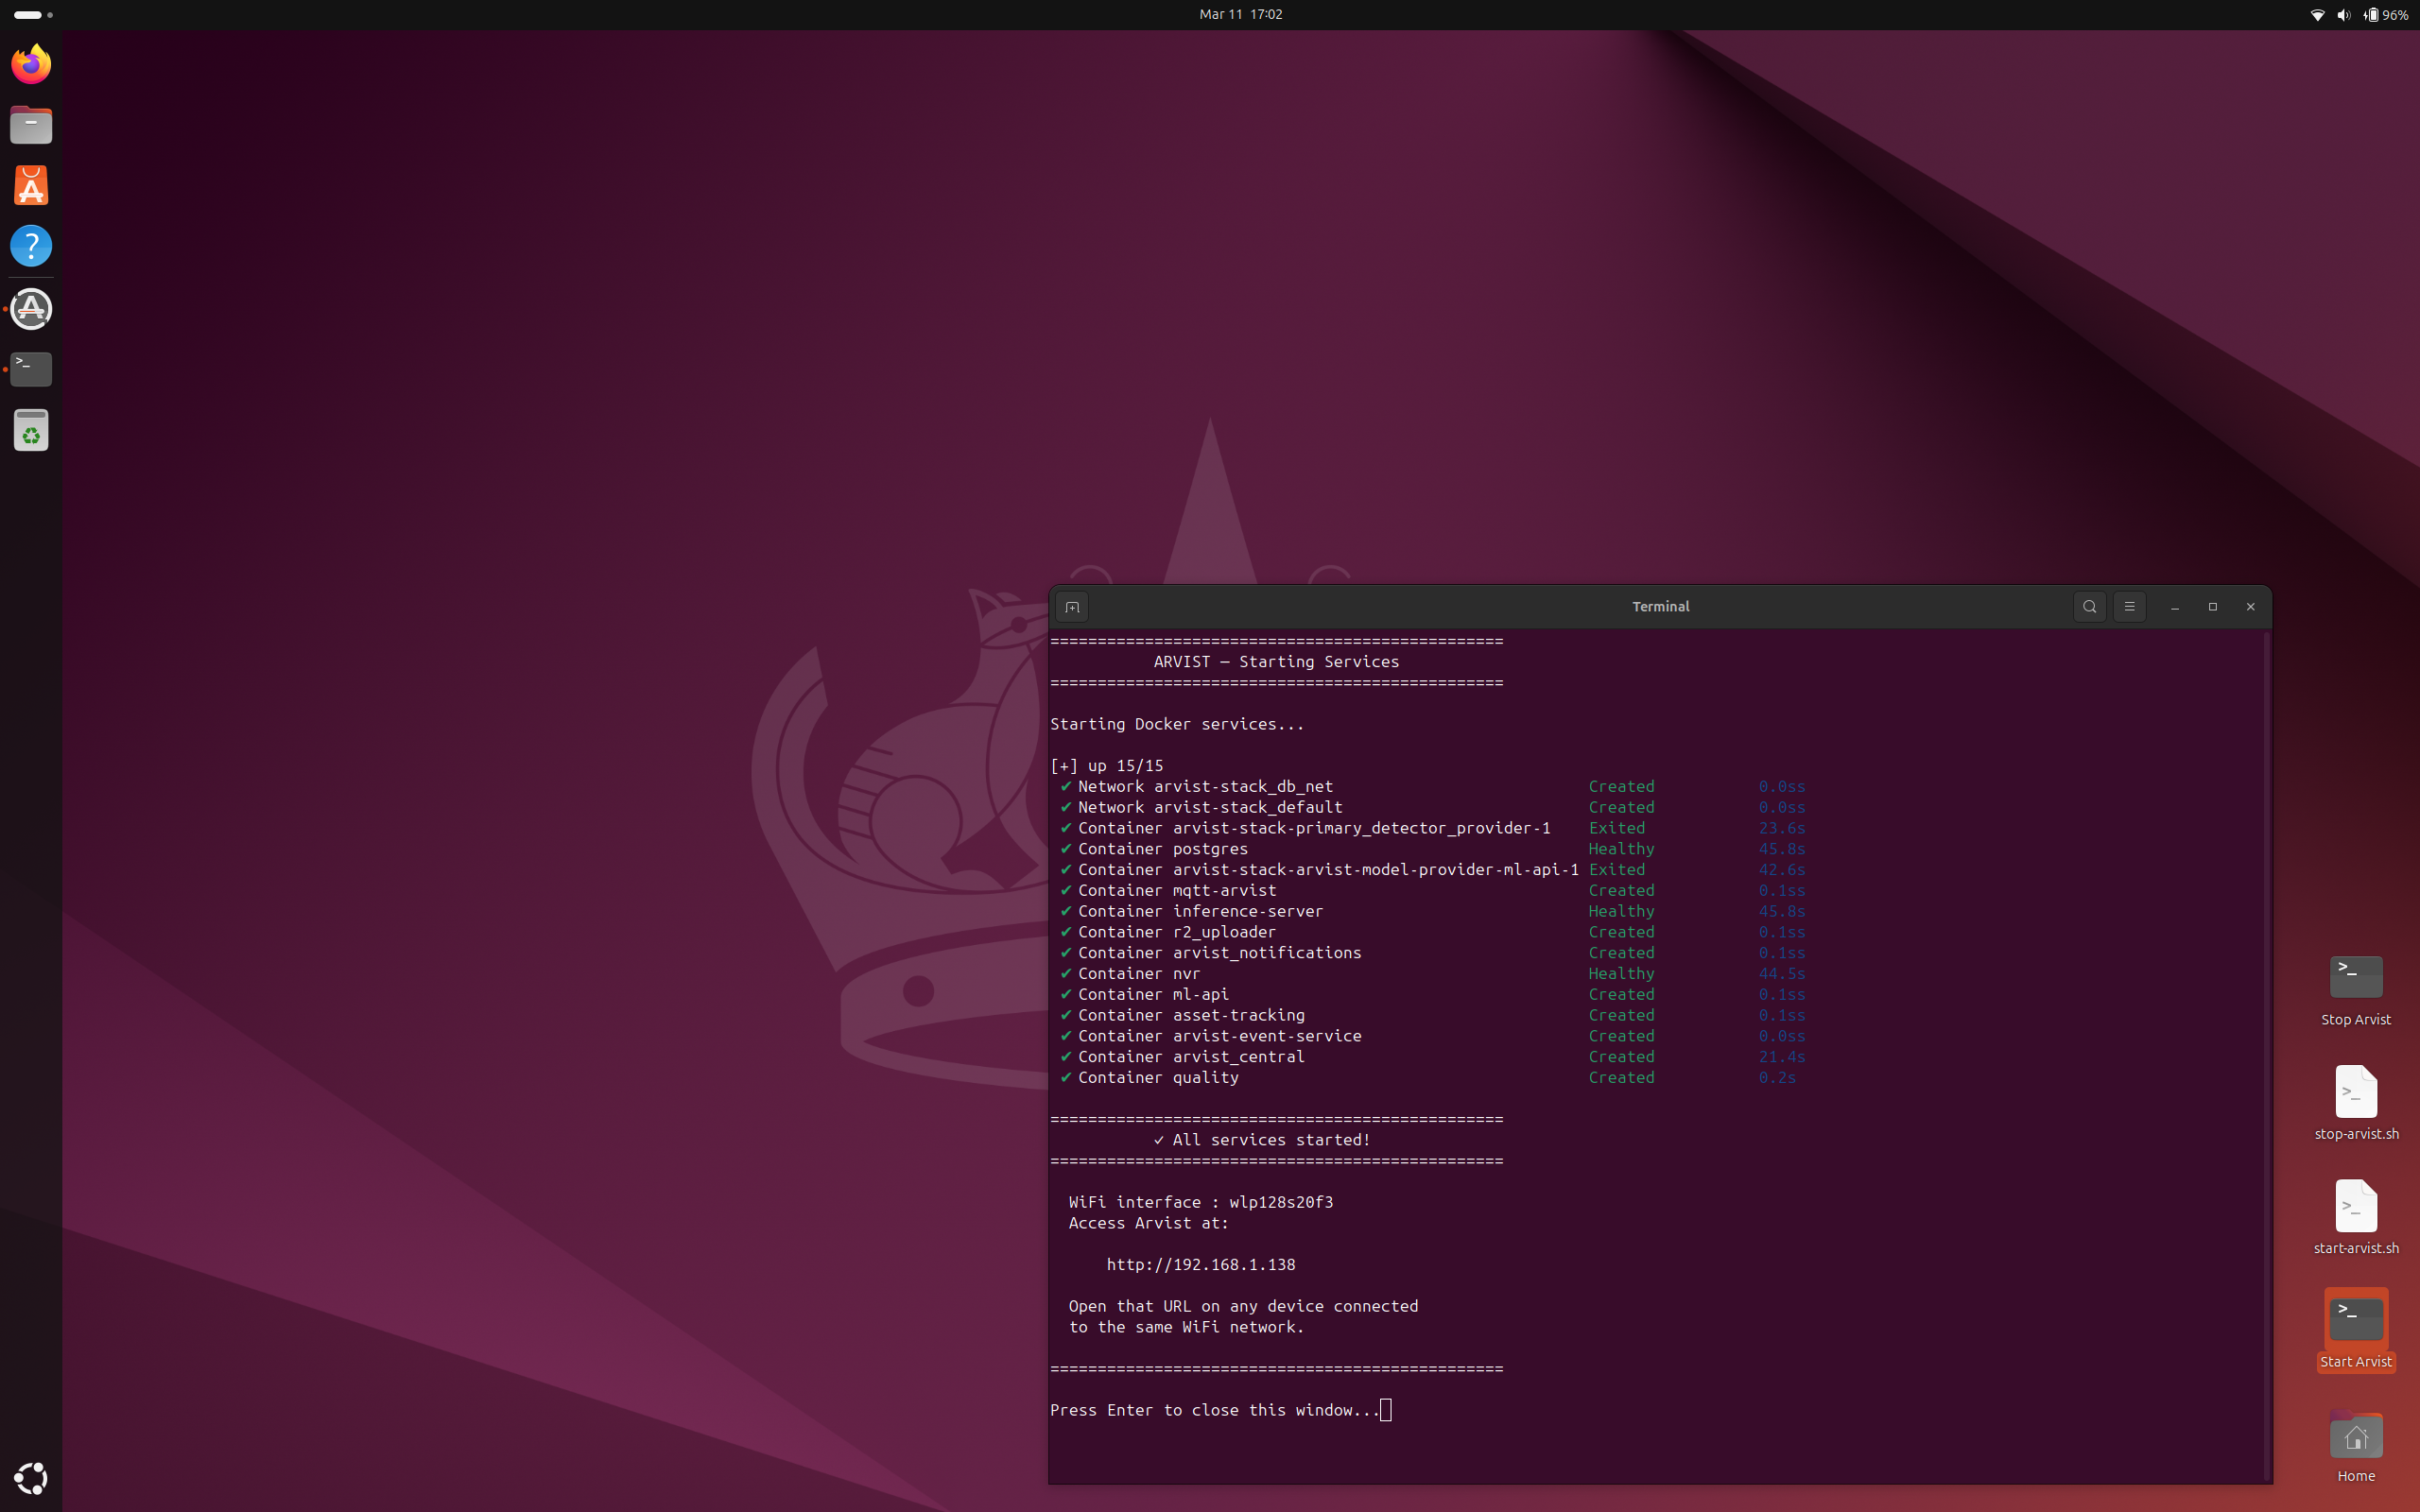
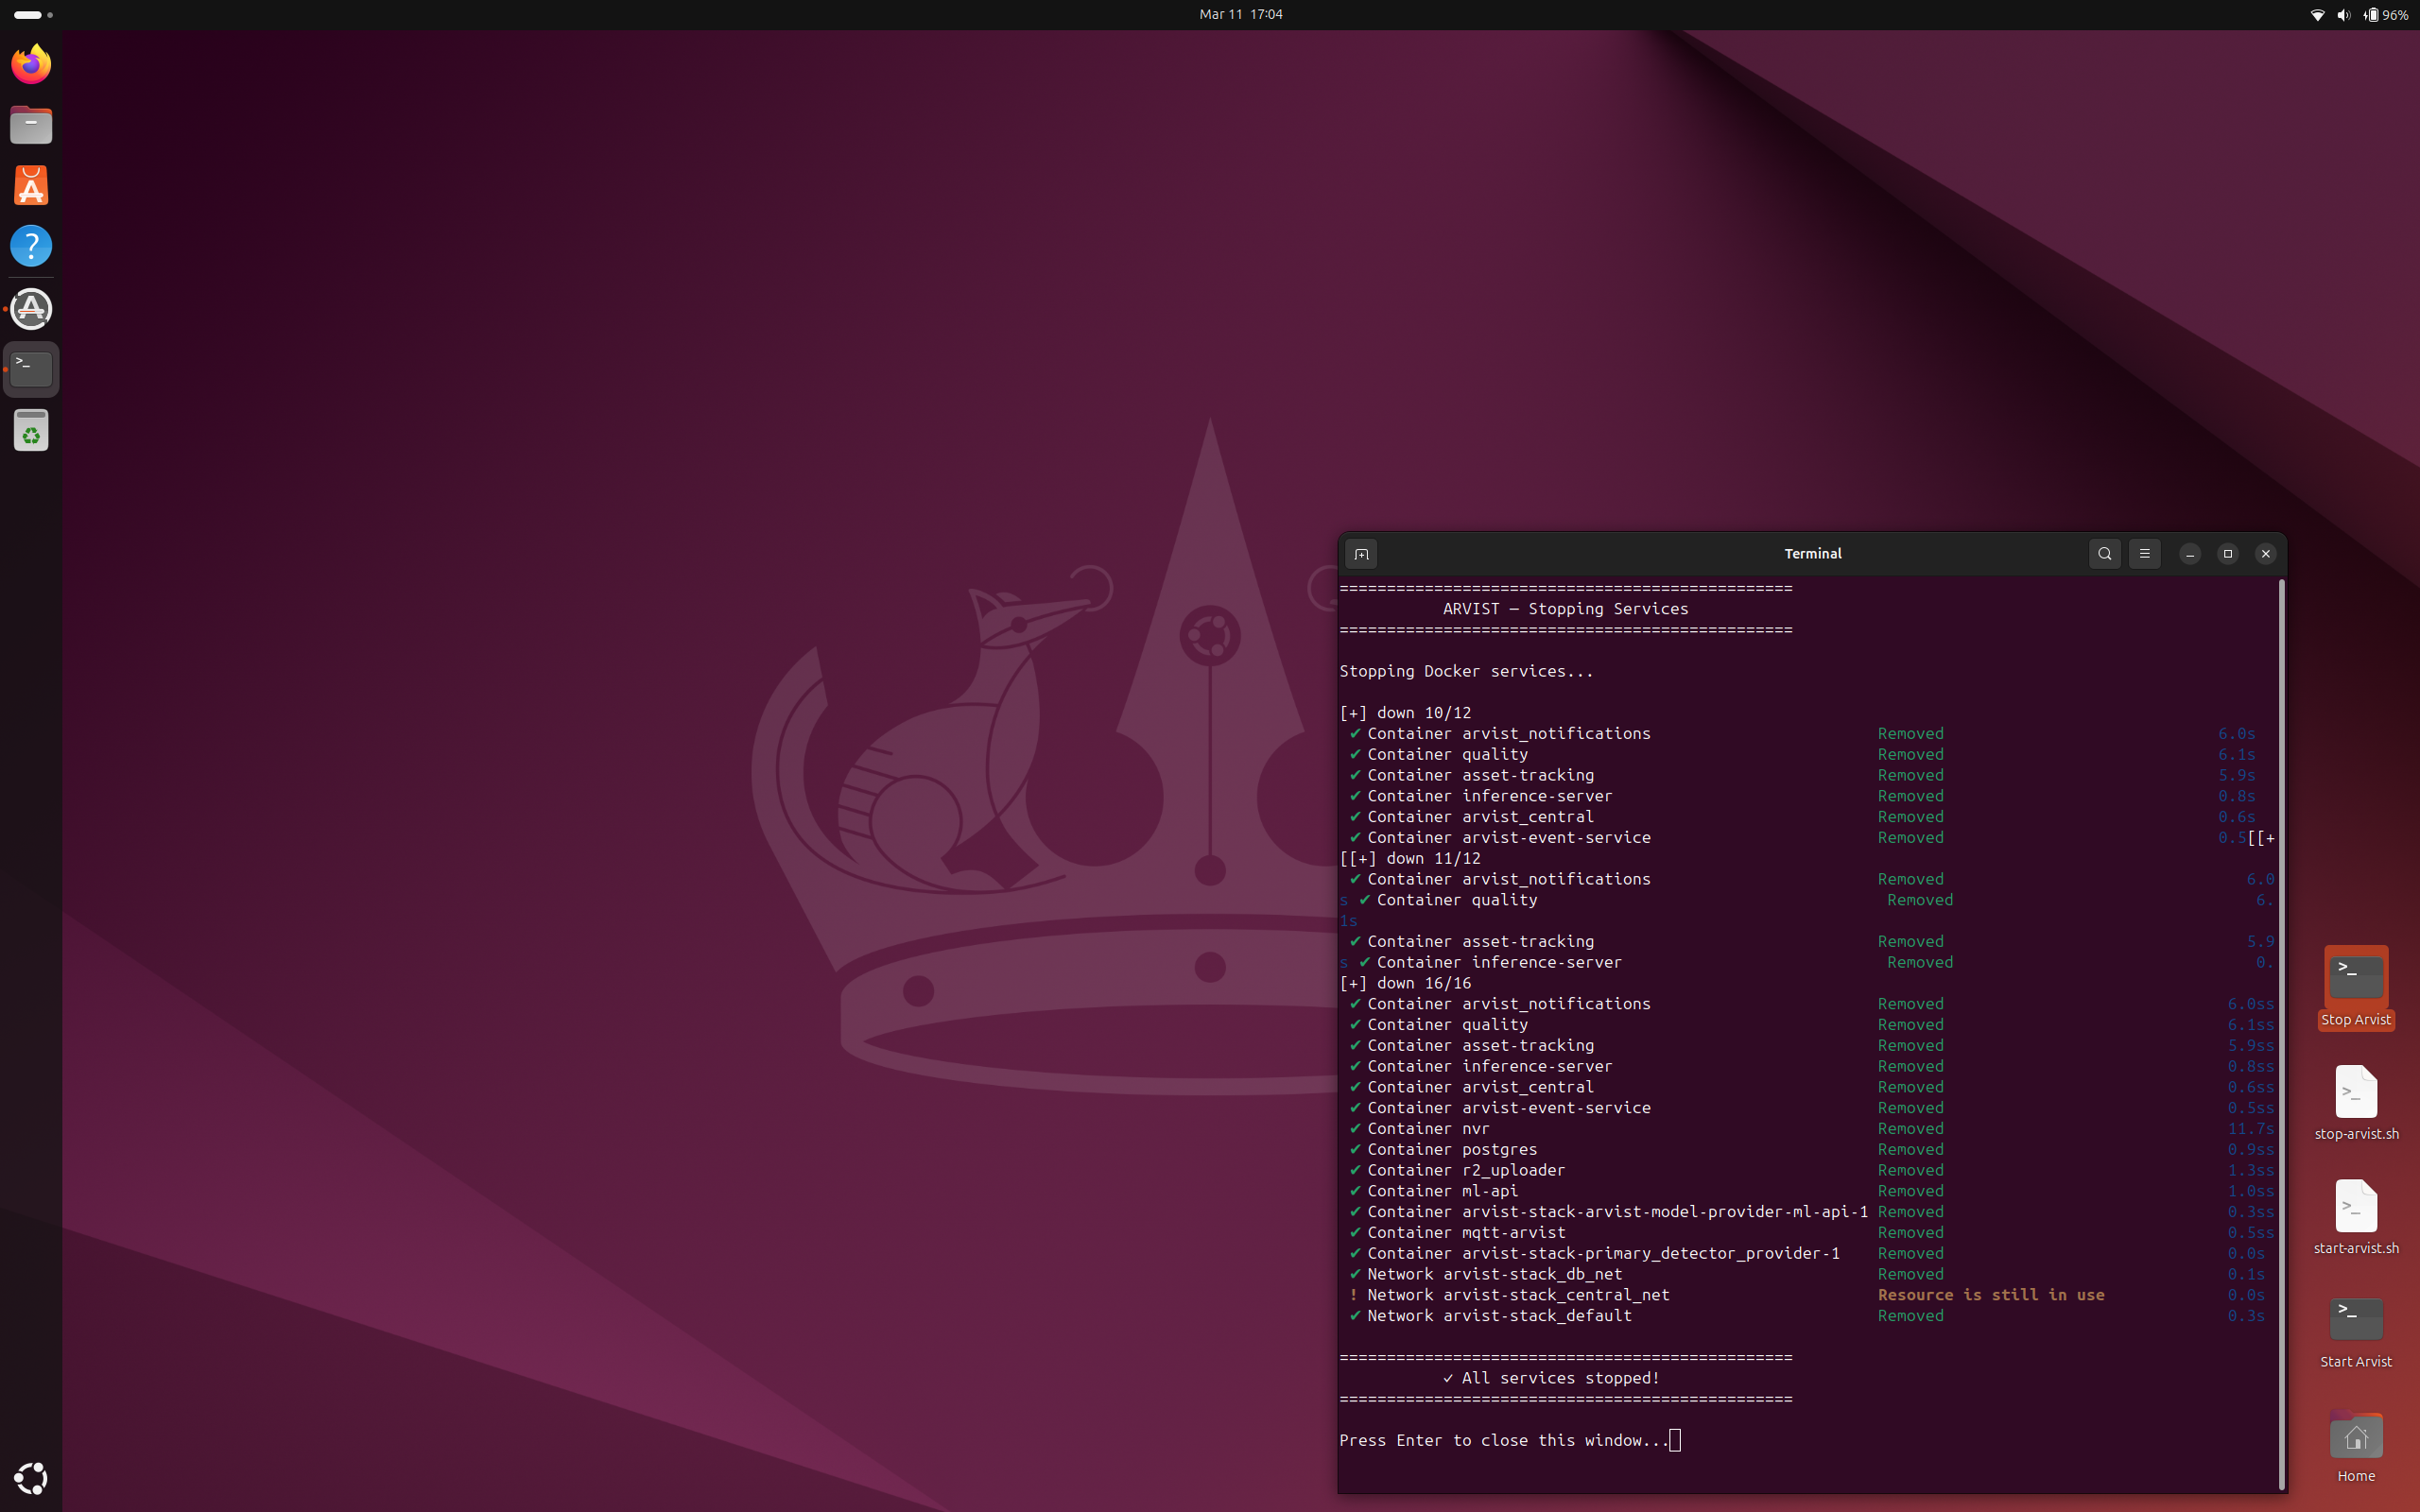
When you're done, use the Stop Arvist desktop icon to cleanly shut down all services.
Phase 3 — Access the Admin Dashboard
Step 4: Open the Admin Dashboard
On the Arvist laptop (or any device connected to the same WiFi), open a web browser and navigate to:
http://<YOUR_IP_ADDRESS>/admin
For example: http://192.168.1.42/admin
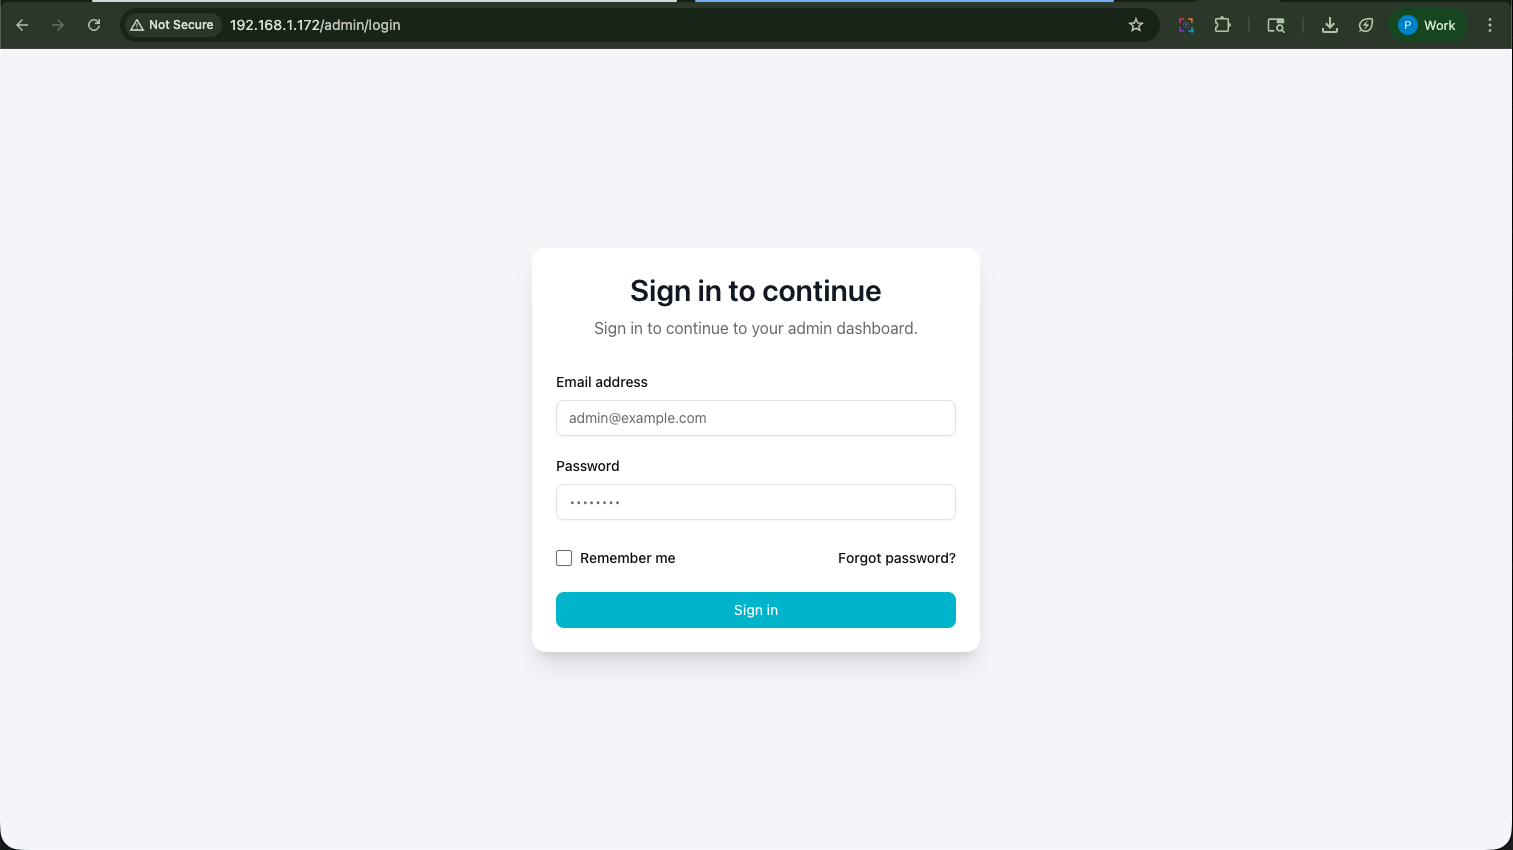
Step 5: Log In
Enter your admin credentials (username and password) and click Sign in.
If you don't have credentials yet, contact your Arvist administrator to get your account set up.
Phase 4 — Configure the Network Interface
This step sets up the ethernet interface so it can assign IP addresses to the cameras.
Step 6: Navigate to Networks
In the left sidebar, click on Operations, then click Networks.
Step 7: Load Network Interfaces
On the Networks page, click the Load Interfaces button in the top-right corner.
After a moment, a list of your network interfaces will appear. You're looking for the ethernet interface — typically named something like enp3s0, eth0, or enp4s0.
The WiFi interface (usually
wlan0orwlo1) is for internet access — don't configure that one here.

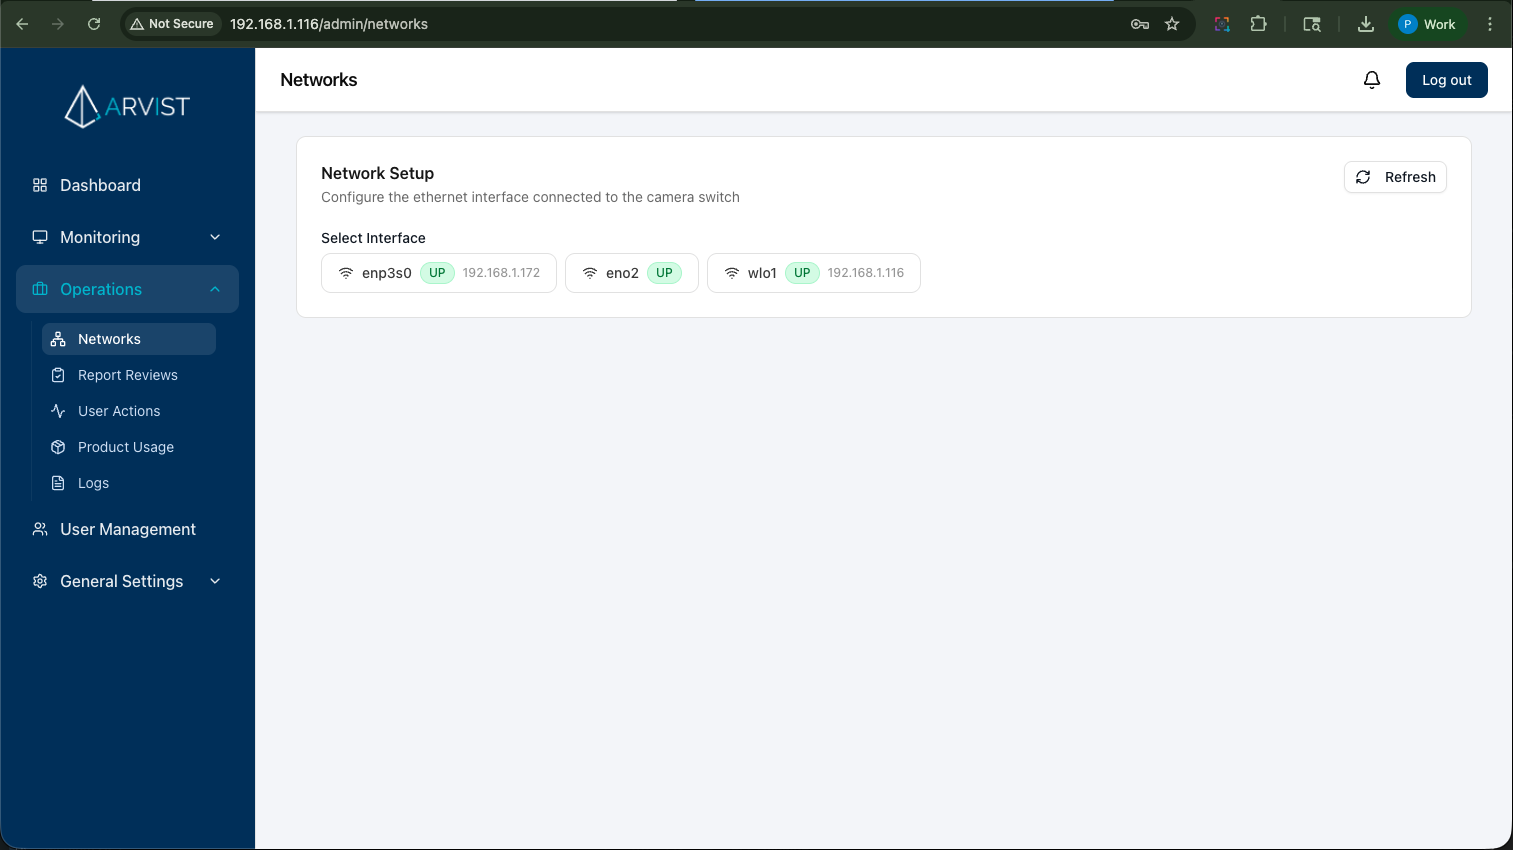
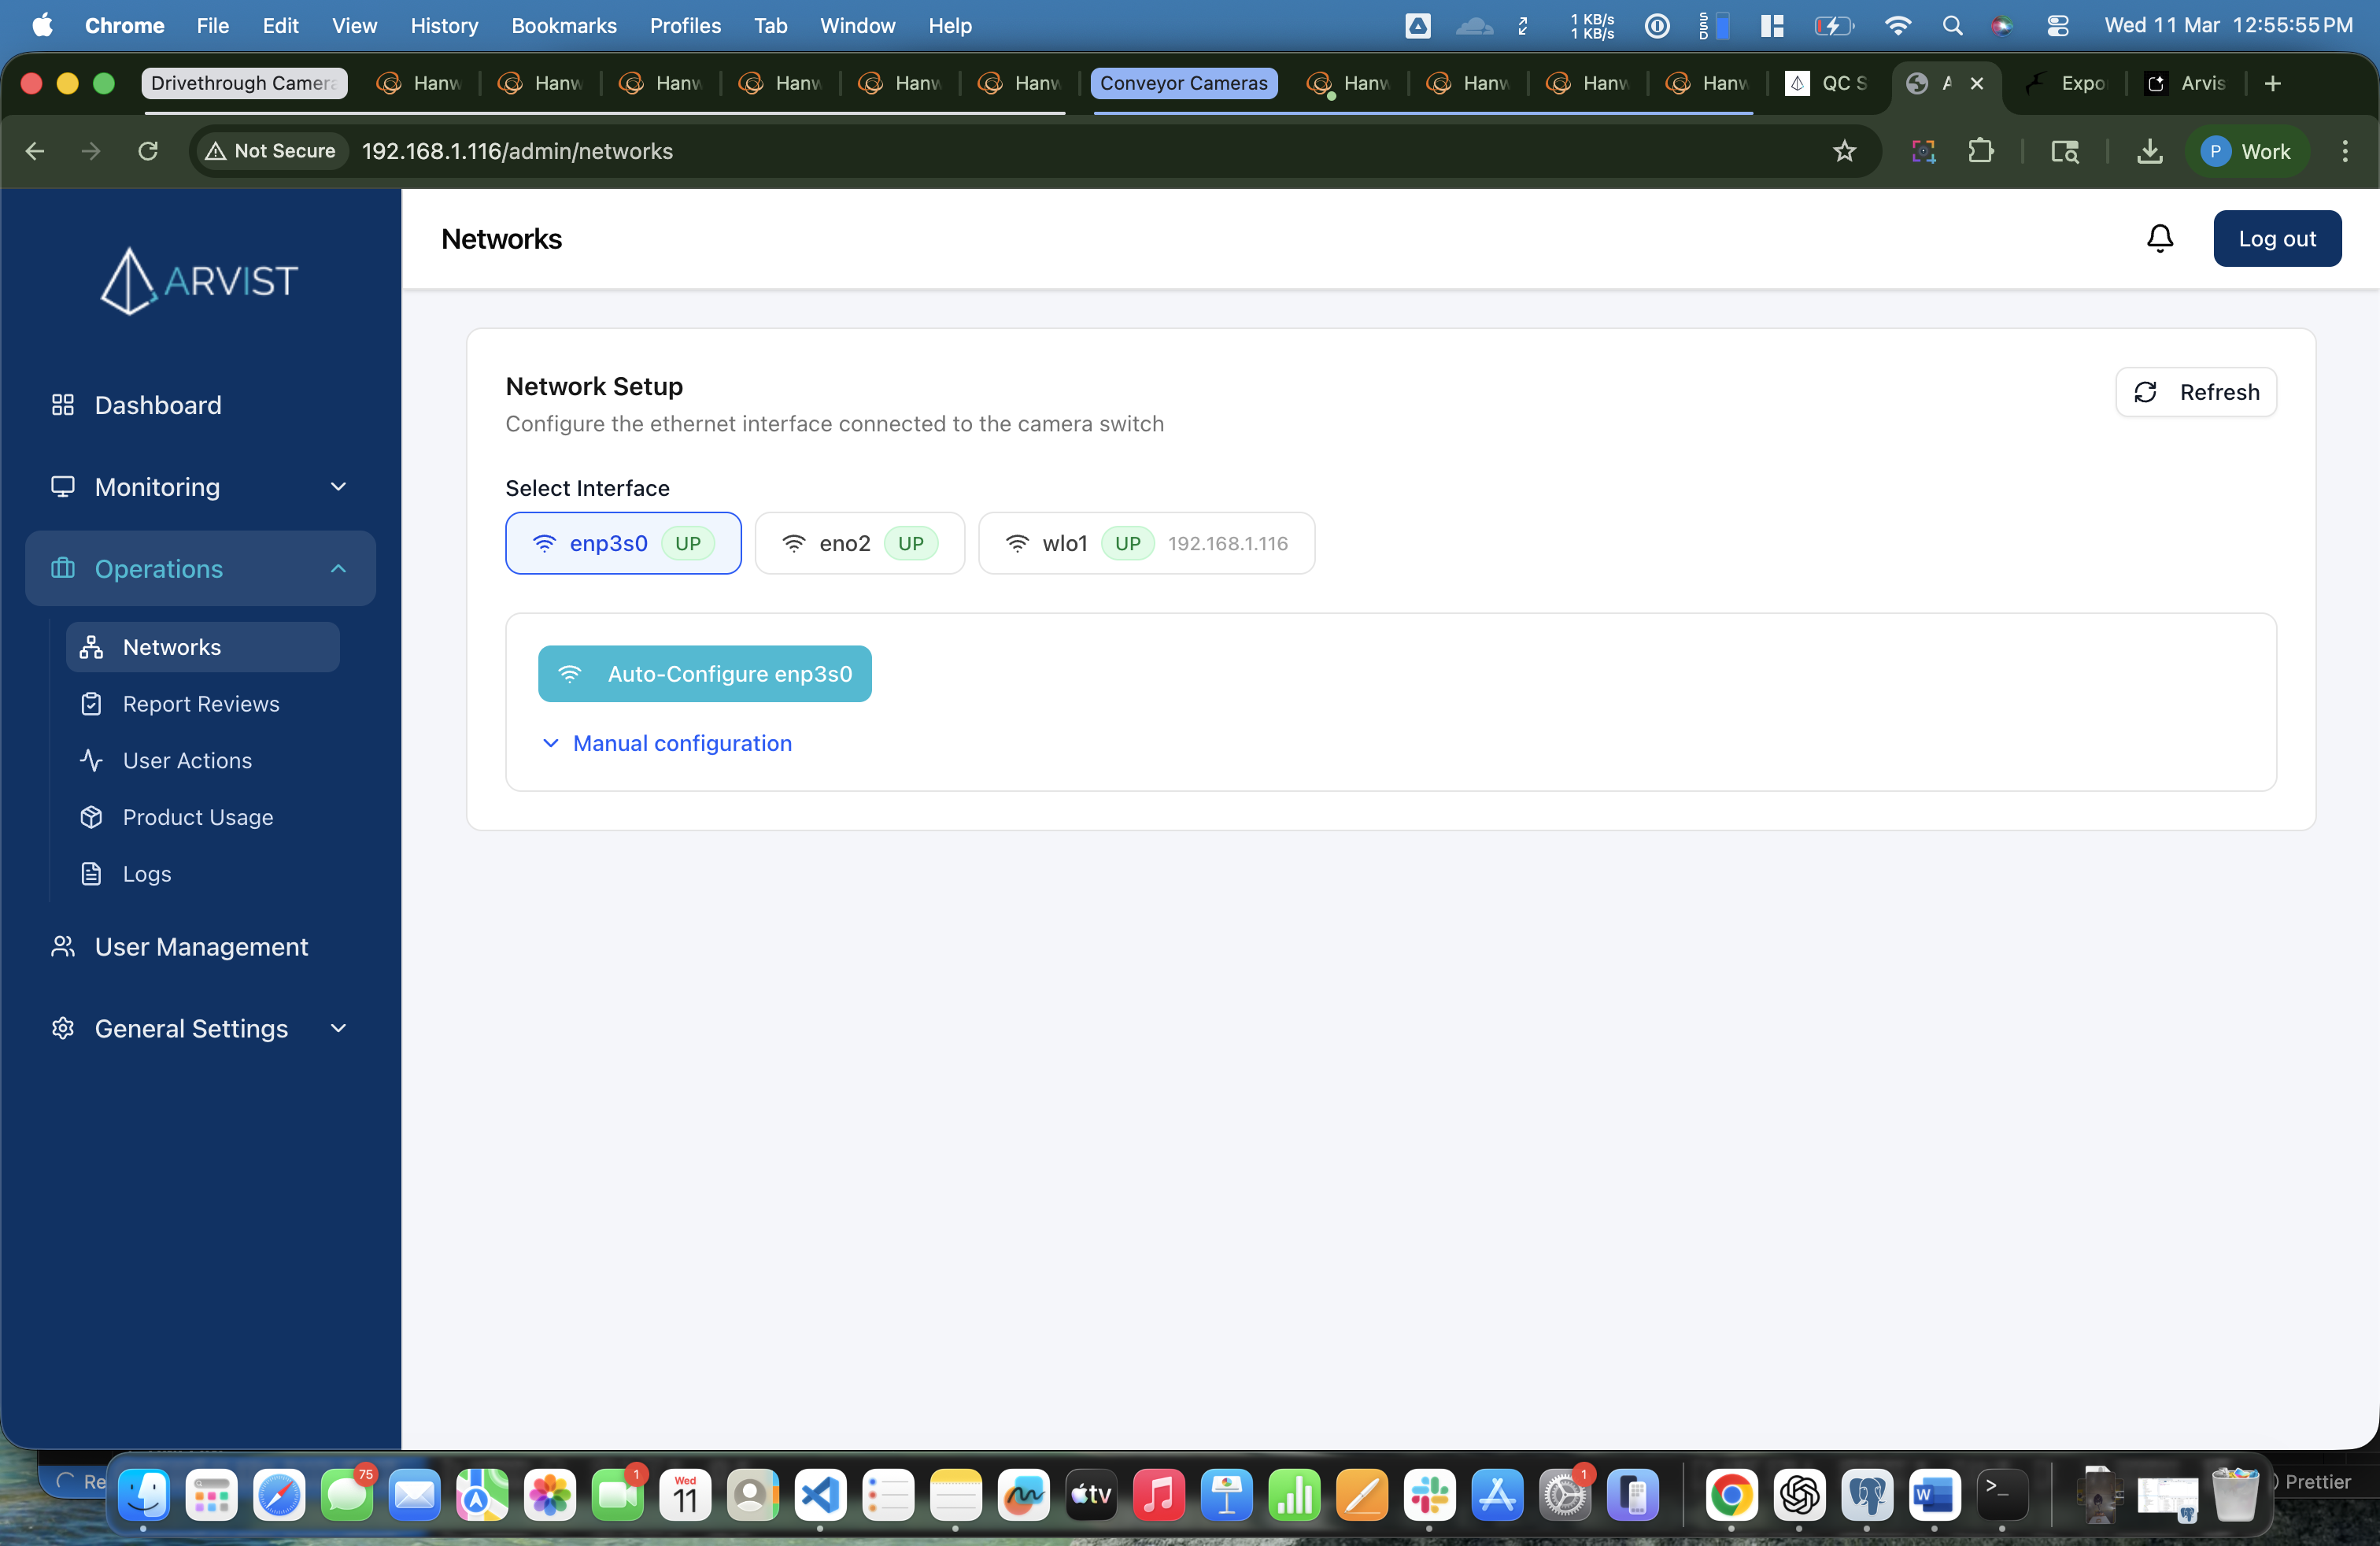
Step 8: Select the Ethernet Interface
Click on the button for your ethernet interface (e.g. enp3s0). It will highlight in blue when selected.
Step 9: Release the Interface (if it has an existing IP)
If the selected interface already shows an IP address next to its name, you need to release it first before auto-configuring a fresh one.
Click the orange Release Interface button.
This removes any existing static IP and hands the interface back to NetworkManager. Wait a few seconds for the release to complete.
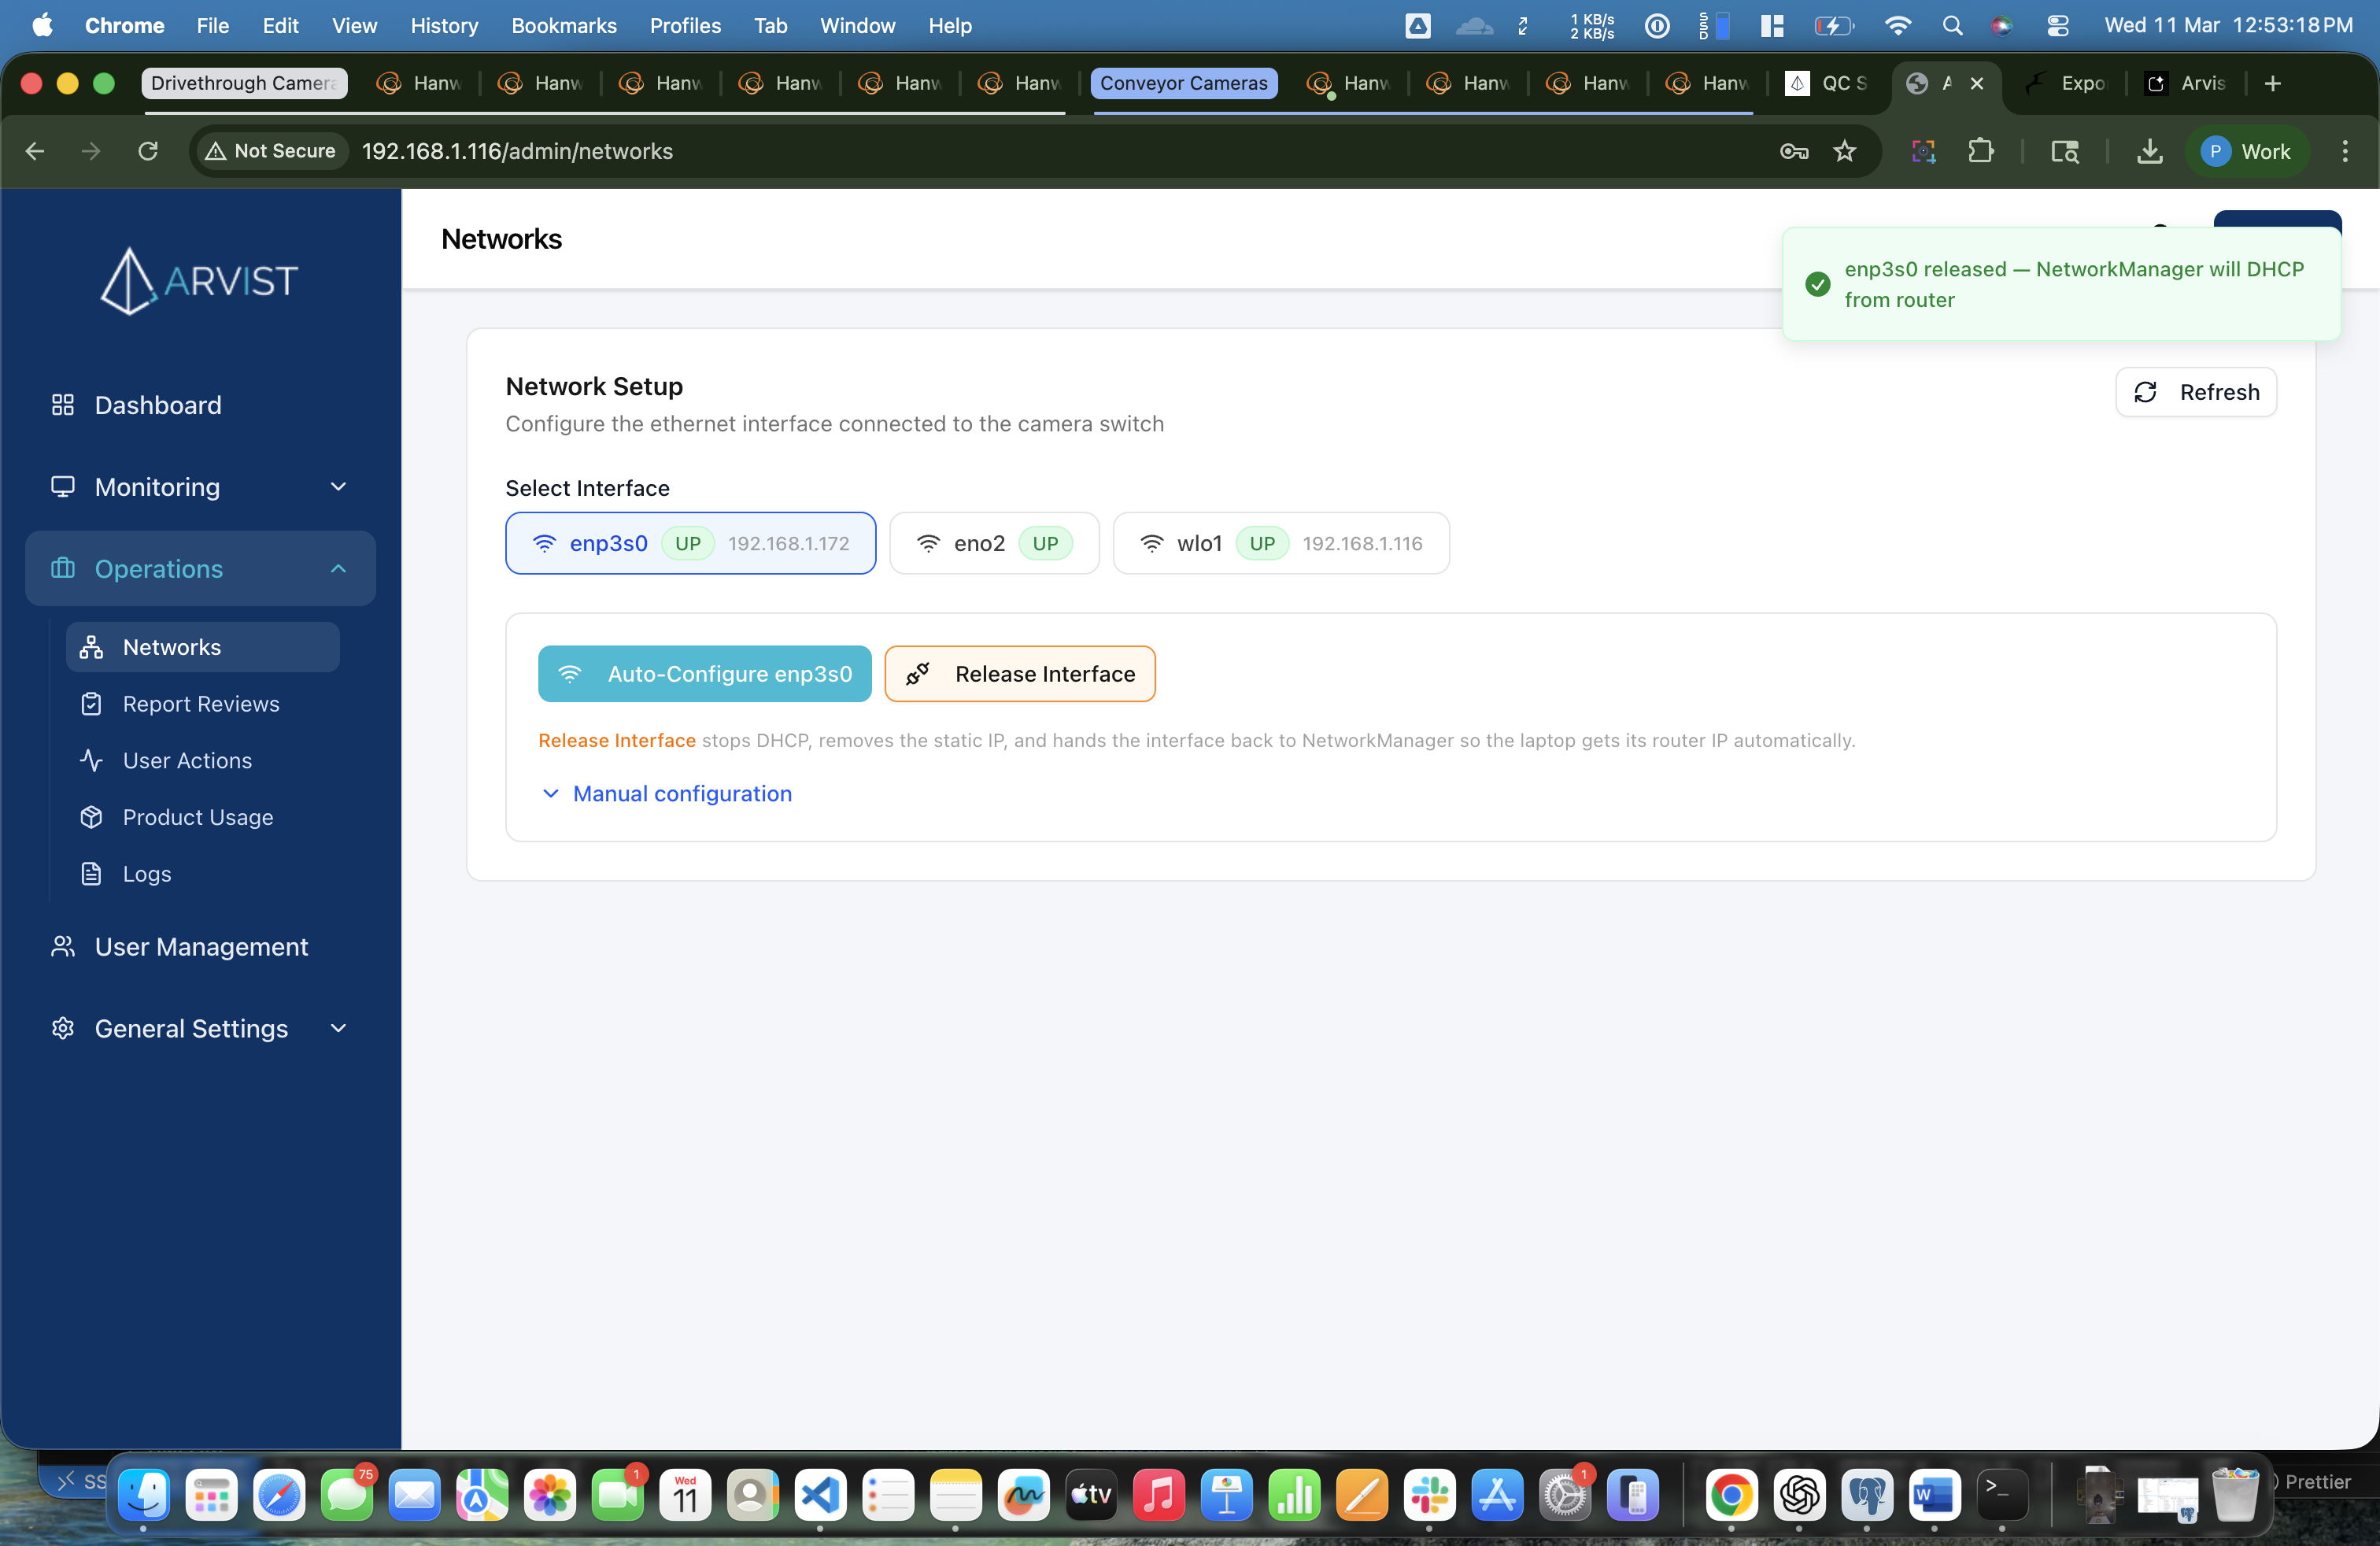
After releasing, the IP address next to enp3s0 will disappear and the Release Interface button will hide — the interface is now ready to be auto-configured.
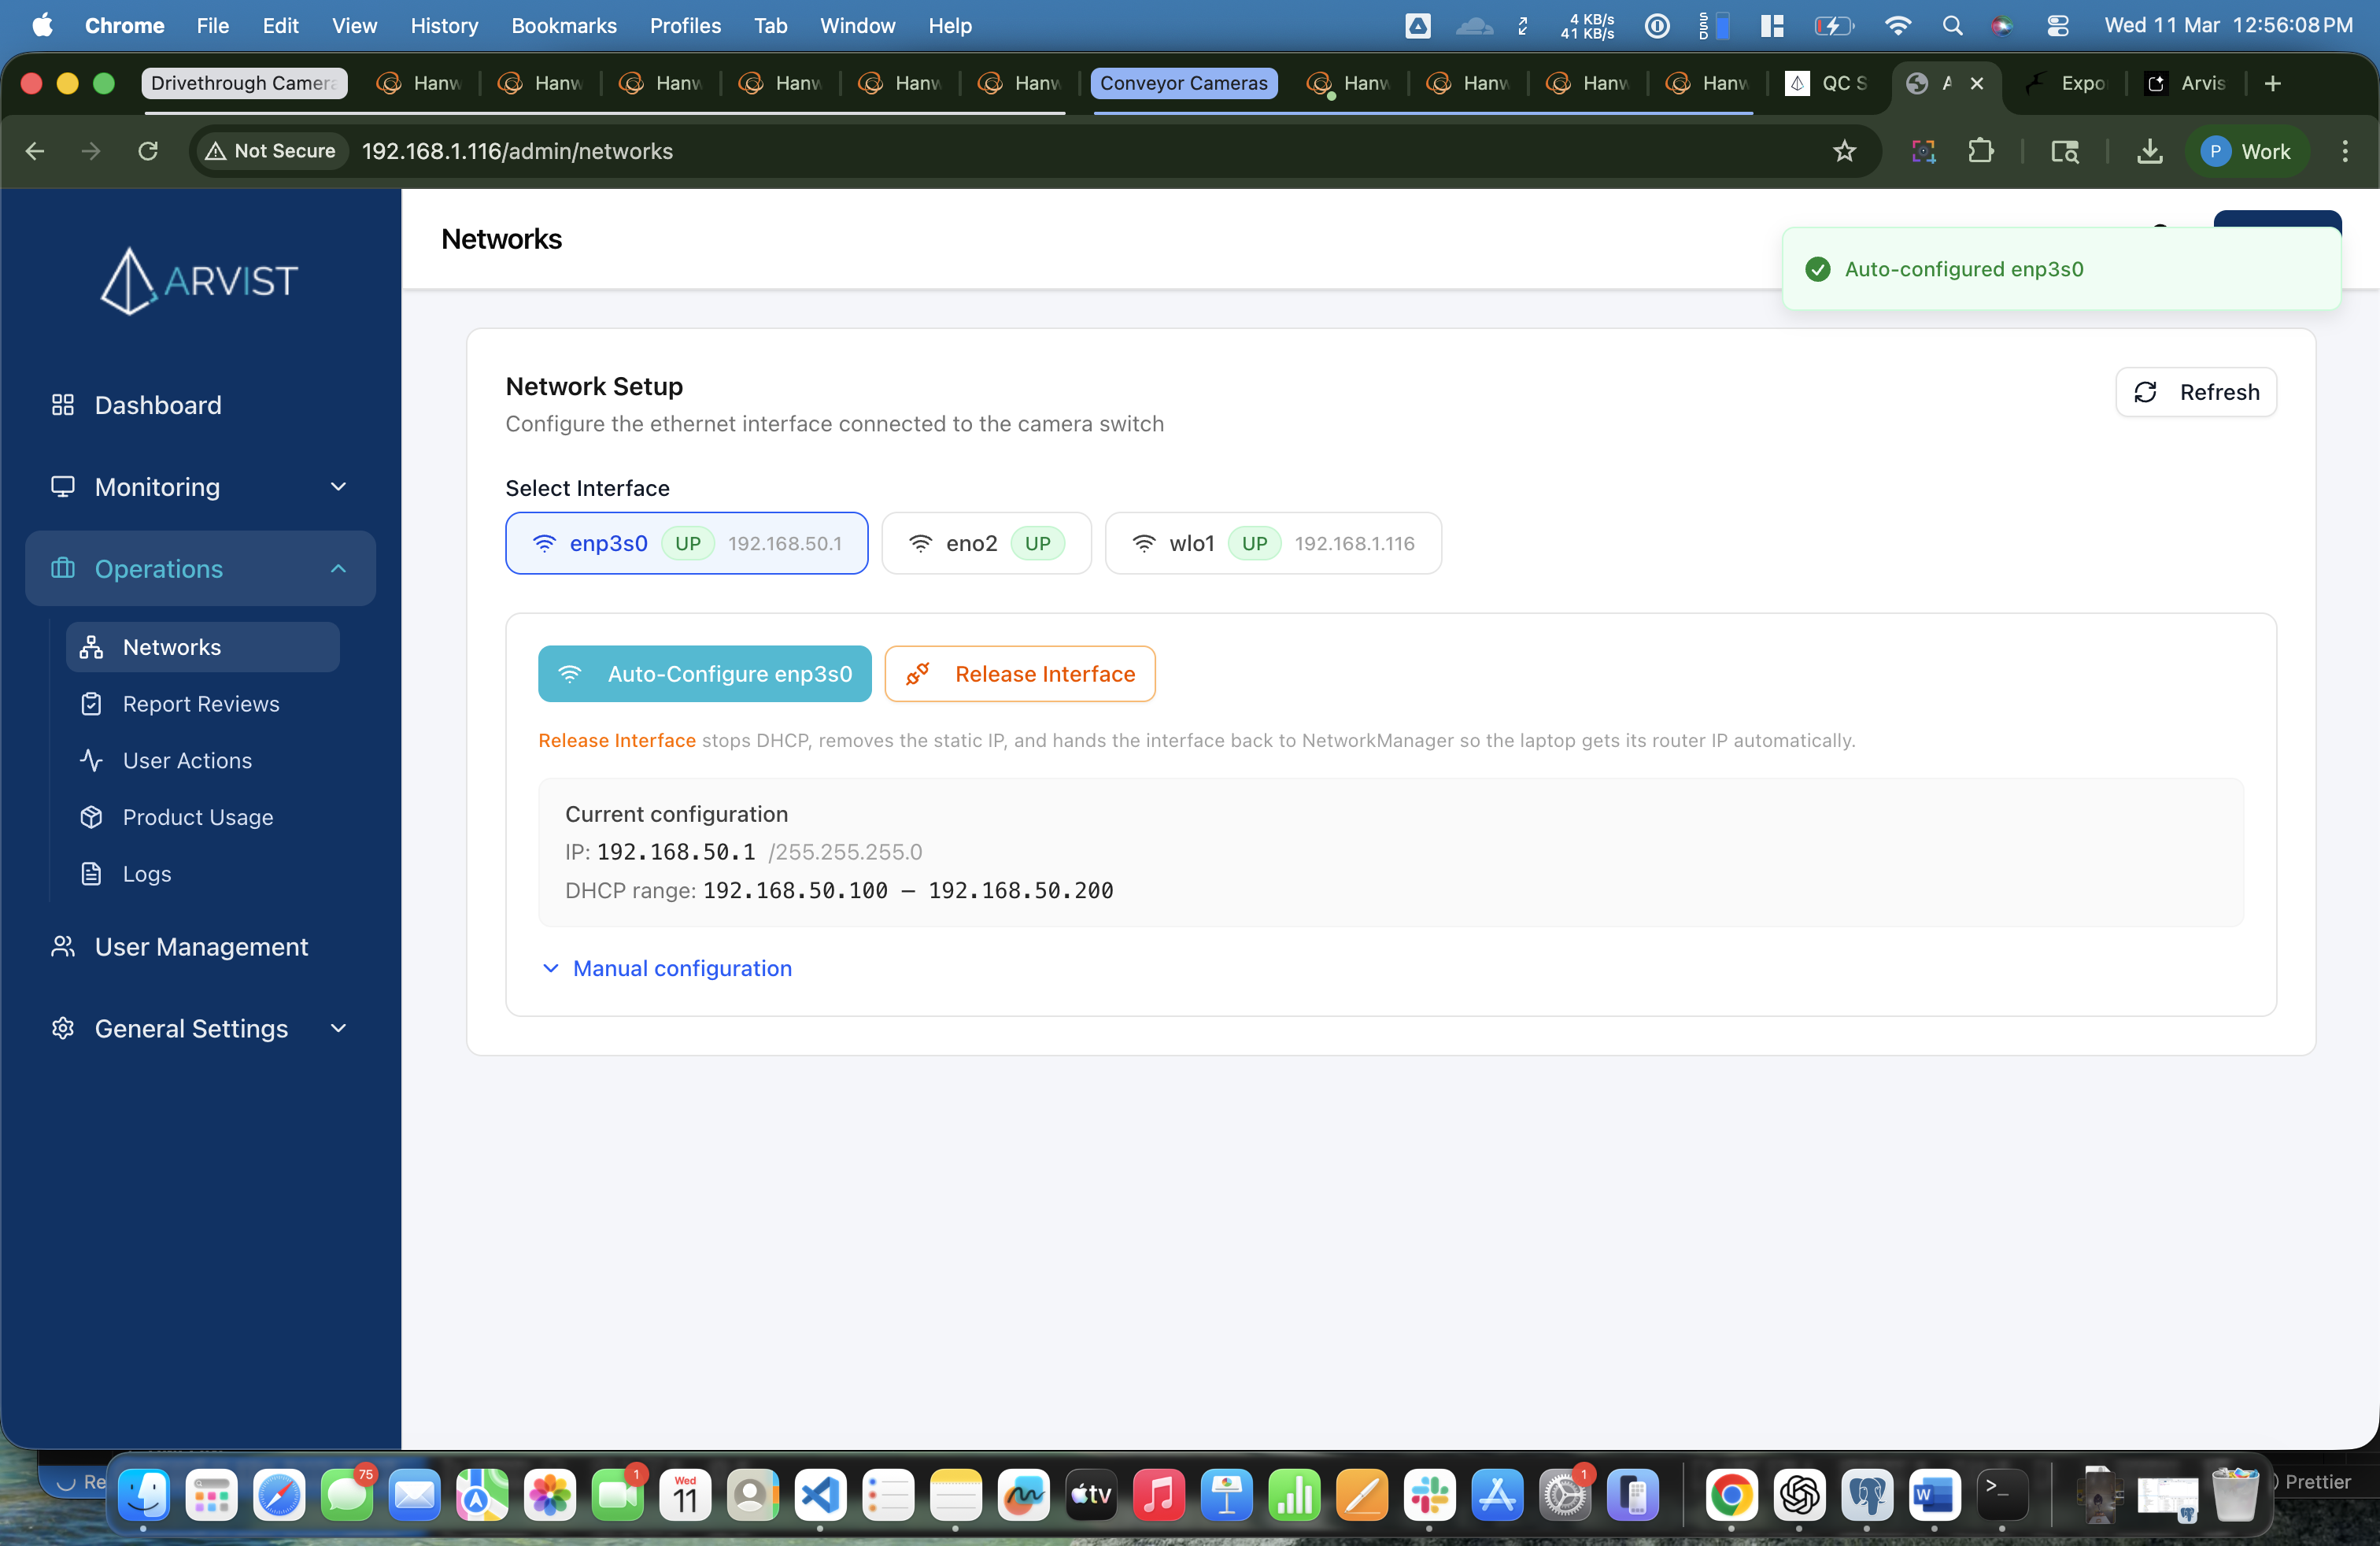
Step 10: Auto-Configure the Interface
Click the blue Auto-Configure enp3s0 button (the button shows your actual interface name).
Arvist will automatically:
- Assign a static IP to the ethernet interface (e.g.
192.168.10.1) - Set up a DHCP server on that interface so cameras plugged into the switch get IP addresses automatically
You'll see a success message and the interface will now show its new IP address.
Phase 5 — Connect the Cameras
Step 11: Plug In Your Cameras
Now that the switch has a DHCP server running, connect each IP camera to the switch using ethernet cables (or PoE injectors if needed).
Power on the cameras and wait 2–5 minutes for them to boot up and get assigned an IP address from the DHCP server.
You don't need to configure the cameras' network settings manually. The auto-configured DHCP server will assign IPs automatically.
Phase 6 — Discover Cameras on the Network
Step 12: Navigate to Cameras
In the left sidebar, click on Monitoring, then click Cameras.
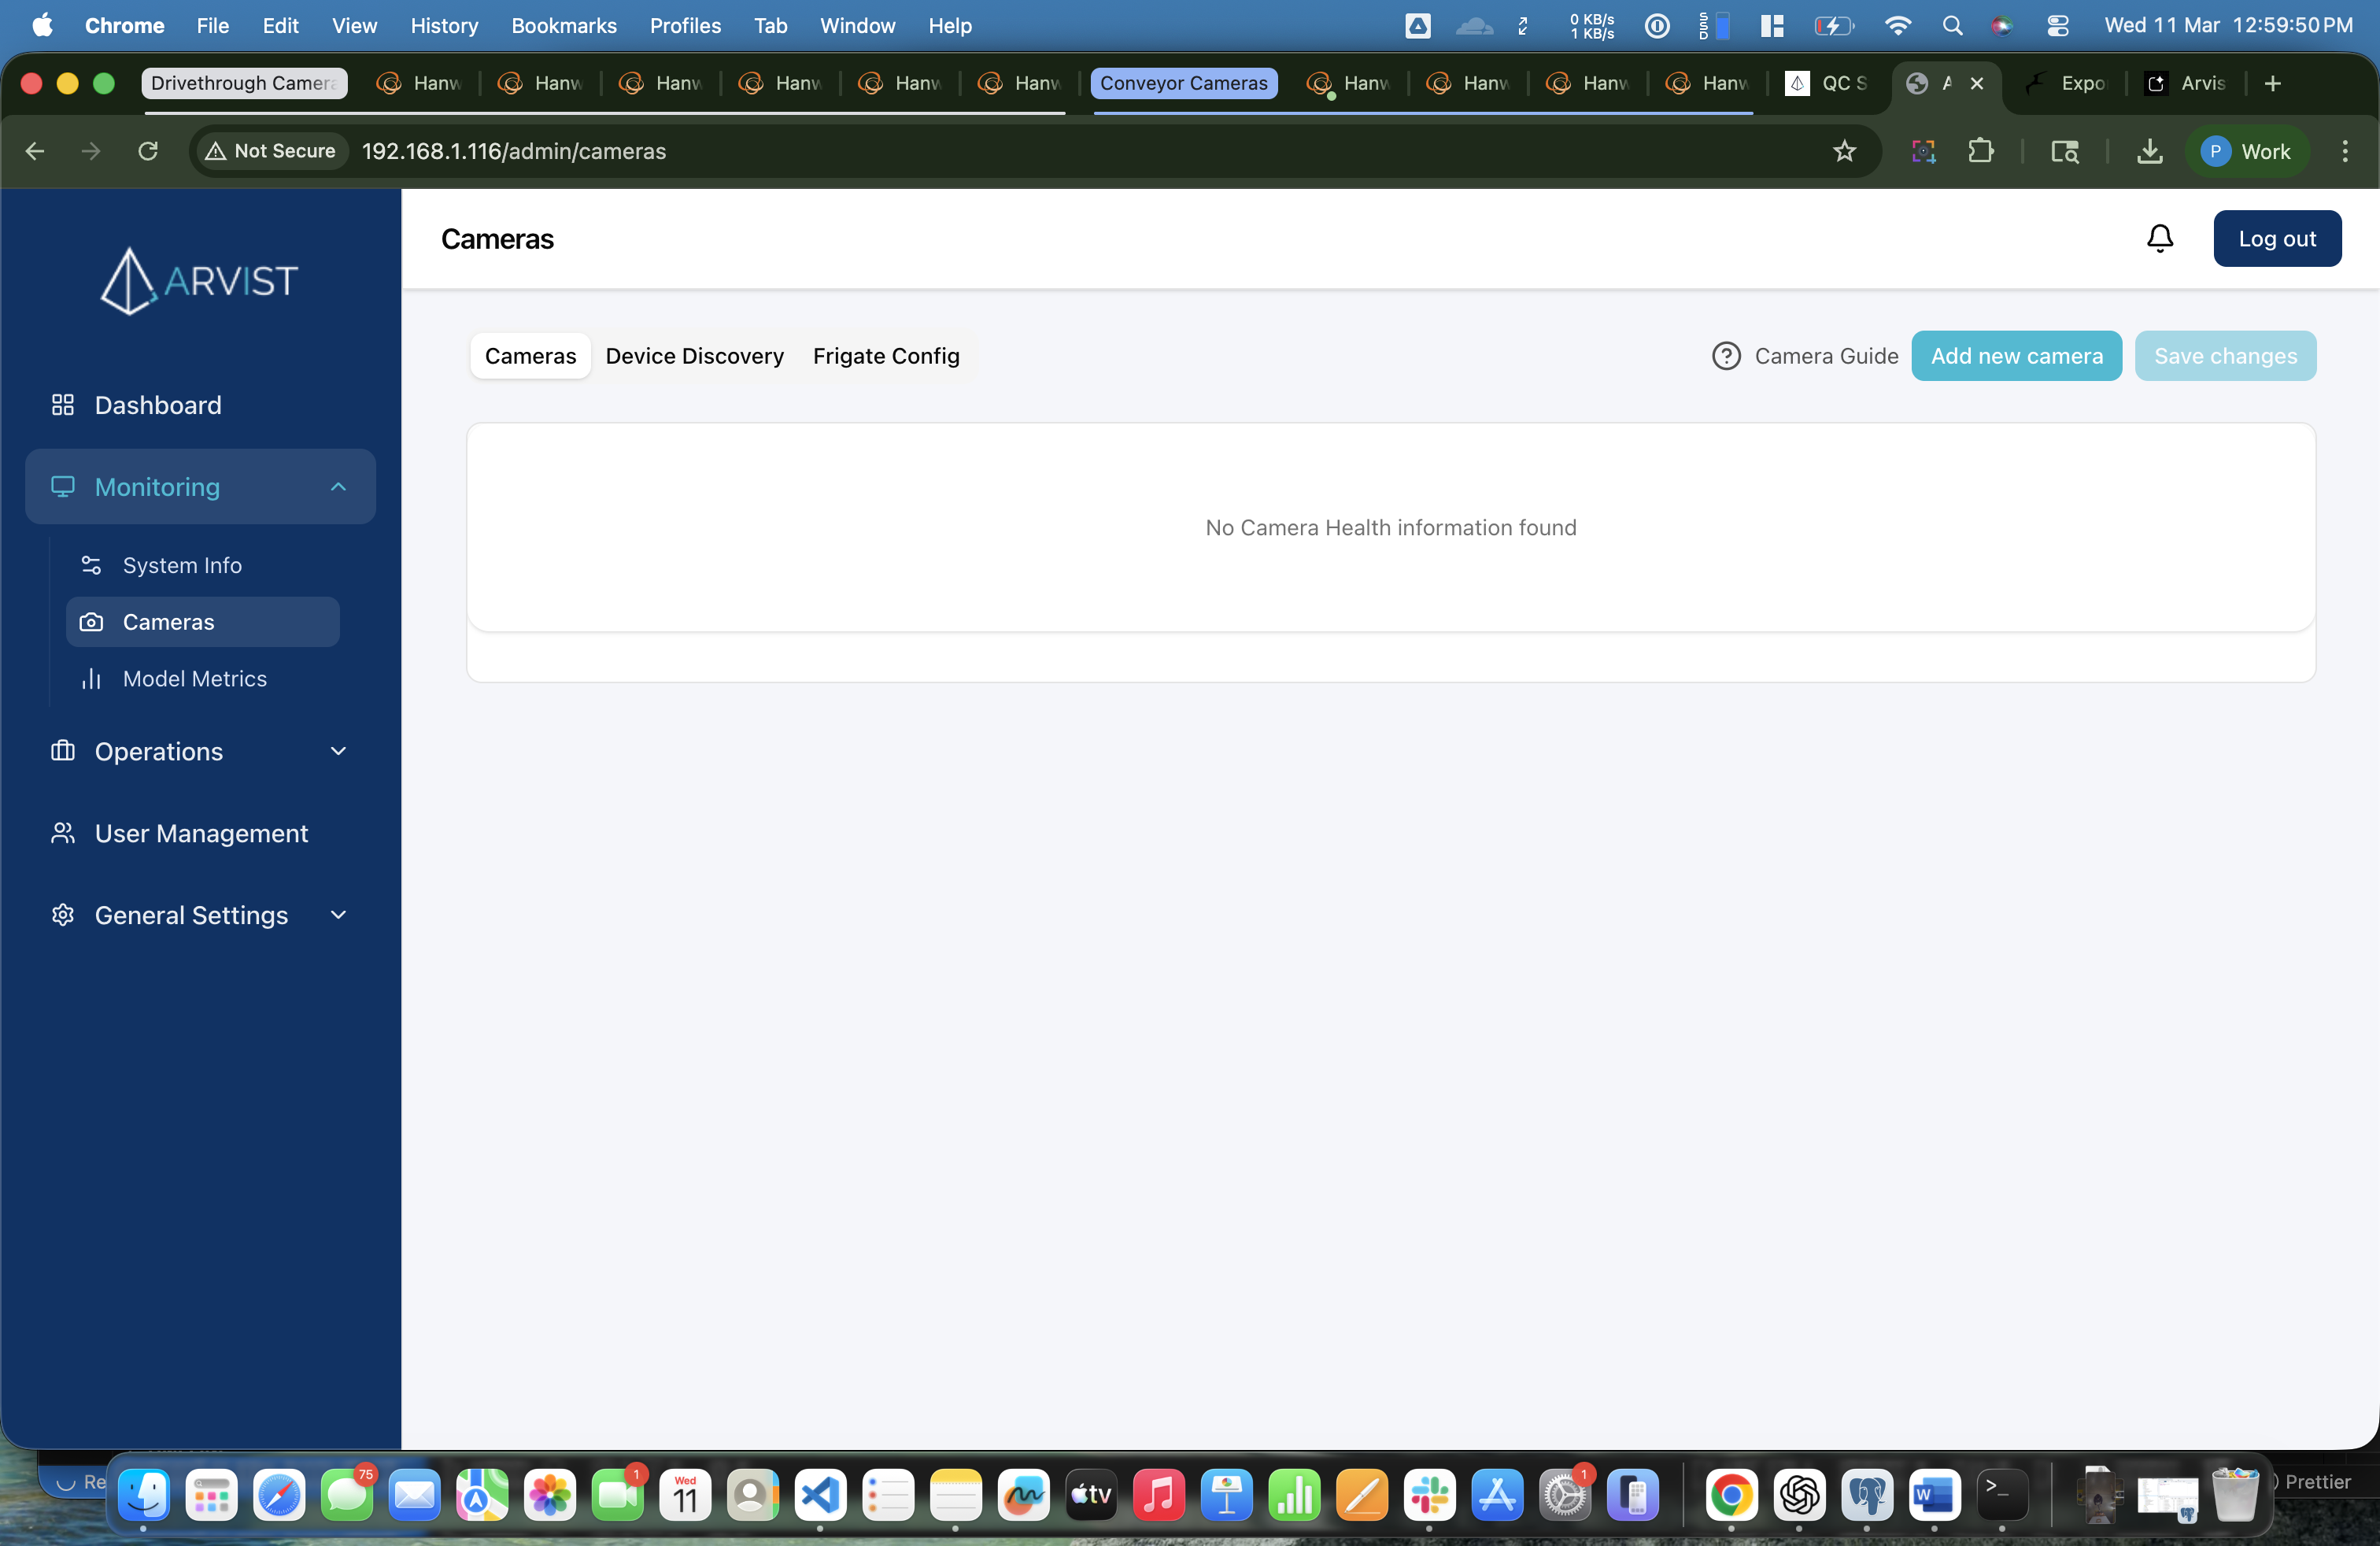
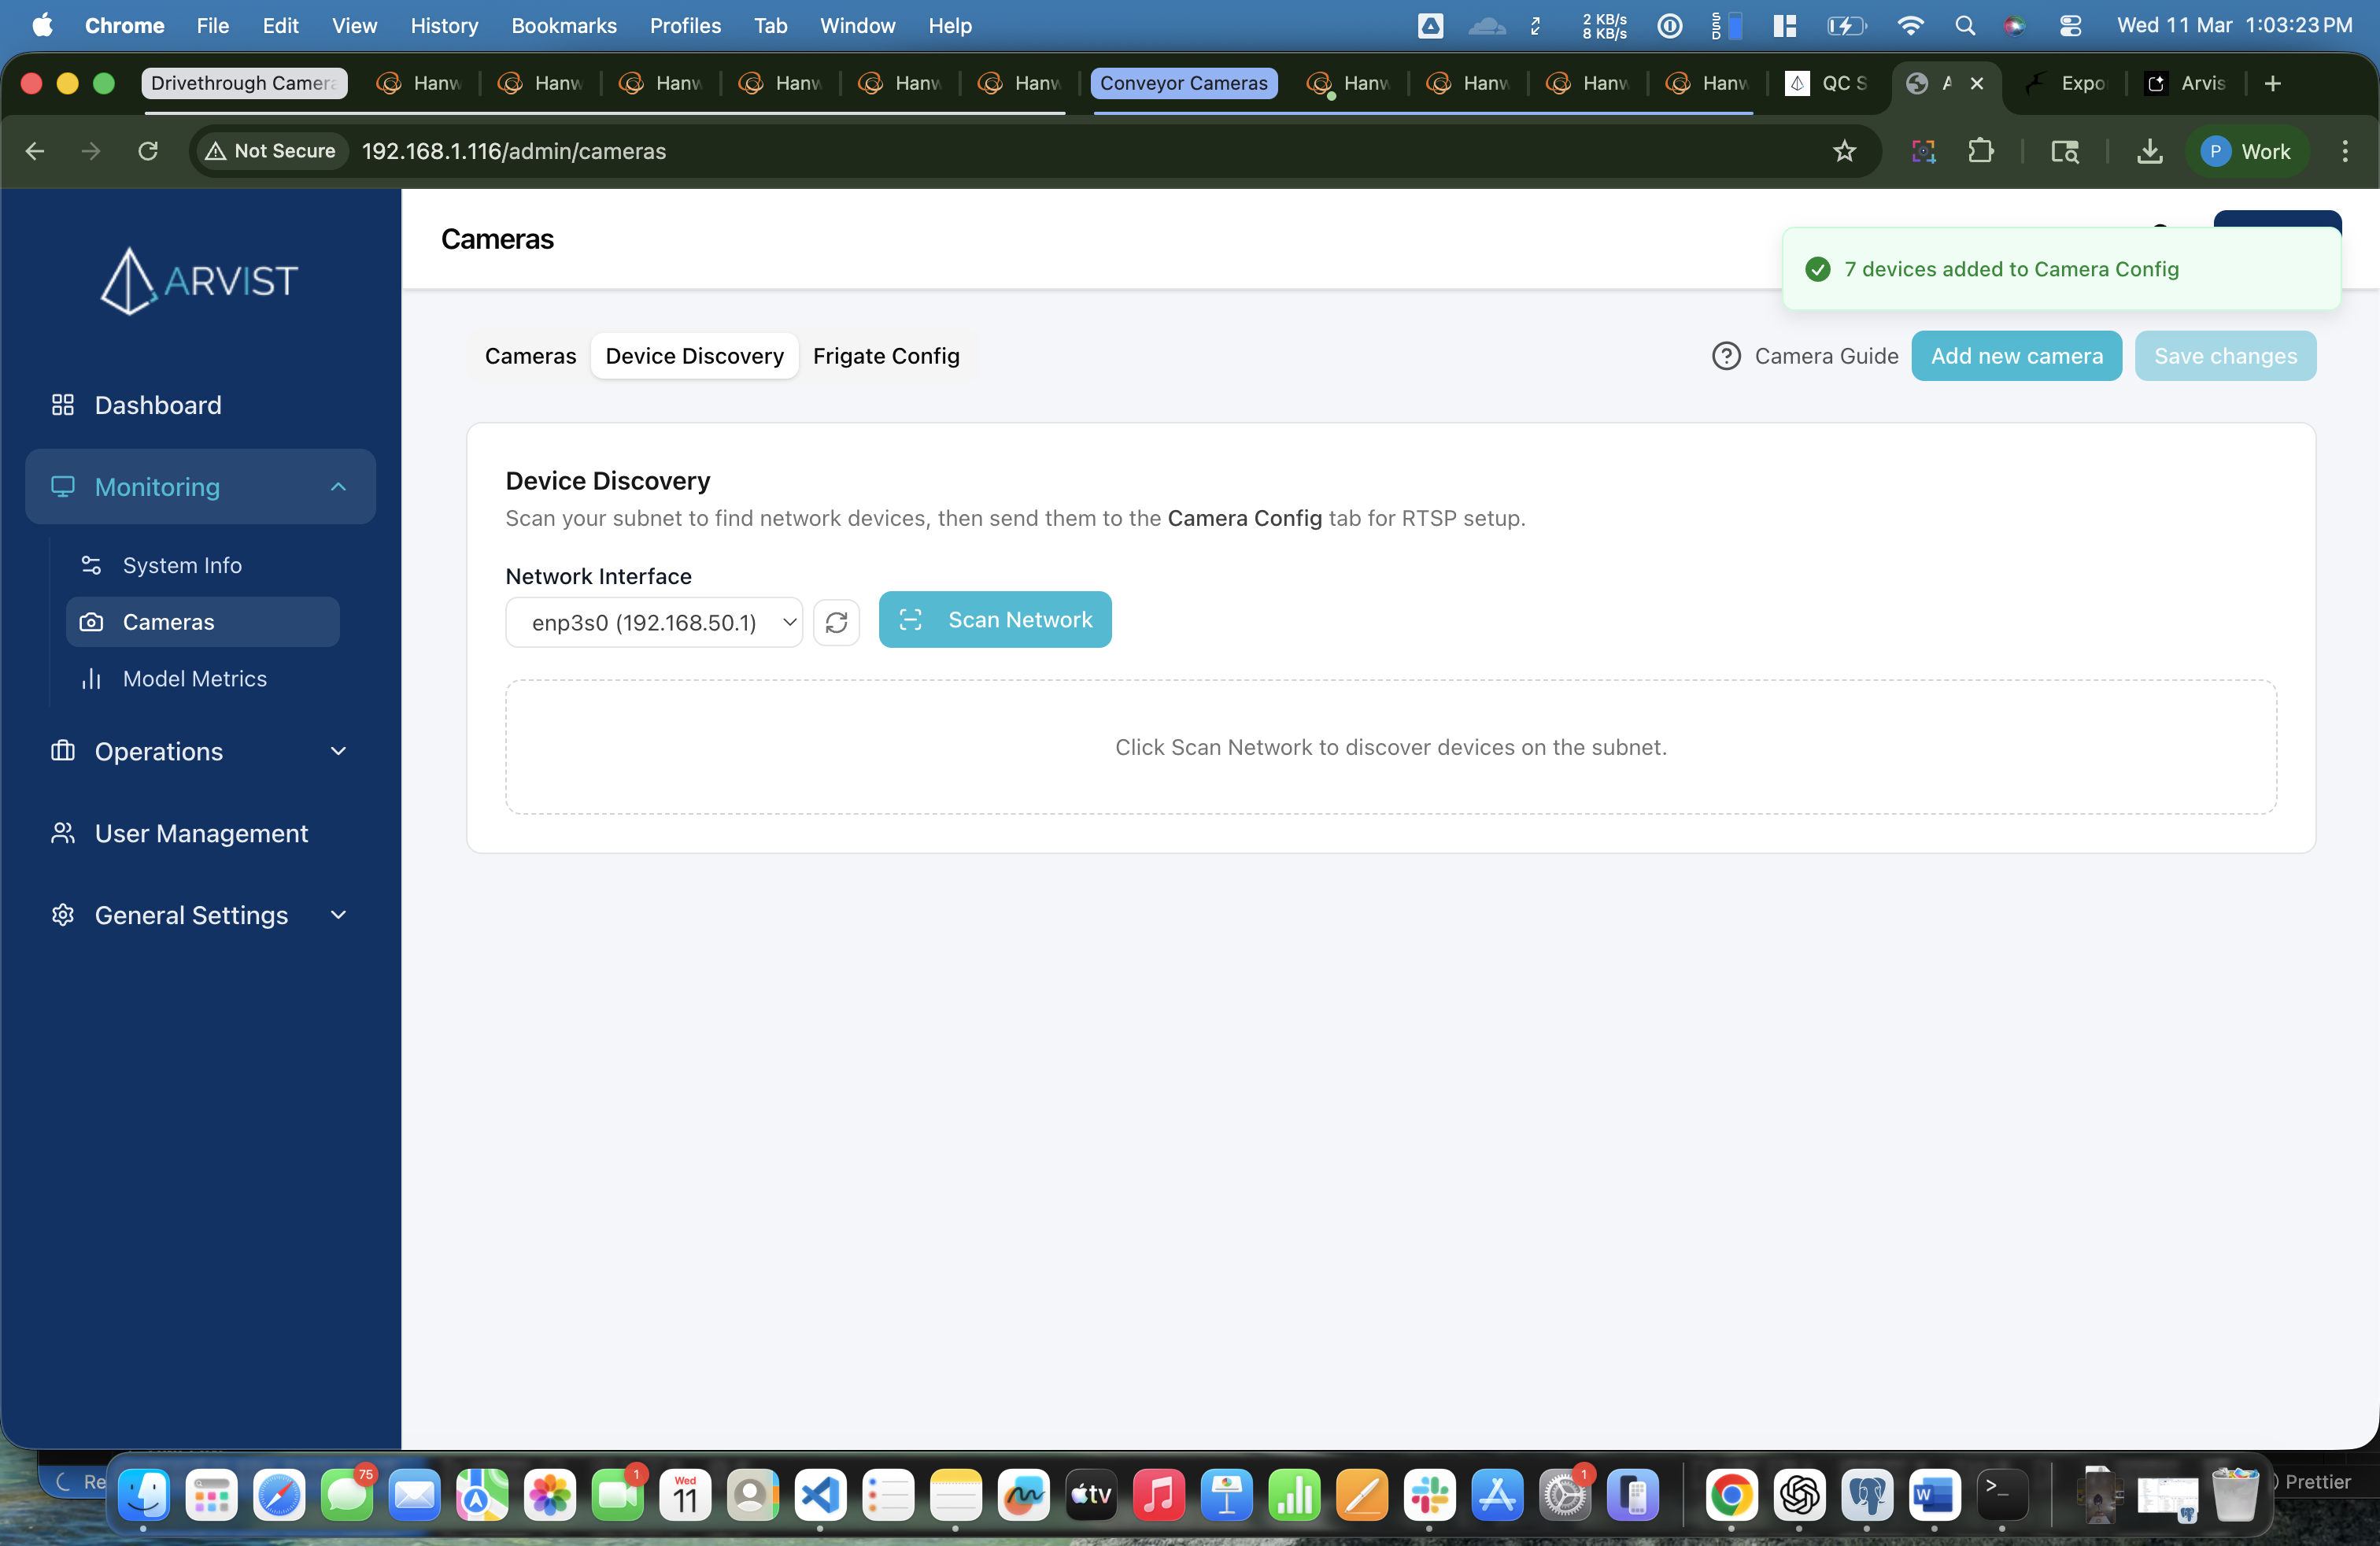
Step 13: Open the Device Discovery Tab
At the top of the Cameras page, you'll see three tabs:
| Tab | Purpose |
|---|---|
| Cameras | View camera health, configure and manage cameras |
| Device Discovery | Scan the network to find connected cameras |
| Frigate Config | Directly edit the NVR config (advanced) |
Click the Device Discovery tab.
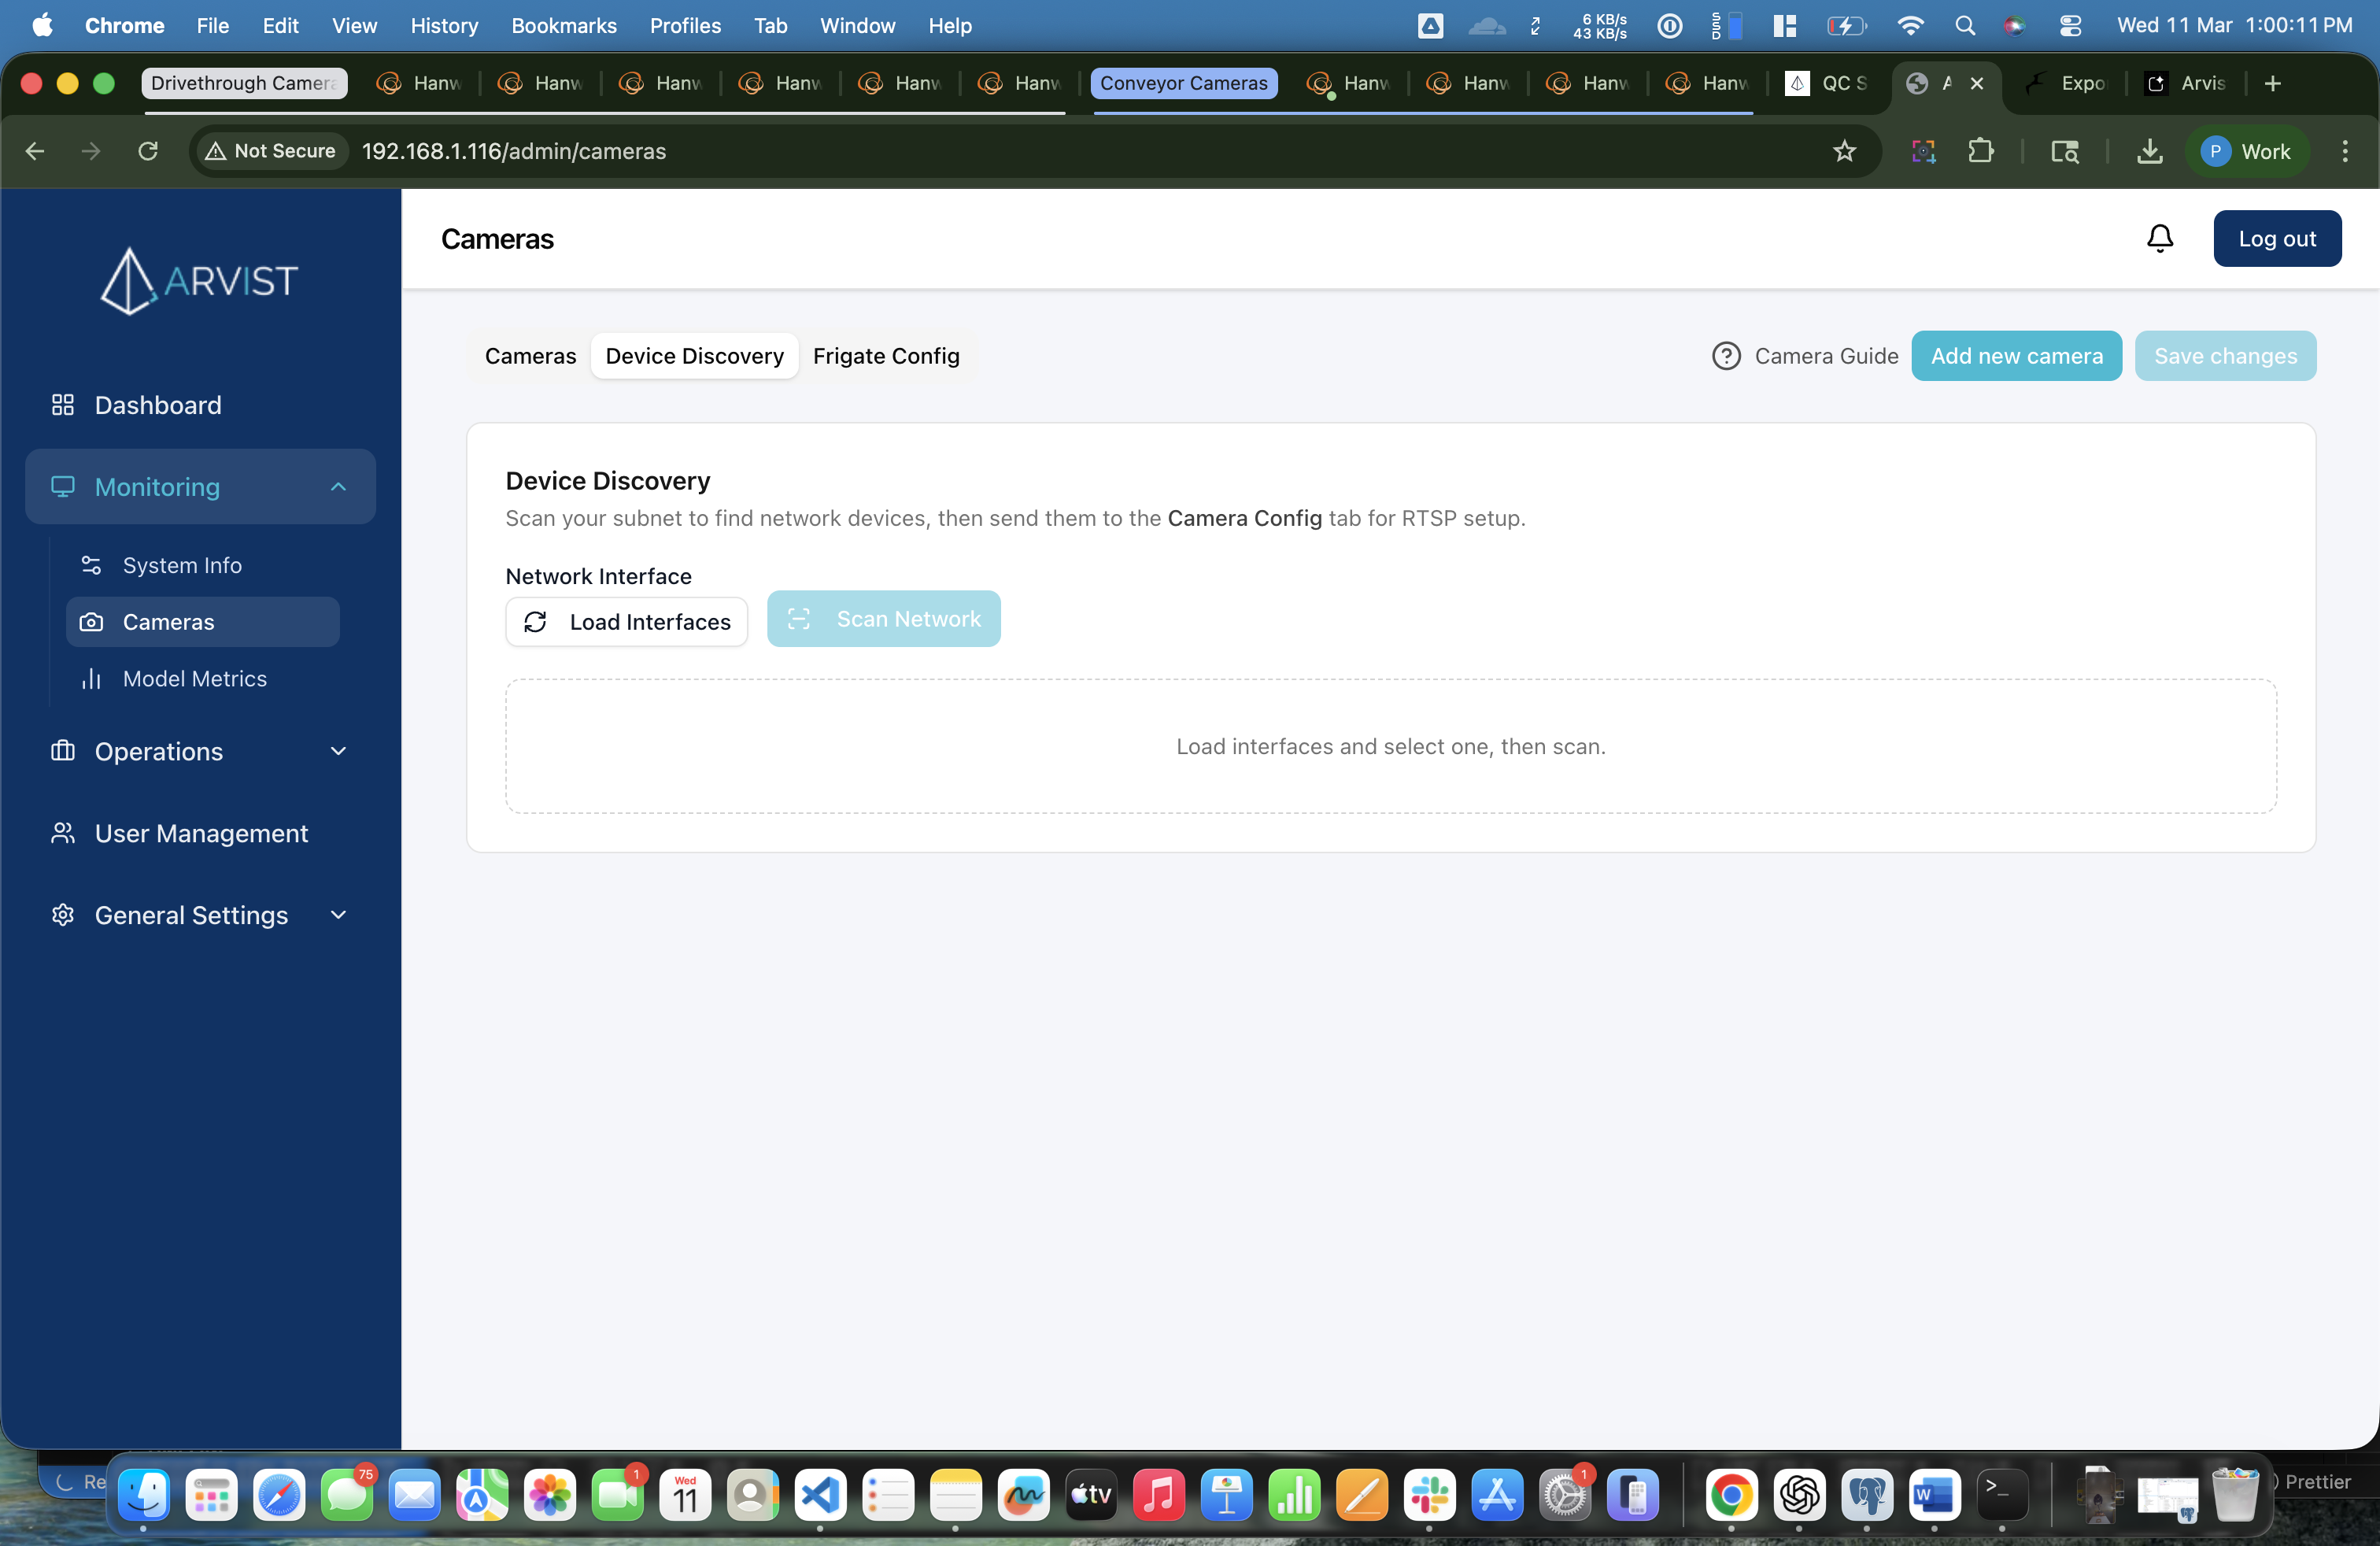
Step 14: Load Interfaces in Device Discovery
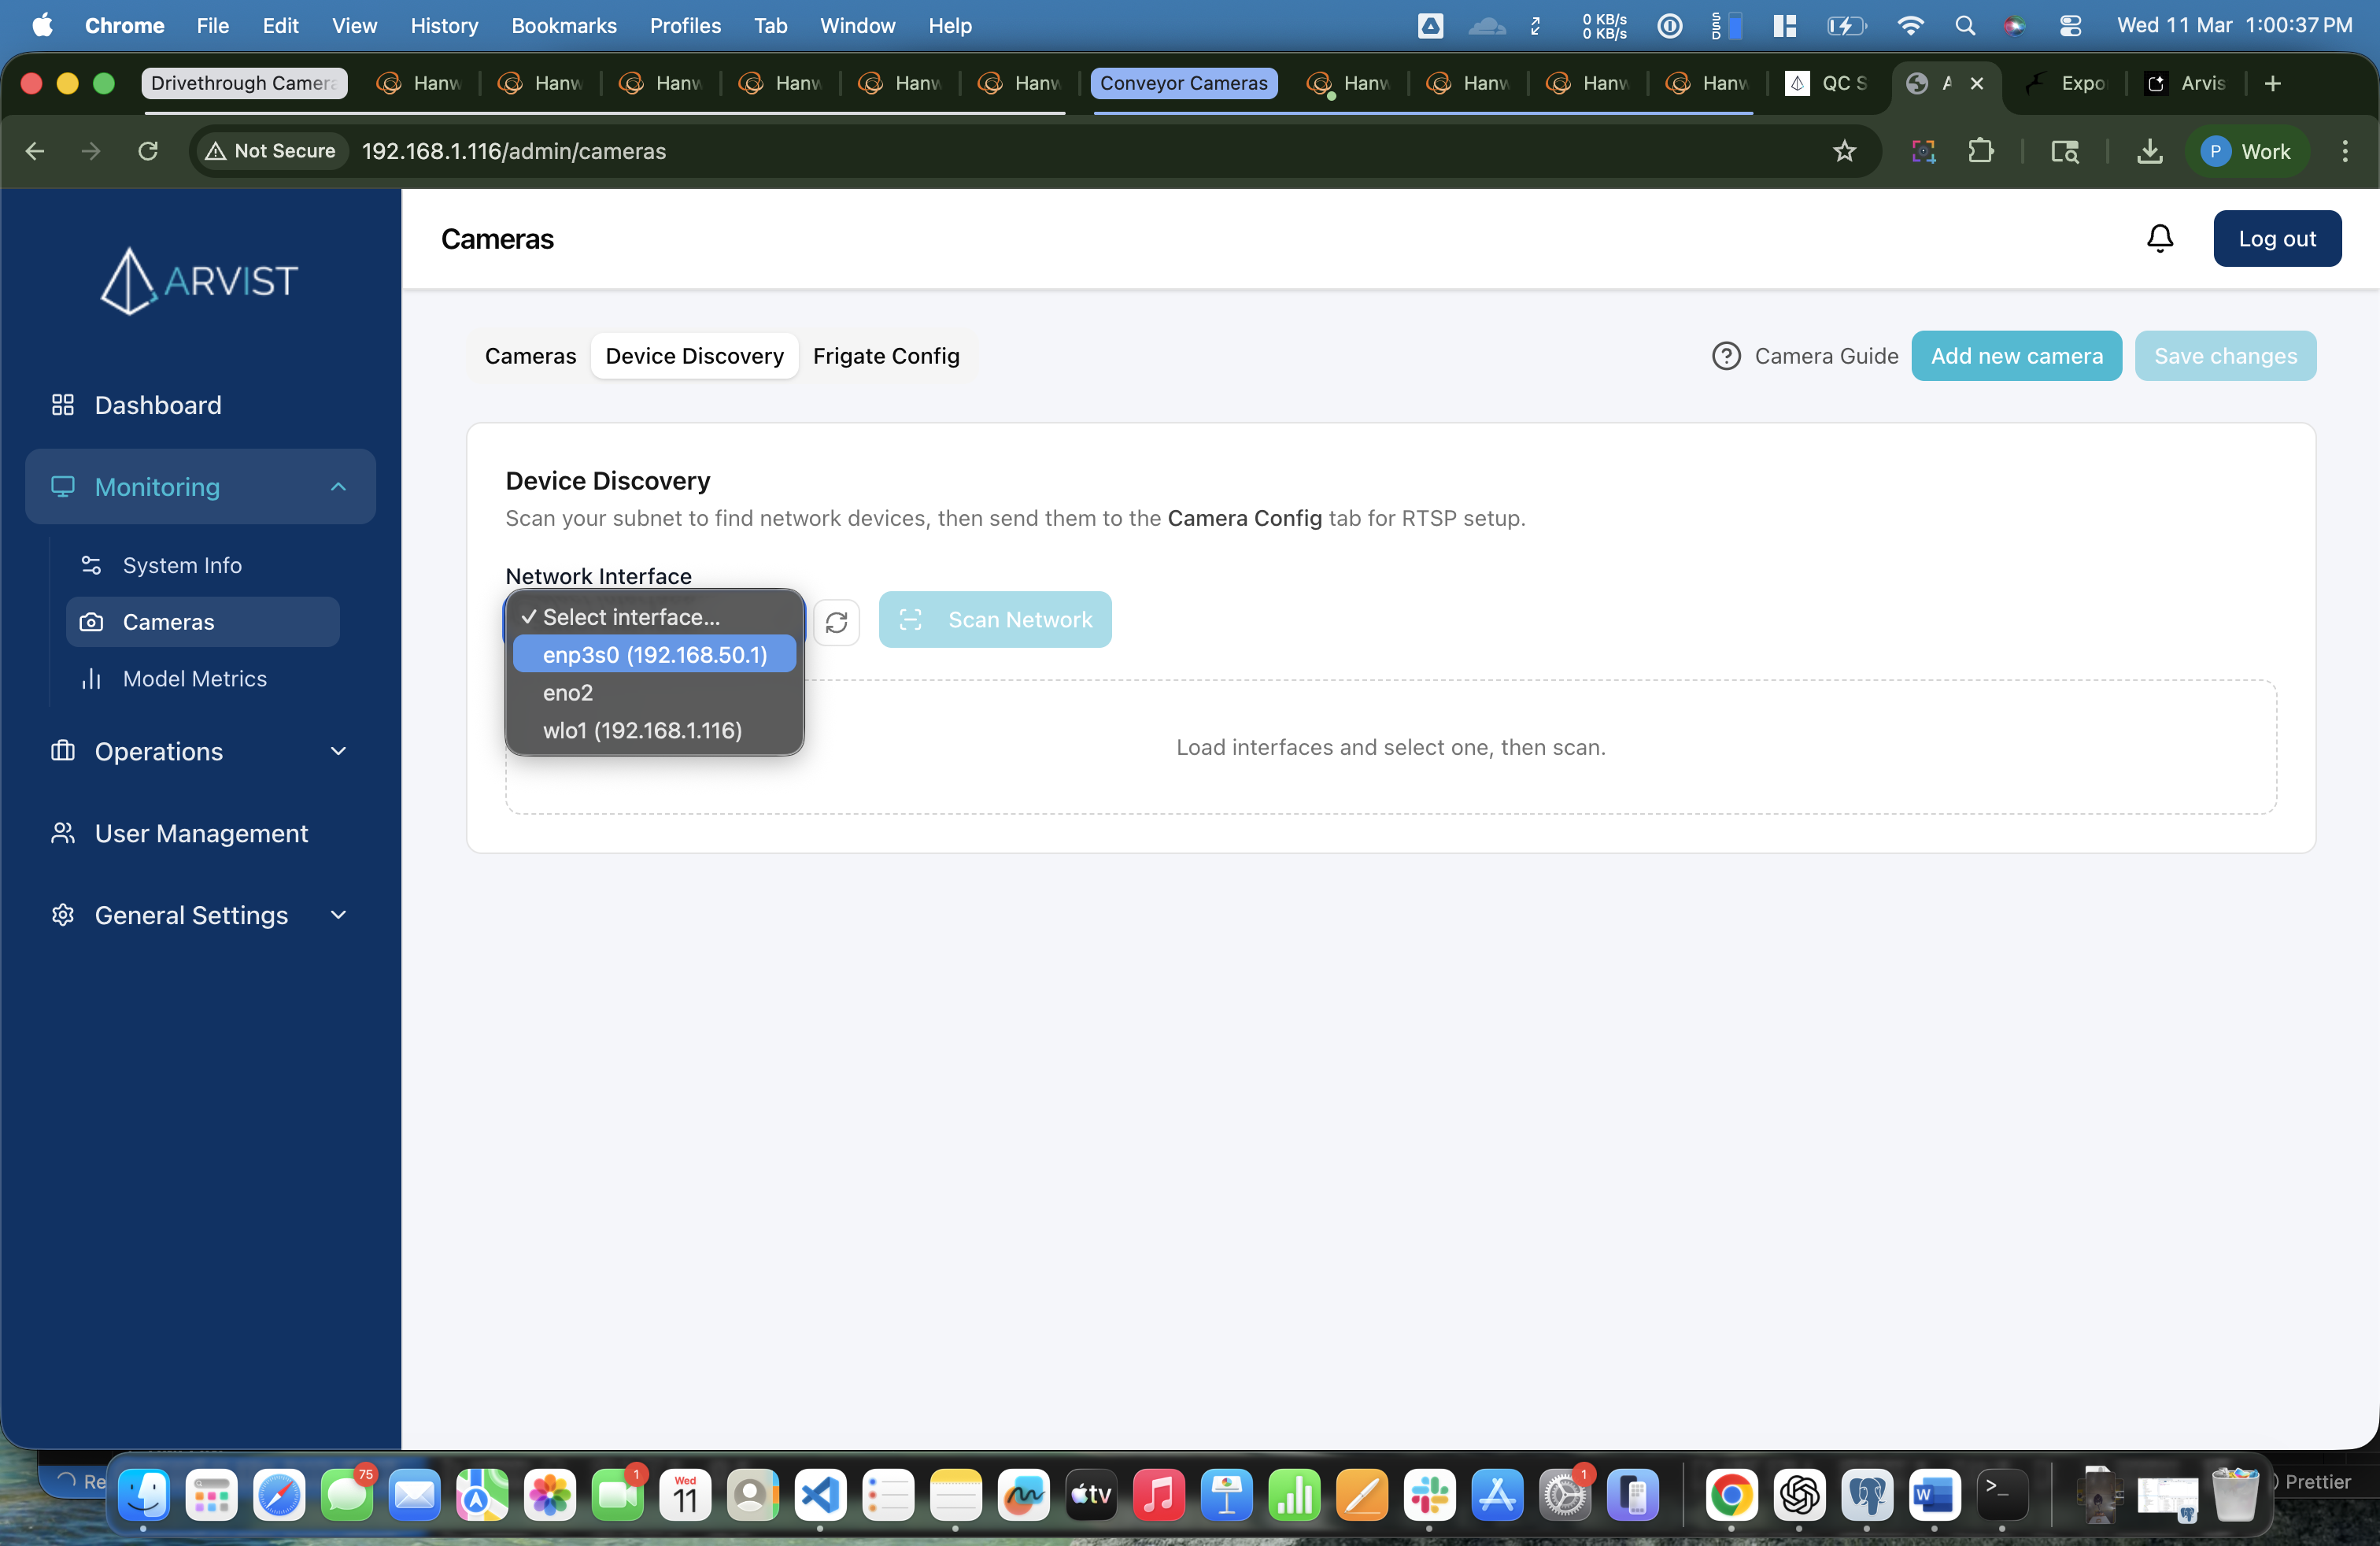
Click the Load Interfaces button. The interface dropdown will appear with your available network interfaces.
Step 15: Select the Configured Ethernet Interface
From the dropdown, select the same ethernet interface you configured earlier (e.g. enp3s0 (192.168.10.1)). The IP address shown next to the name confirms it's the right one.
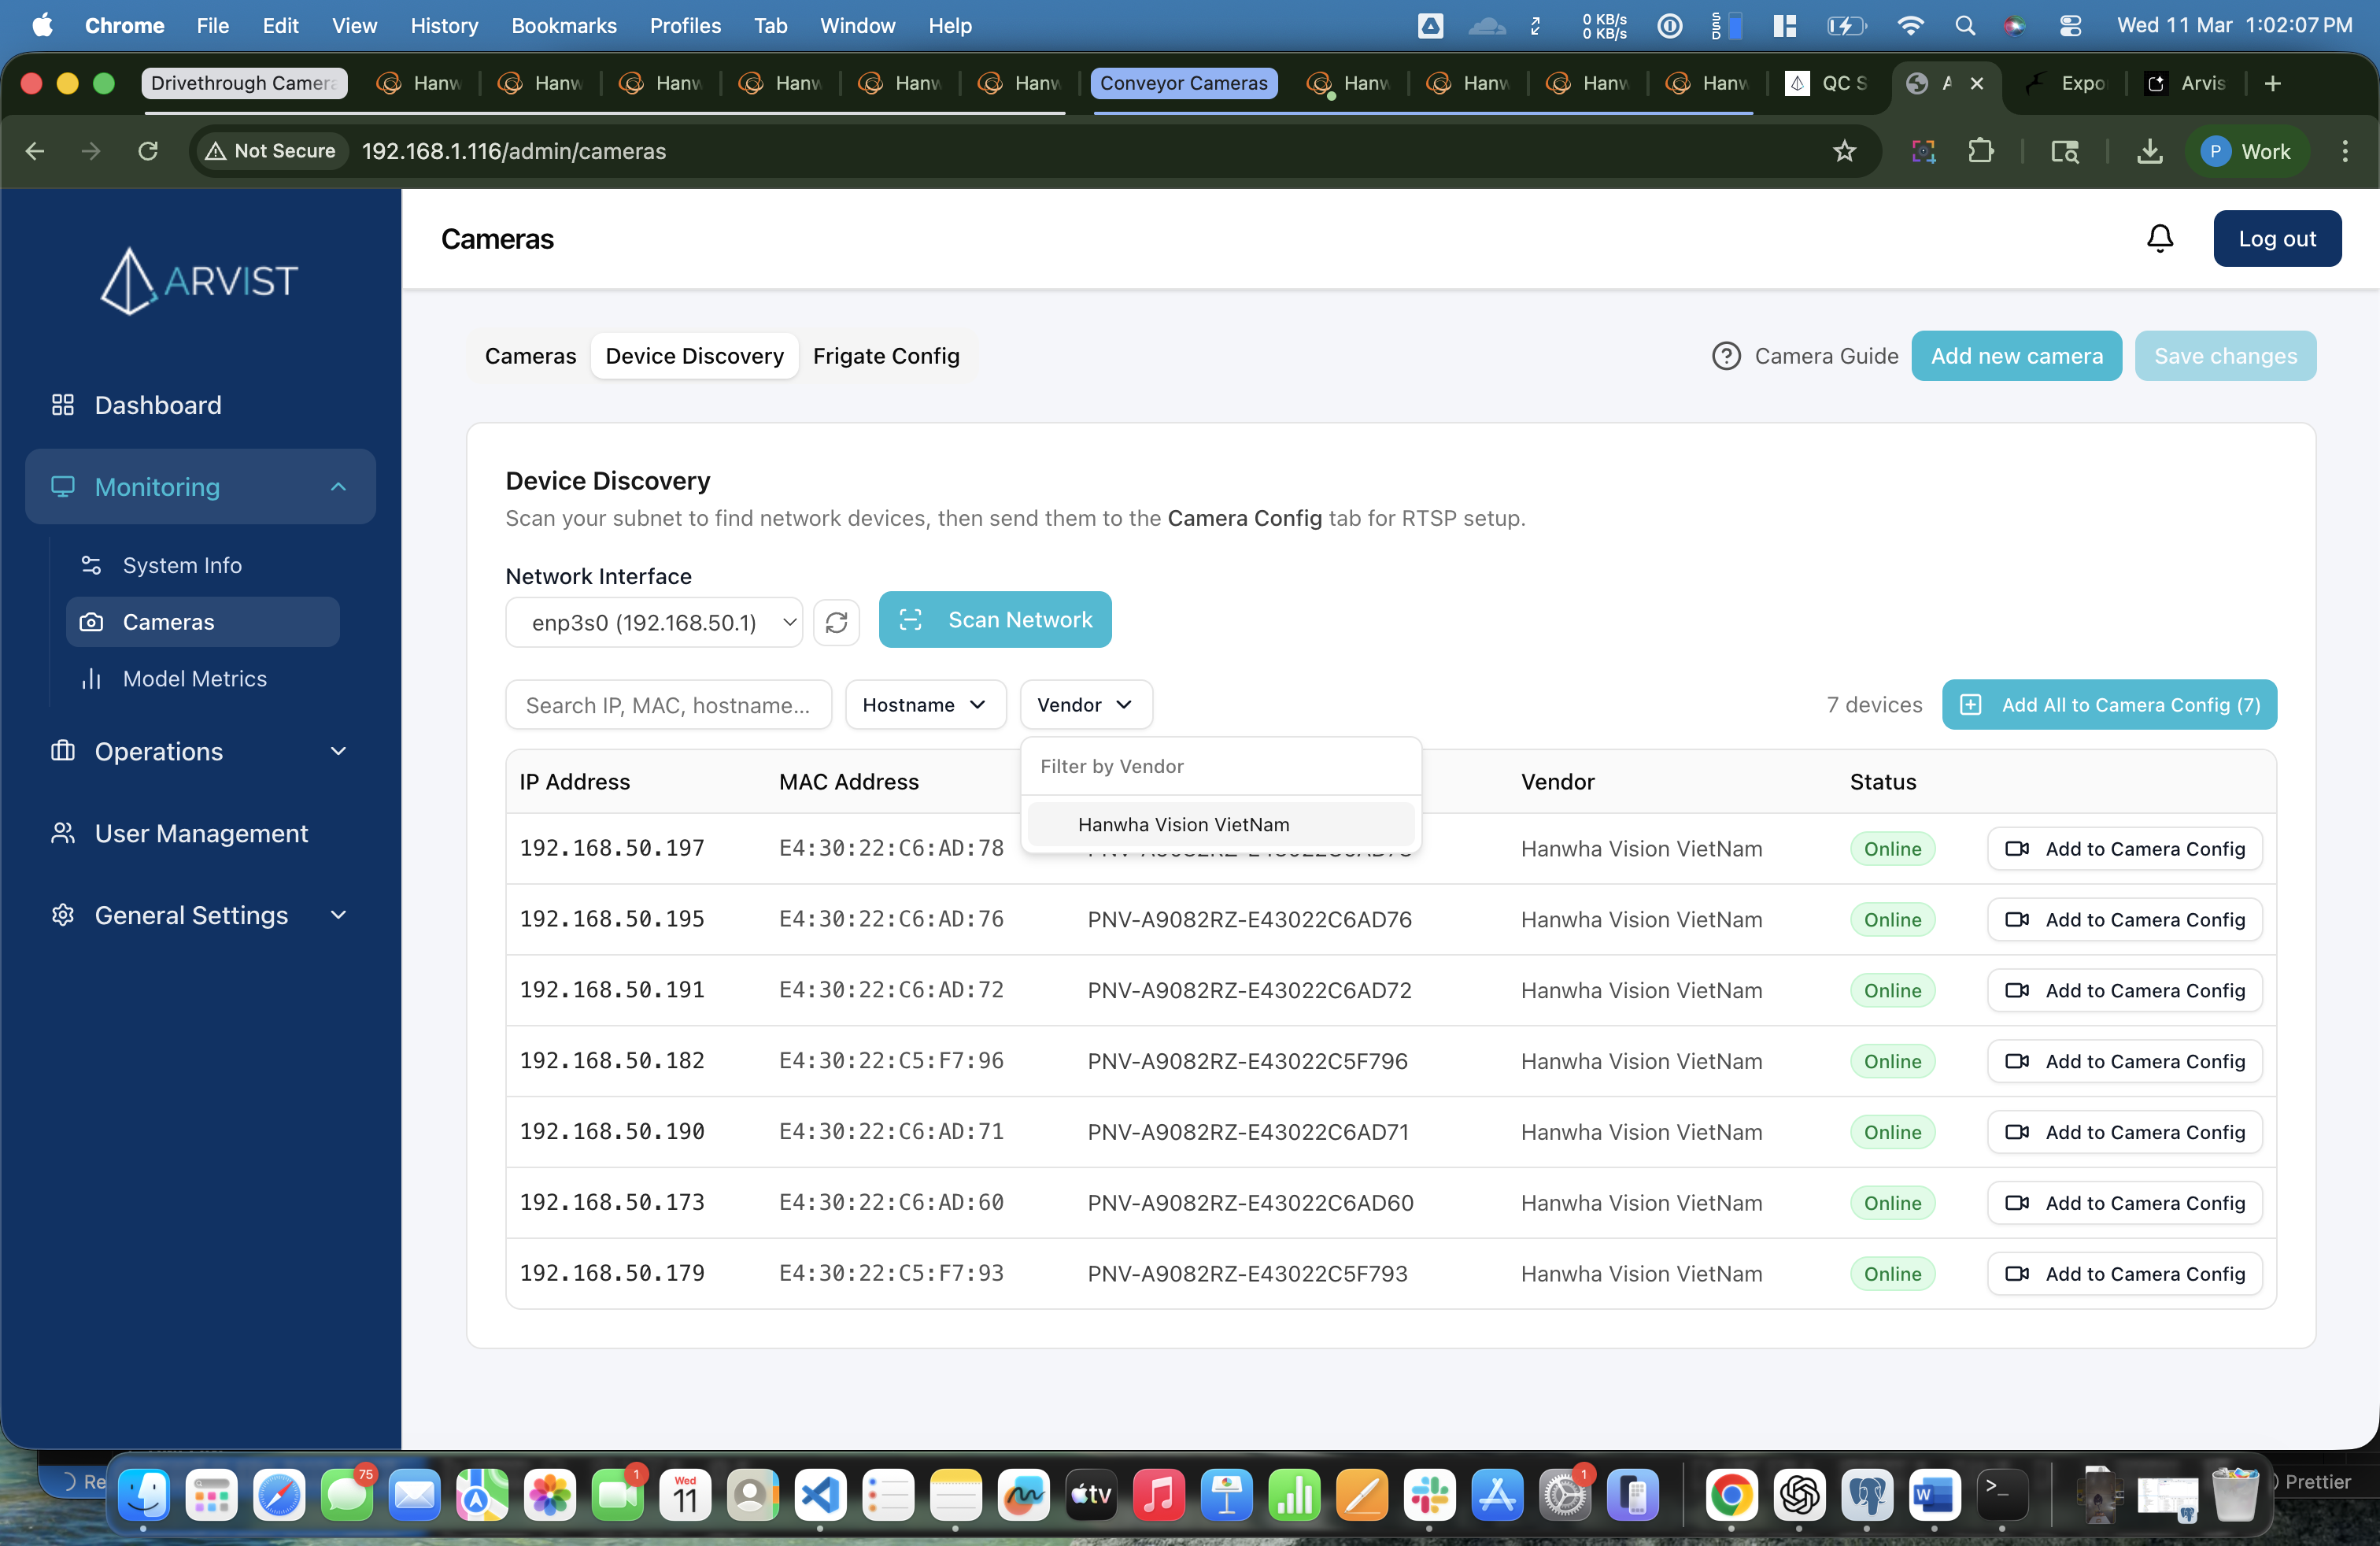
Step 16: Scan the Network
Click the Scan Network button.
The scan will take approximately 30–90 seconds to complete. While scanning, the button shows "Scanning… (this may take a minute)". Once done, a table of discovered devices appears.

Step 17: Filter by Vendor (Optional but Recommended)
If you have many devices on the network, use the Vendor filter dropdown to quickly find your cameras by manufacturer name.
For example, if you're using Hanwha cameras:
- Click the Vendor dropdown button
- Check Hanwha (or your camera brand)
- The table instantly filters to show only those devices
Phase 7 — Add Cameras to Camera Config
Step 18: Add Cameras
You have two options:
Option A — Add All at Once (Recommended for bulk setup)
Click the blue Add All to Camera Config button. All visible/filtered devices will be moved to the Camera Config tab in one click.
Option B — Add Individually
For each camera you want to add, click the Add to Camera Config icon (the small + icon on the right side of its row).
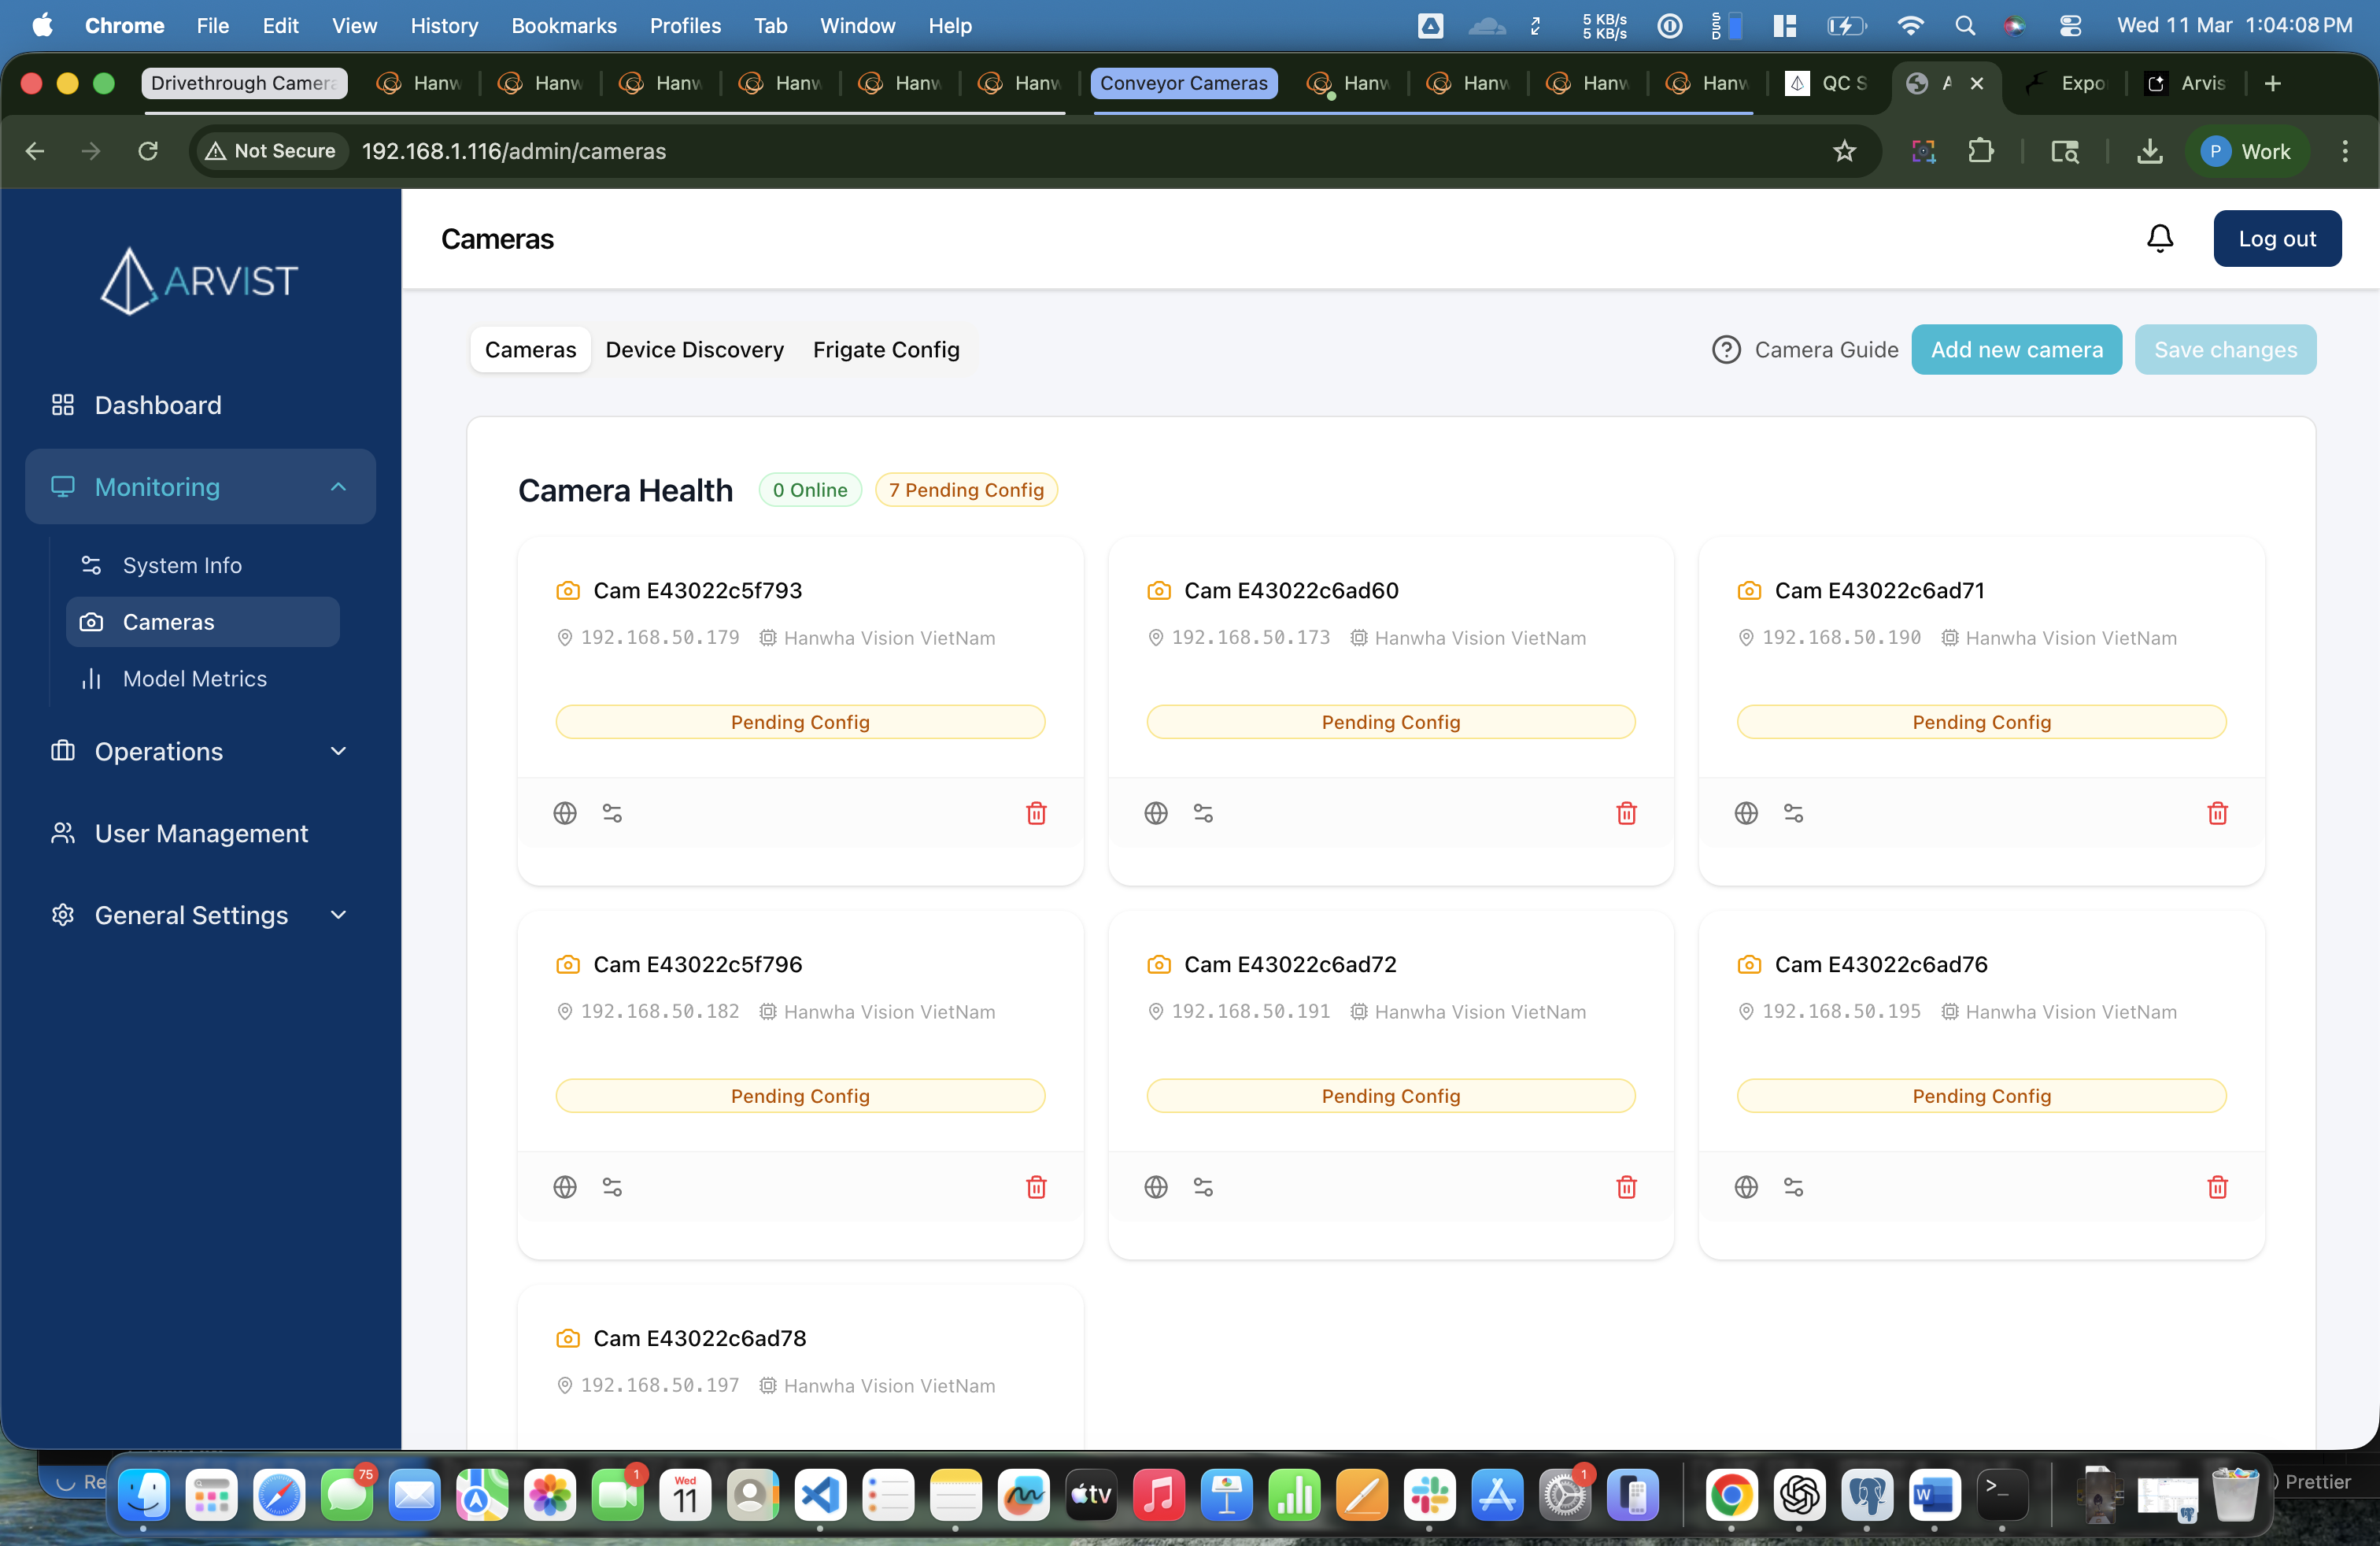
Once added, the camera disappears from the Device Discovery list and appears in the Cameras tab with an auto-generated name like Cam_E43022c6ad60.
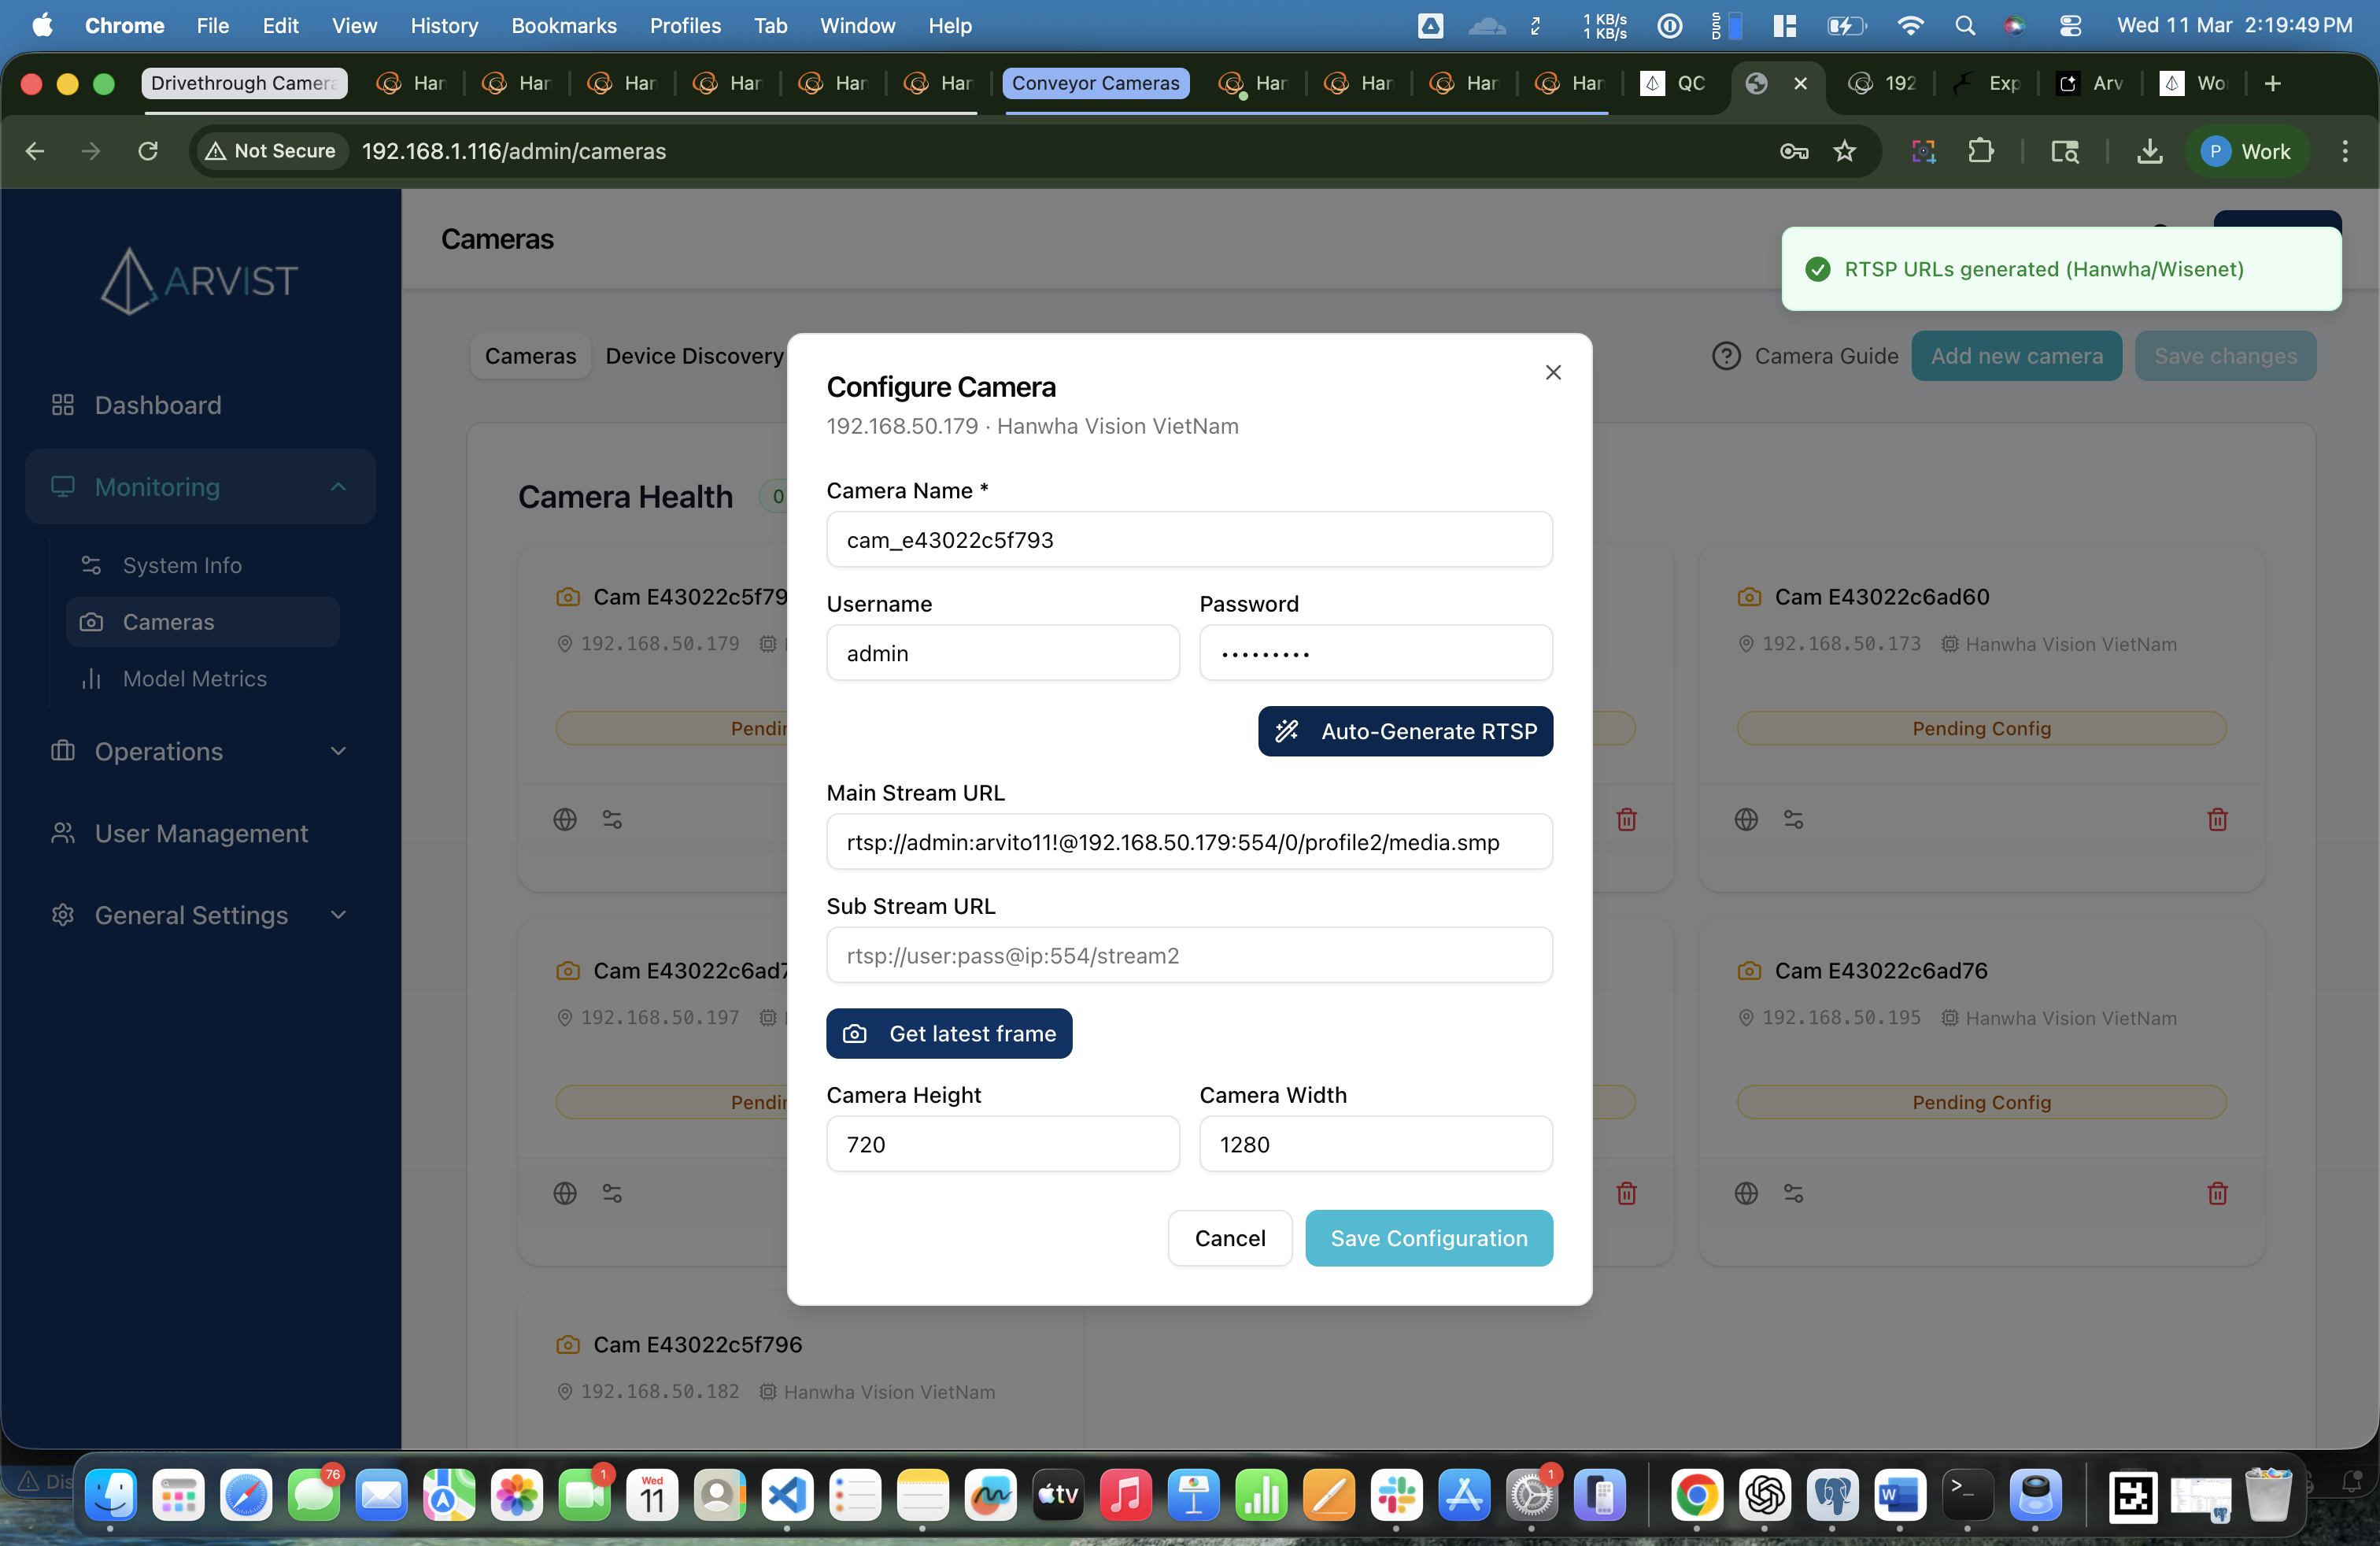
Step 19: Switch to the Cameras Tab
Click the Cameras tab at the top. You'll see camera cards for each camera you added, showing:
- Auto-generated name (e.g.
Cam E43022c6ad60) - IP address
- Vendor / manufacturer name
- Status badge (will be offline until RTSP is configured)
Phase 8 — Configure Each Camera
Repeat the following steps for each camera card in the Cameras tab.
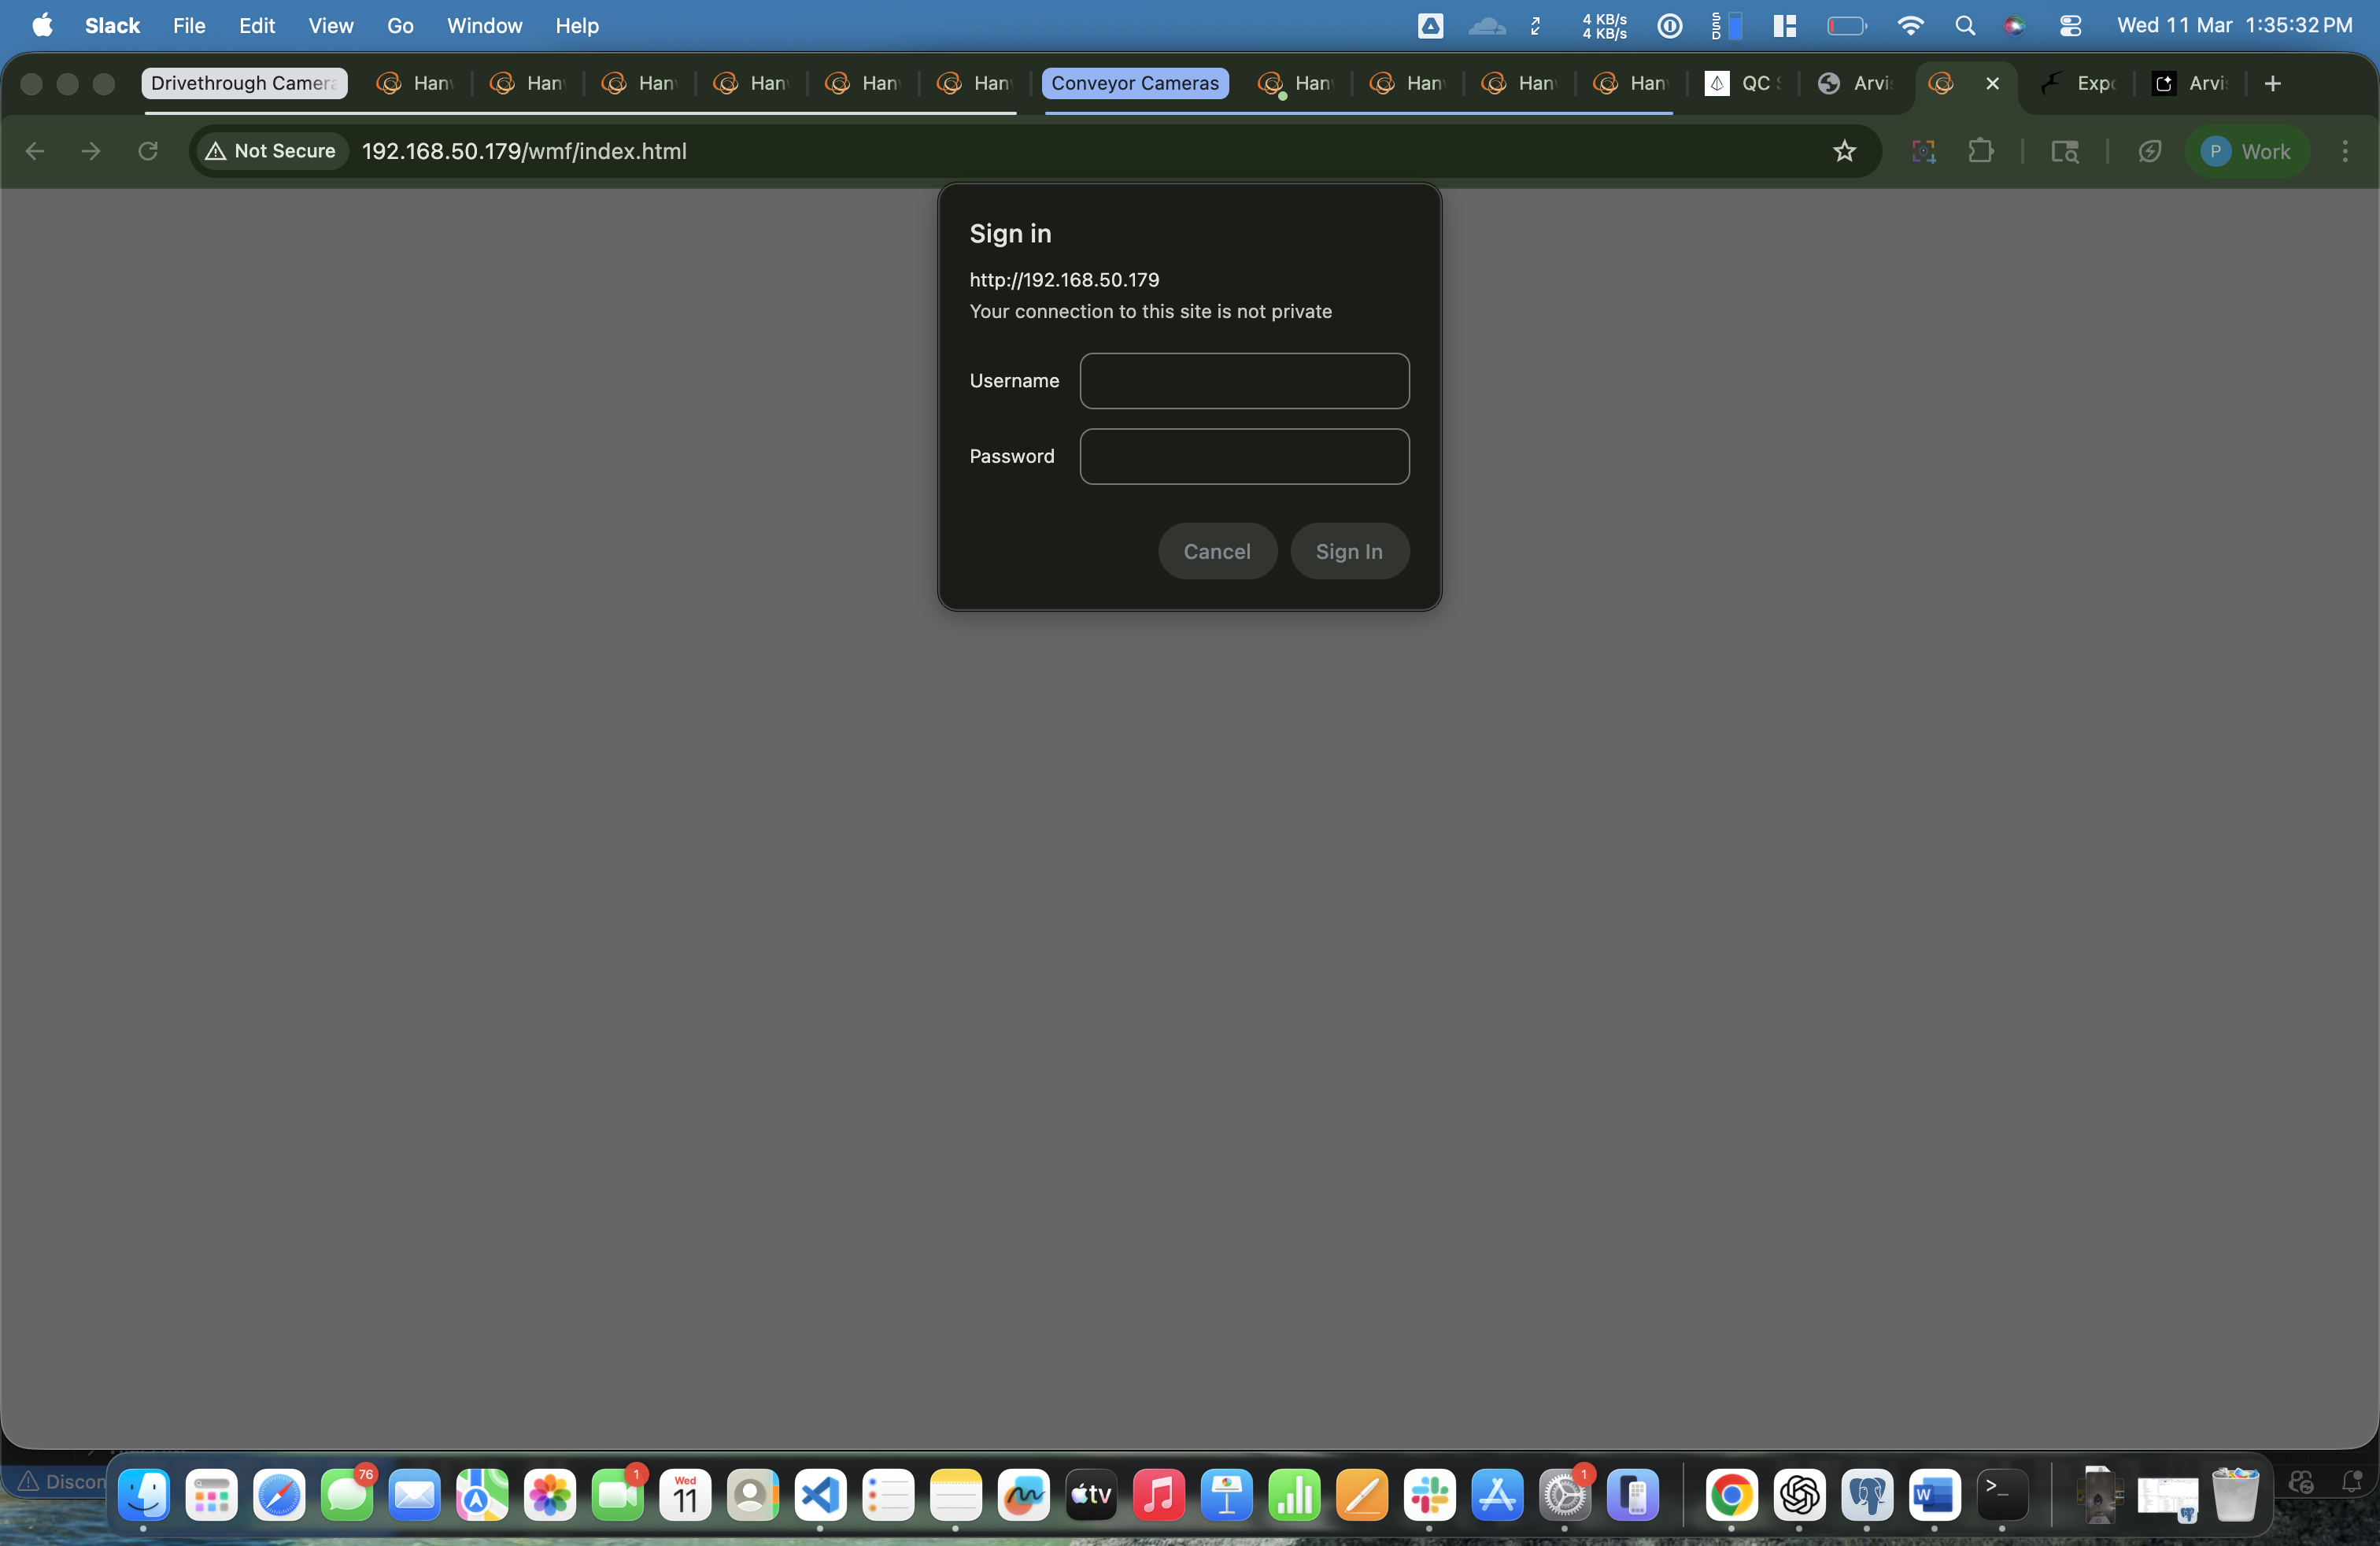
Camera web UIs are only reachable from devices connected directly to the switch, because the cameras are on the switch network — not on WiFi.
Use the Arvist laptop to open camera web UIs. The laptop is connected to the switch via ethernet, so it can reach all camera IPs directly.
If you are using a Chromebook instead, you must connect it to the switch using an ethernet cable (via a USB-C to ethernet adapter if needed). Without a wired connection to the switch, the Chromebook will not be able to reach the camera IP addresses and the web UI will not load.
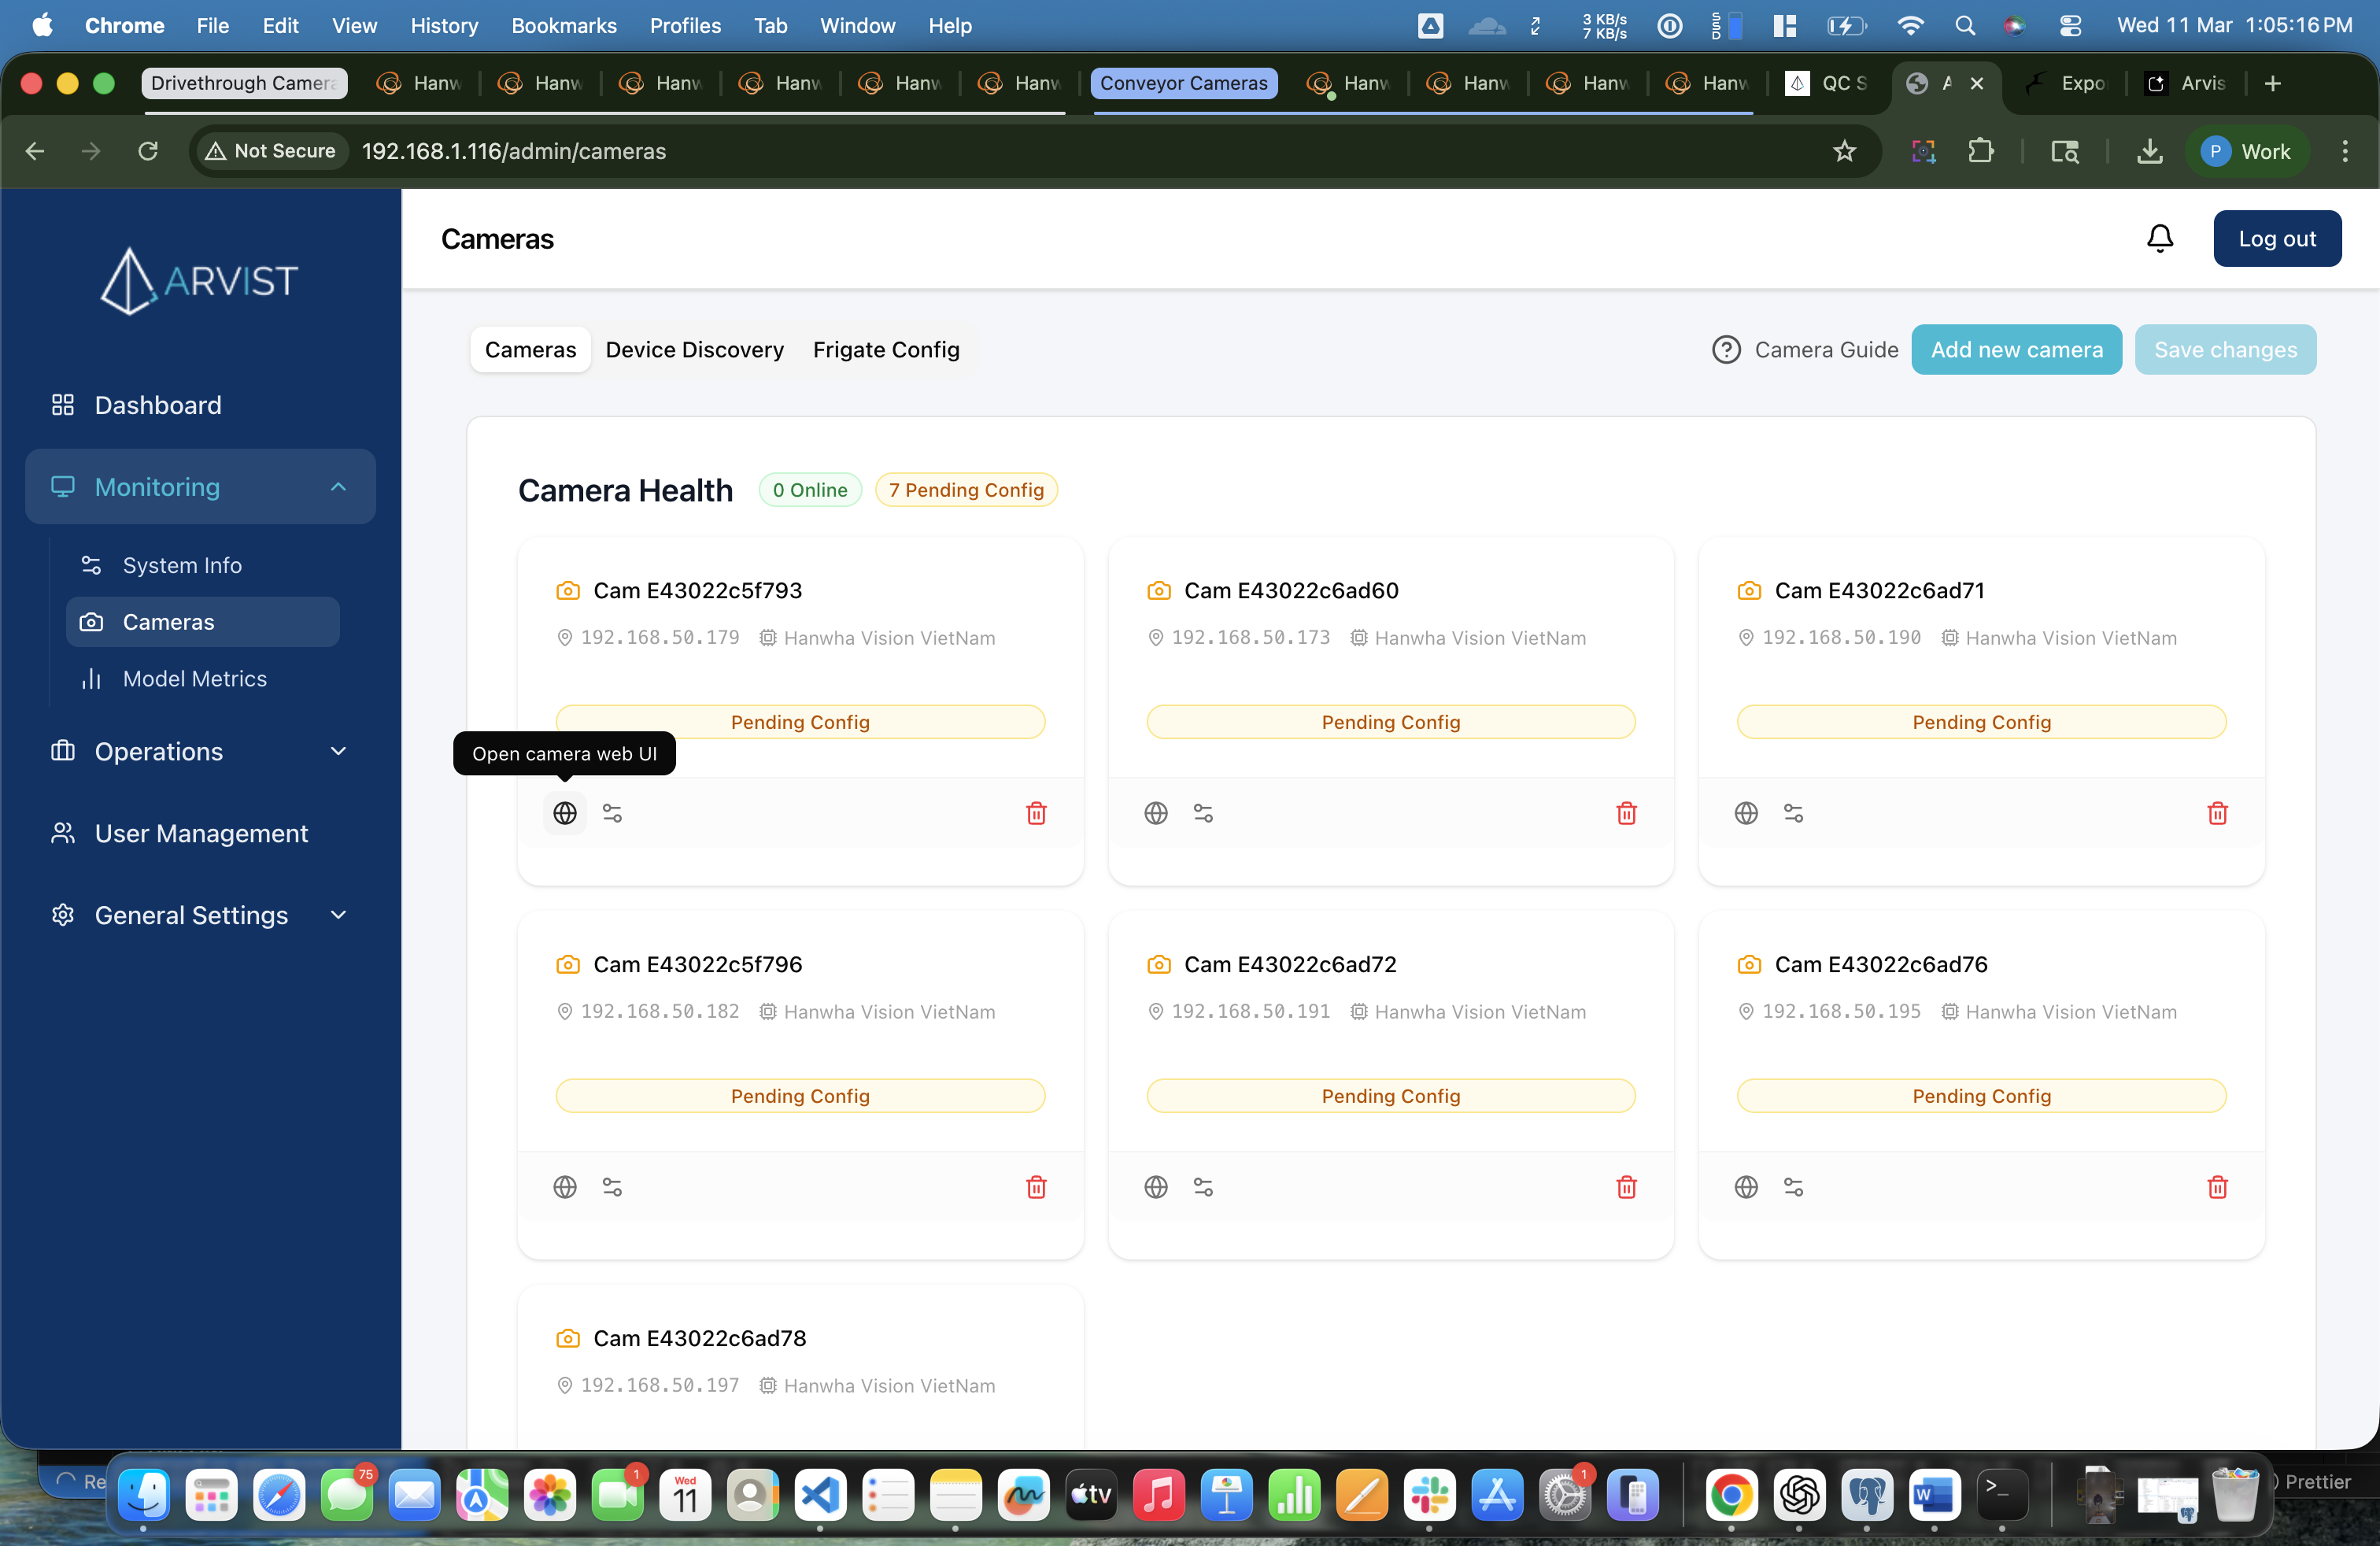
Step 20: Open the Camera's Web Interface
On a camera card, click the Globe icon (🌐). This opens the camera's own built-in web interface in a new browser tab.
Step 21: Set Up Camera Credentials
In the camera's web UI:
- If it's a brand new camera: Create new login credentials (change the default admin password to a secure one)
- Configure any camera-specific settings relevant to the deployment:
- Stream settings (resolution, FPS, encoding — refer to Recommended Camera Settings)
- Image settings (orientation, brightness, etc.)
- Physical placement (tilt, pan, zoom if PTZ)
When done, close that tab or navigate back to the Arvist admin dashboard tab.
Step 22: Open the Configure Dialog
Back on the Cameras page in Arvist, find the same camera card and click the Configure icon (the sliders icon — next to the Globe icon).
This opens the Configure Camera dialog.
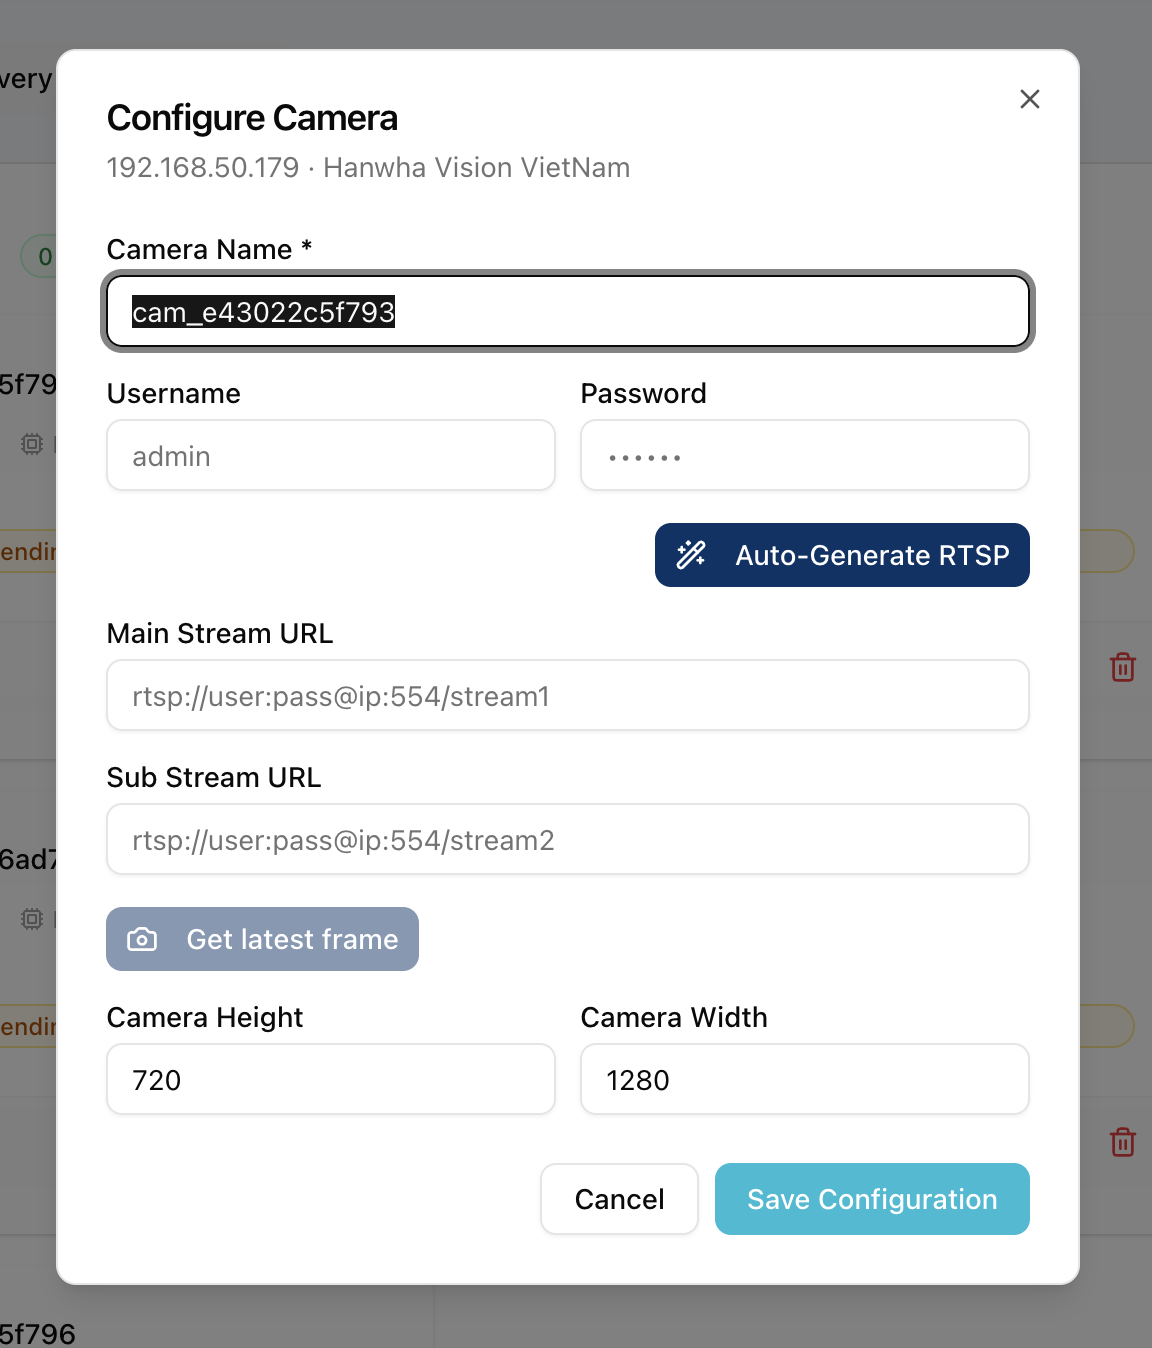
Step 23: Enter Camera Credentials
In the Configure Camera dialog:
- Enter the Username (e.g.
admin) - Enter the Password (the password you just set or the existing one)
Step 24: Auto-Generate RTSP URLs
Click the Auto Generate RTSP button (magic wand icon ✨).
Arvist will connect to the camera using the credentials you entered and automatically fill in:
- Main Stream URL — the full RTSP URL for the high-resolution recording stream
- Sub Stream URL — the RTSP URL for the lower-resolution detection stream
For Hanwha cameras, only the Main Stream auto-fills. The sub stream field will remain empty — this is expected behavior for Hanwha.
Step 25: Get the Latest Frame (Recommended)
Click the Get Latest Frame button (camera icon 📷).
Arvist will pull a single frame from the camera stream and display it as a preview directly in the dialog. This lets you:
- Verify the camera is online and streaming
- Confirm the camera's physical placement (what it's actually pointing at)
- Choose a meaningful name for the camera based on what you see
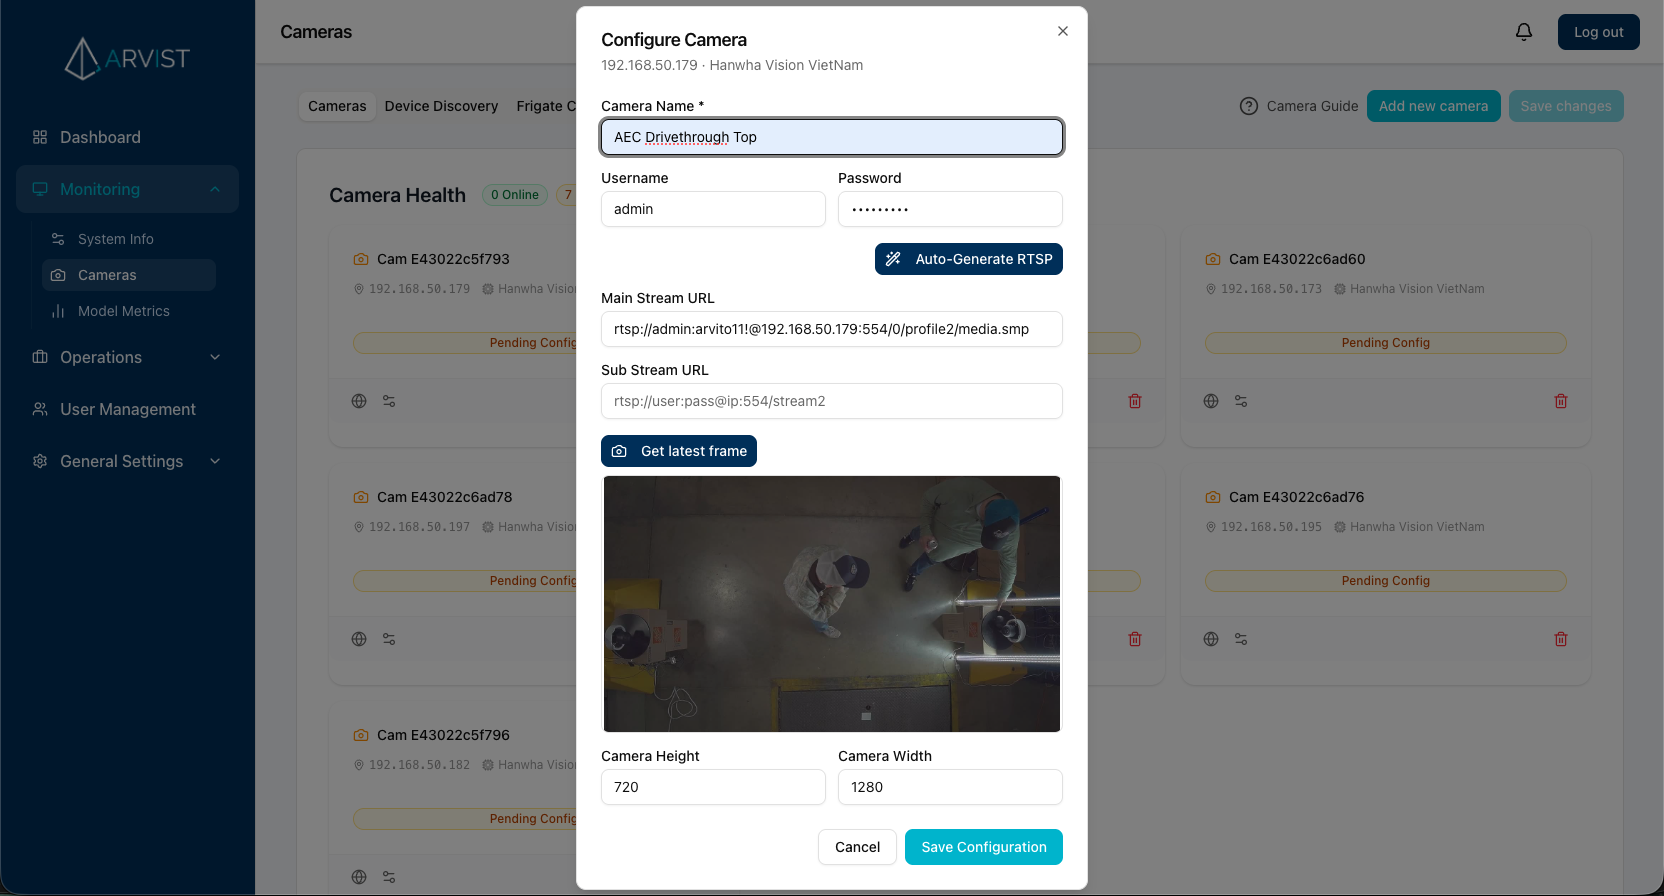
If you installed the cameras yourself and know exactly where each one is pointed, you can skip "Get Latest Frame" and name the camera directly. But for multi-person setups or when cameras were installed by others, this step helps avoid mix-ups.
Step 26: Name the Camera
In the Camera Name field, type a clear, descriptive name based on where the camera is placed:
| Example Names |
|---|
Dock_Door_1 |
Entrance_North |
Conveyor_Line_3 |
Shipping_Dock_East |
Warehouse_Aisle_2 |
Camera names use underscores instead of spaces automatically. Keep names short and location-specific.
Step 27: Save Camera Configuration
Review the form:
- Camera Name — descriptive location name ✅
- Main Stream URL — auto-filled ✅
- Sub Stream URL — auto-filled (or empty for Hanwha) ✅
- Height — defaults to
720✅ - Width — defaults to
1280✅
Click Save Configuration.
The dialog closes and the camera card updates with the name and configuration you entered.
Repeat for All Cameras
Go through Steps 20–27 for each camera card in the Cameras tab. You can configure all cameras before saving to keep things efficient.
Phase 9 — Save All Changes
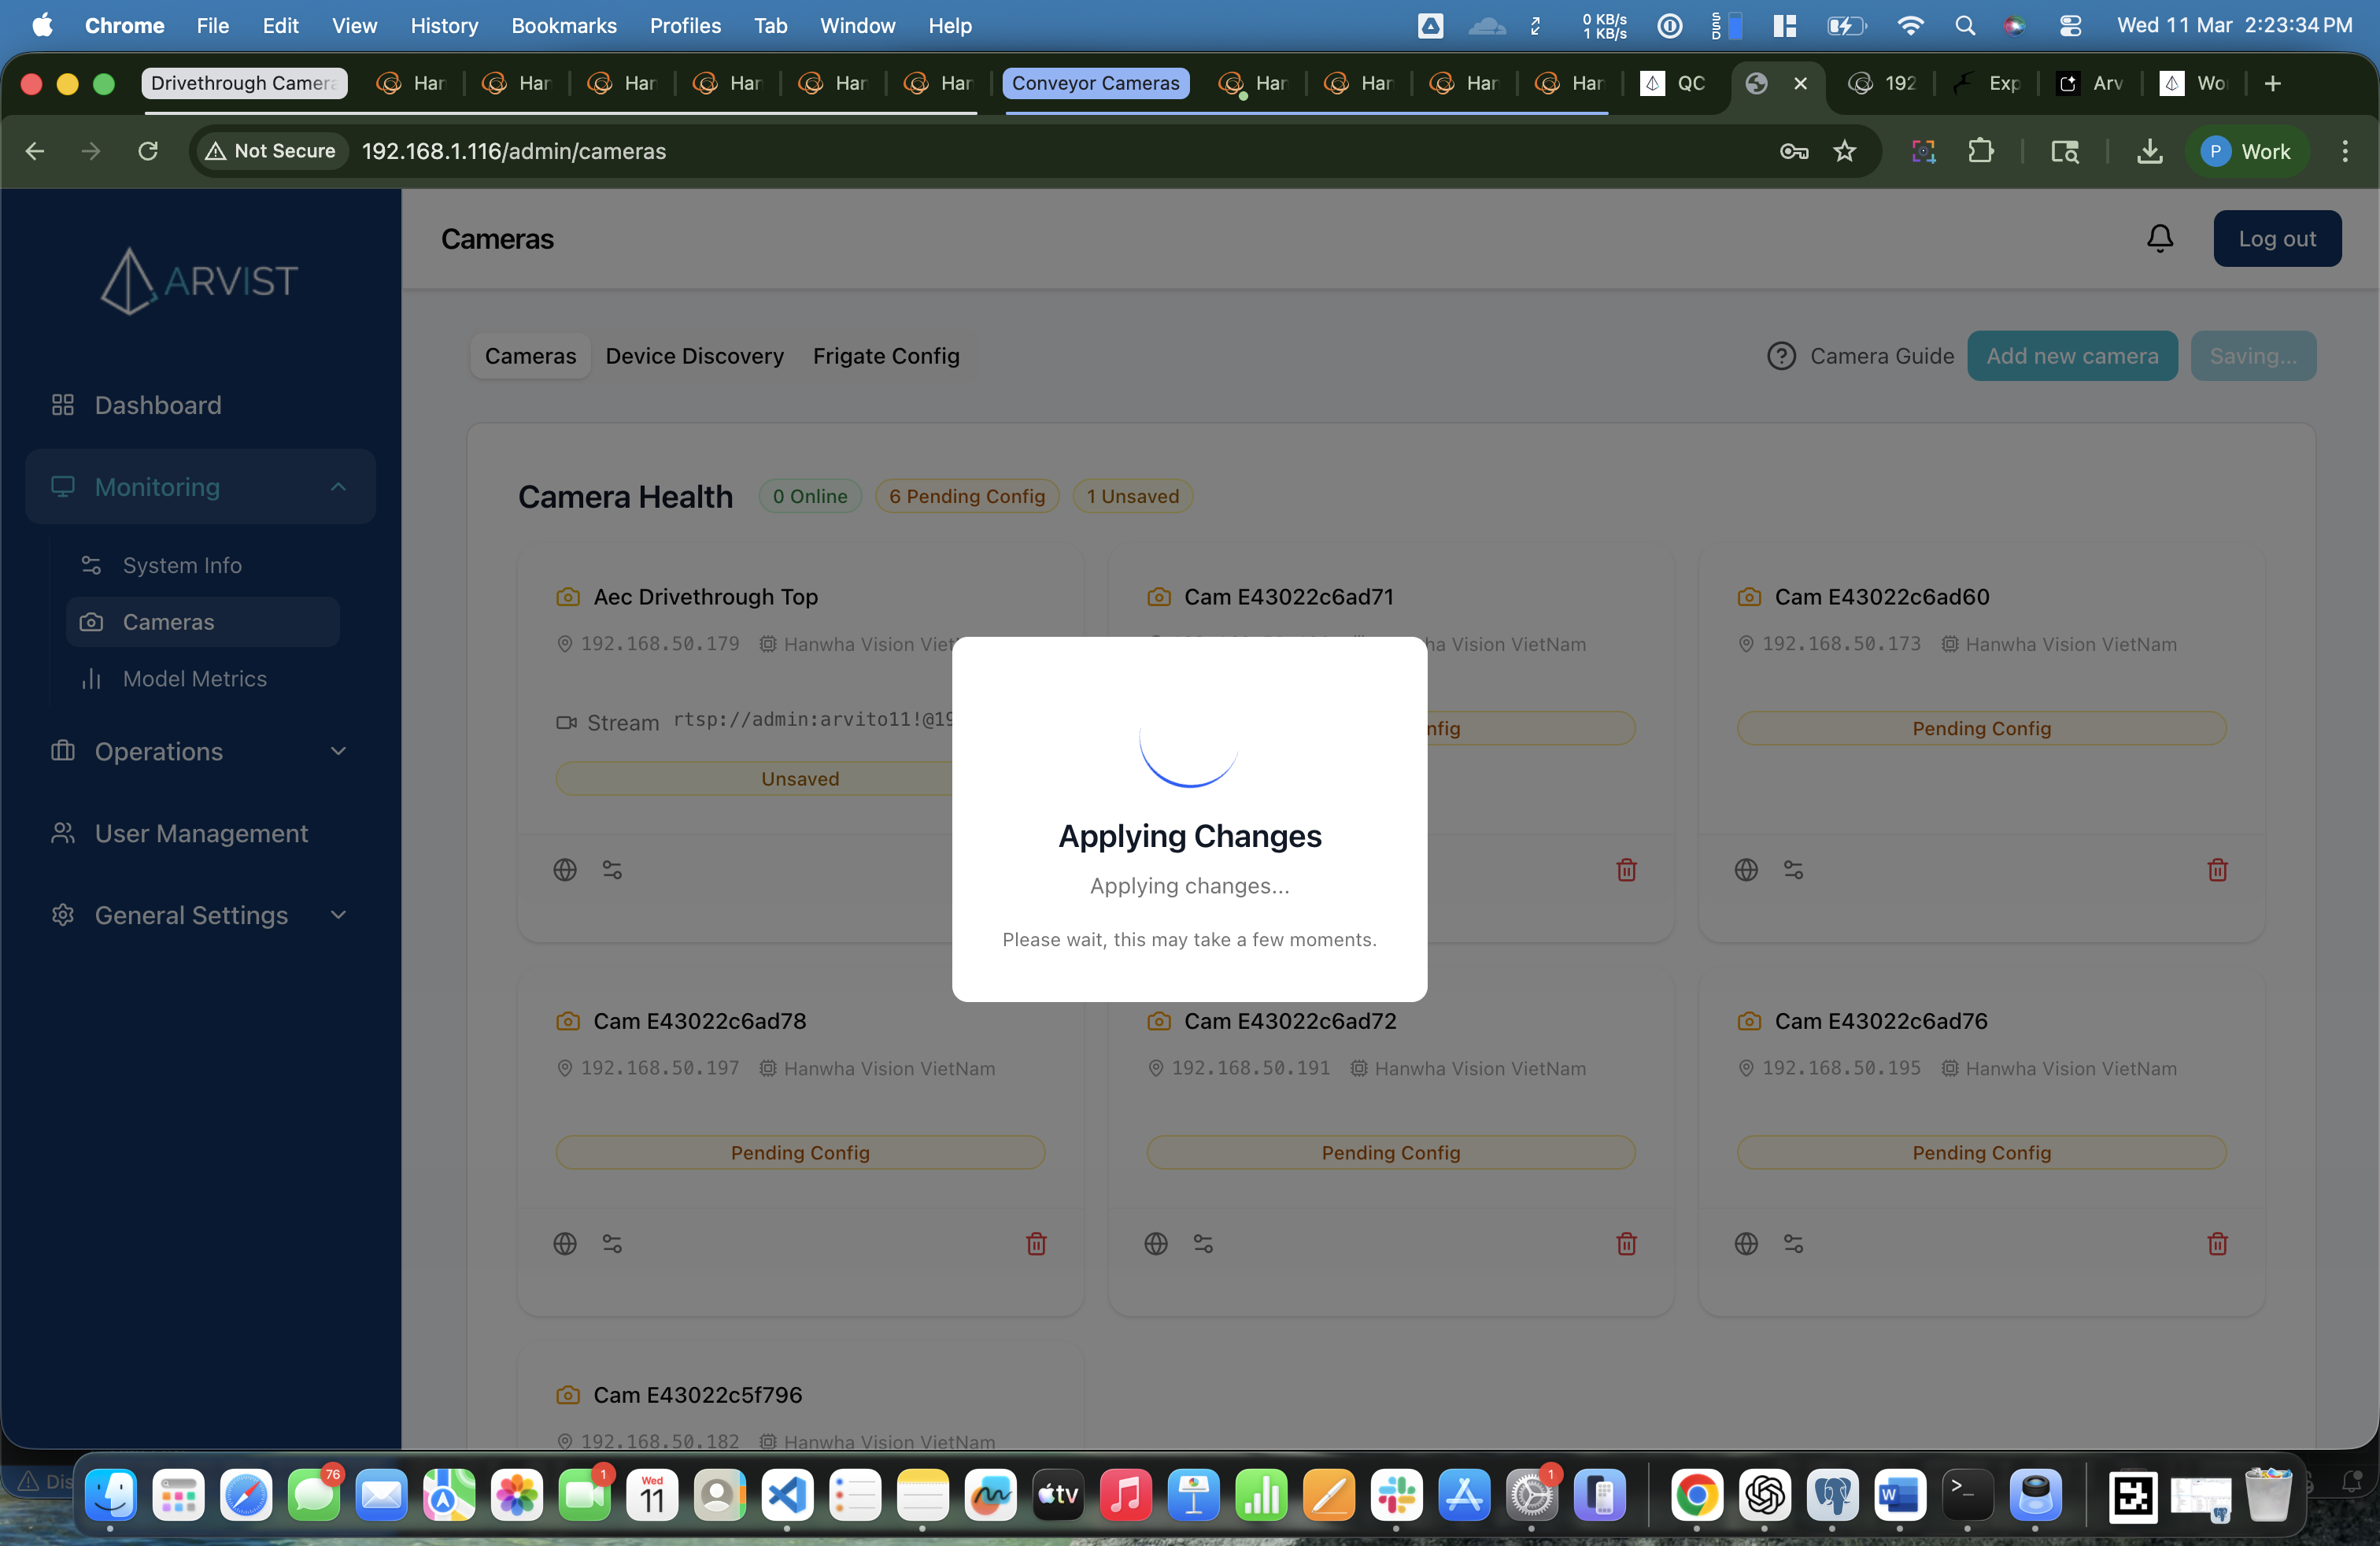
Step 28: Click "Save Changes"
Once all cameras are configured, click the Save Changes button in the top-right corner of the Cameras page.
This triggers the following:
- All camera configurations are written to the NVR config file (
config.yaml) - The NVR (Frigate) restarts to apply the new configuration
- A progress overlay shows the current step
⏳ This process takes 30–90 seconds. The page will show a saving overlay with status updates. Wait for it to complete before navigating away.

Phase 10 — Verify Camera Health
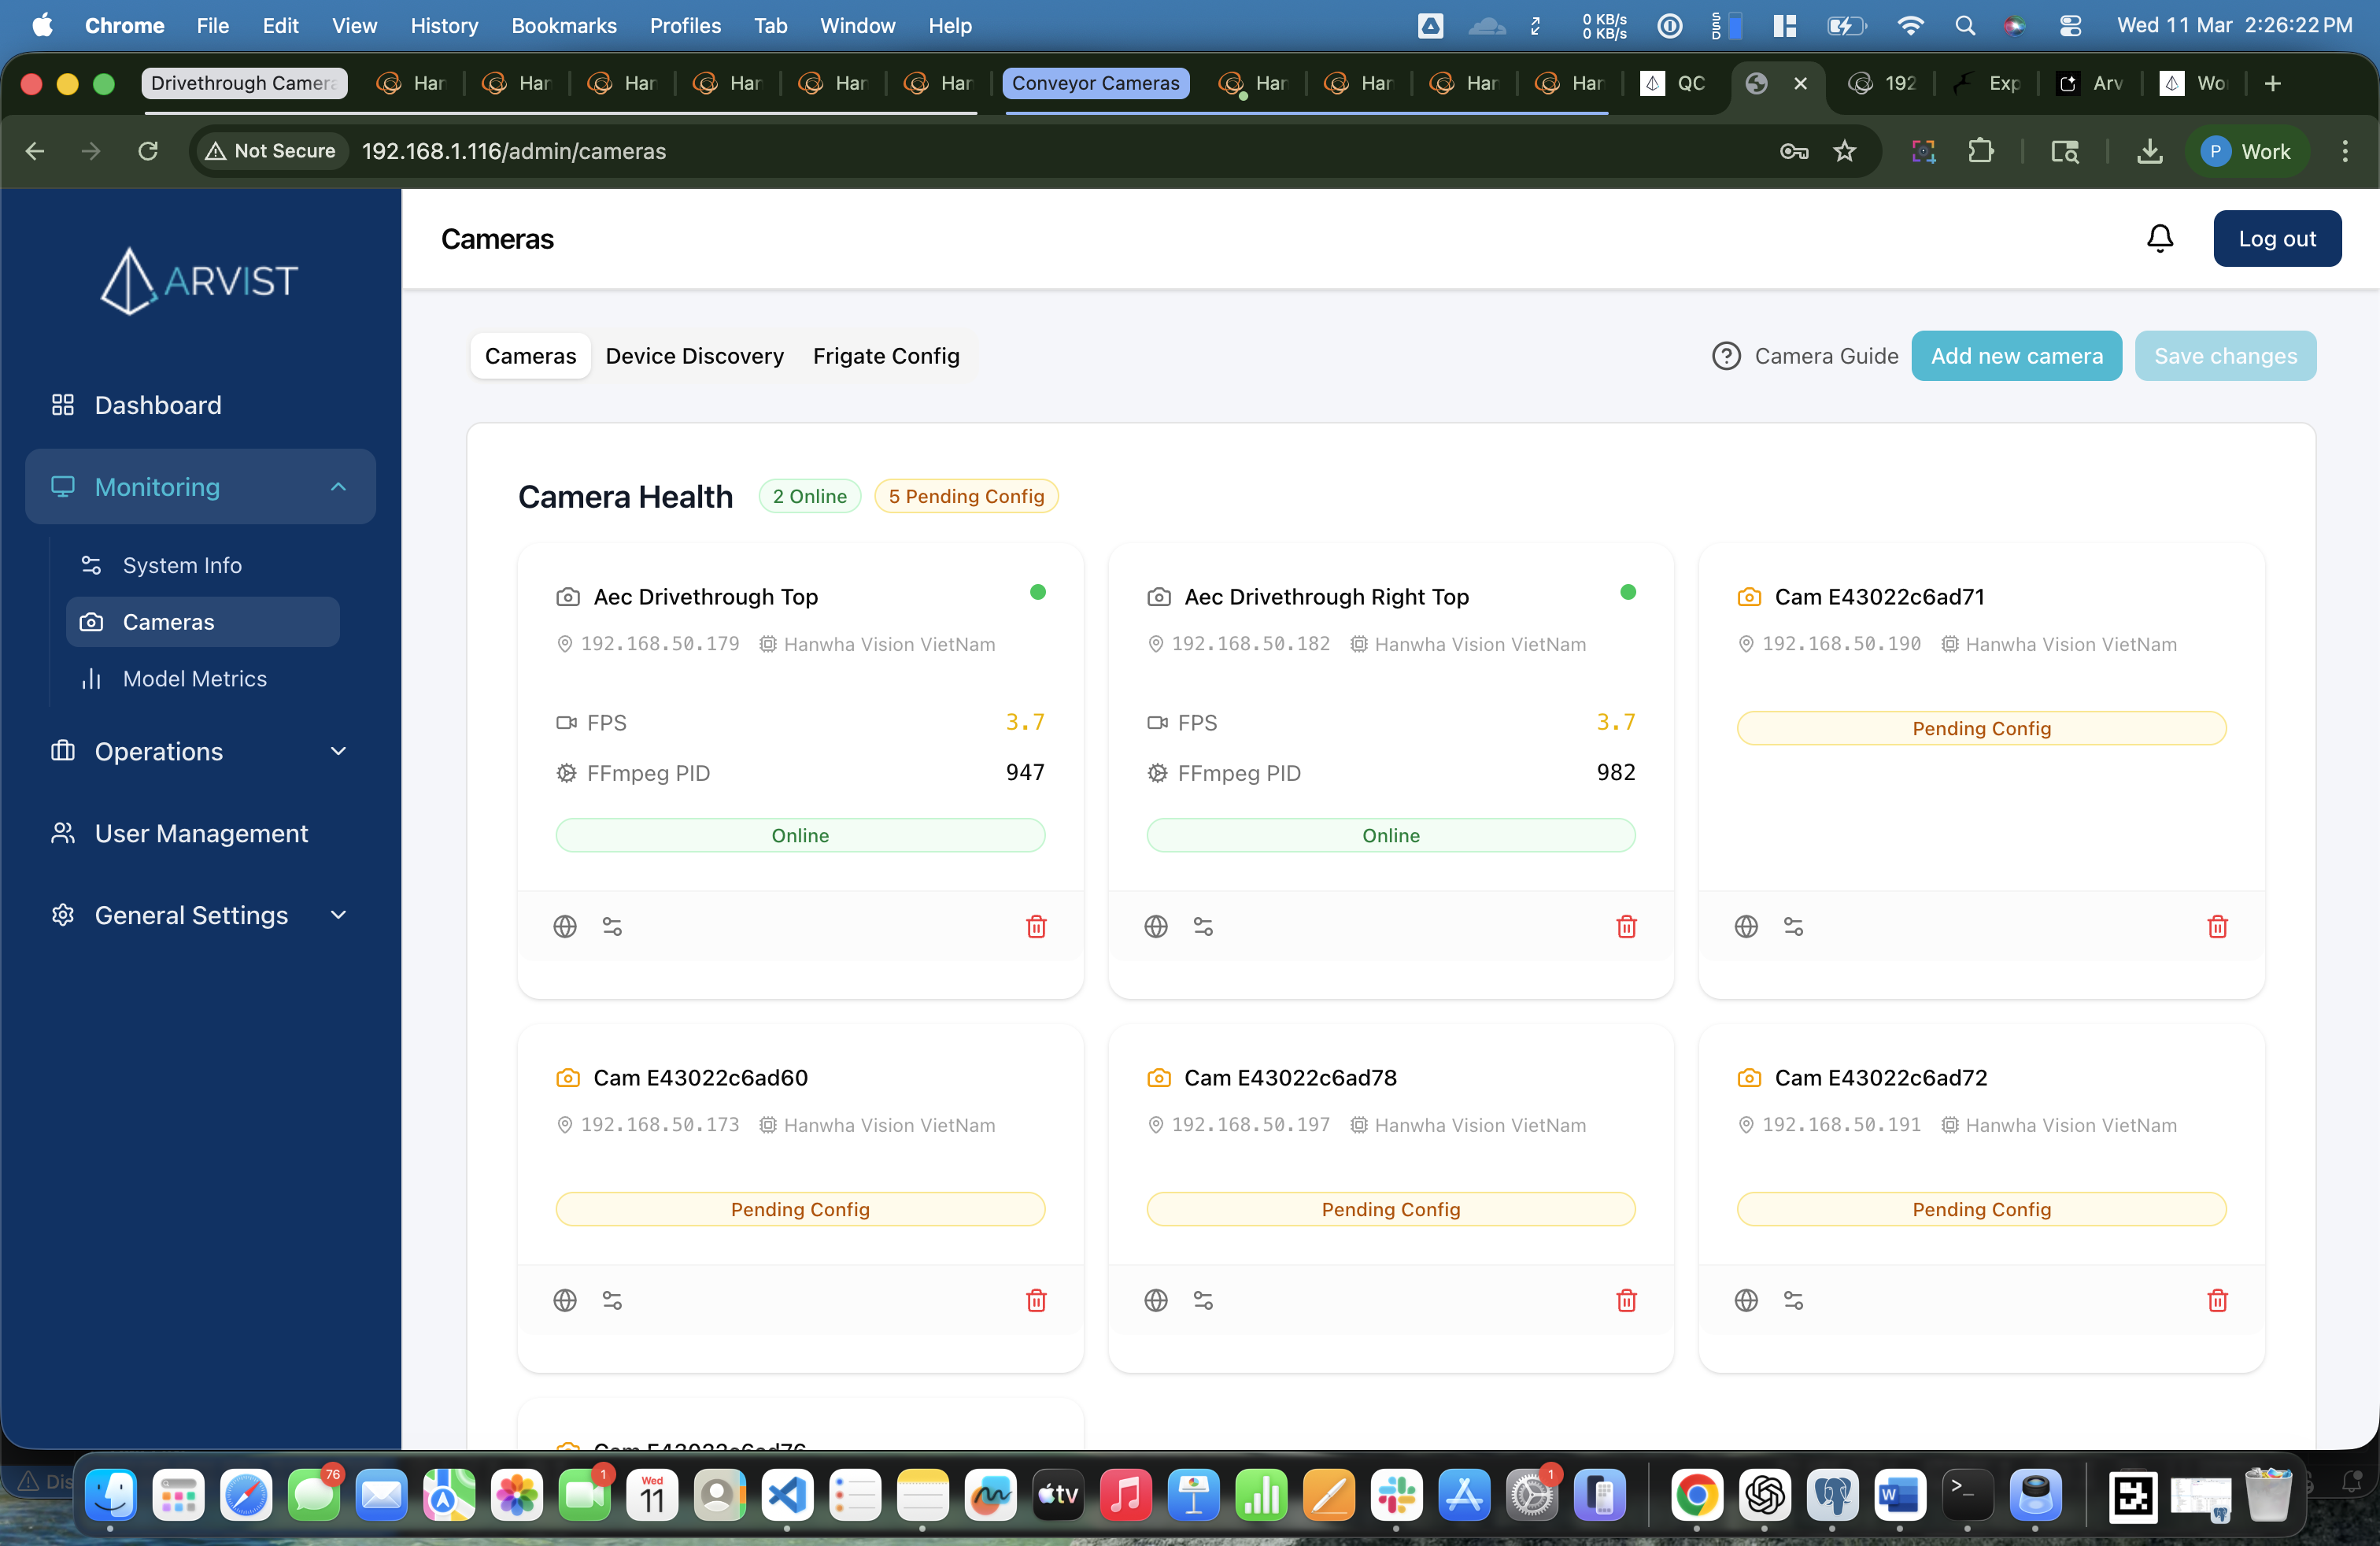
Step 29: Review Camera Health
After the save completes, scroll down on the Cameras tab to see the Camera Health section.
Each camera card now shows live status information:
| Field | Description |
|---|---|
| Camera Name | The name you gave it |
| IP Address | Camera's IP on the switch network |
| Vendor | Camera manufacturer |
| FPS | Live frames per second |
| FFmpeg PID | Process ID — confirms the stream is active |
| Status Badge | 🟢 Online or 🔴 Offline |
- Give it 1–2 minutes — it may still be starting up after the NVR restart
- Check that the RTSP credentials are correct
- Verify the camera is powered on and the ethernet cable is plugged in
- Click Configure again and retry Auto Generate RTSP
Editing the Frigate Config Directly (Advanced)
For users with technical knowledge, the Frigate Config tab provides a raw YAML editor for the NVR's config.yaml file. You can:
- View all cameras currently in the config
- Edit stream URLs, detection settings, and more
- Save and restart Frigate directly from this page
Direct YAML editing can break your NVR configuration if done incorrectly. Stick to the Cameras tab unless you know what you're doing.

Deleting a Camera
To remove a camera from the configuration:
- Find the camera card in the Cameras tab (Camera Health section)
- Click the Delete icon (🗑️ trash can) on the card
- The card shows a red "Marked for deletion" badge — the camera is not deleted yet
- If you changed your mind, click the Undo icon (↩️) to cancel the deletion
- When ready, click Save Changes to permanently remove it from the NVR config
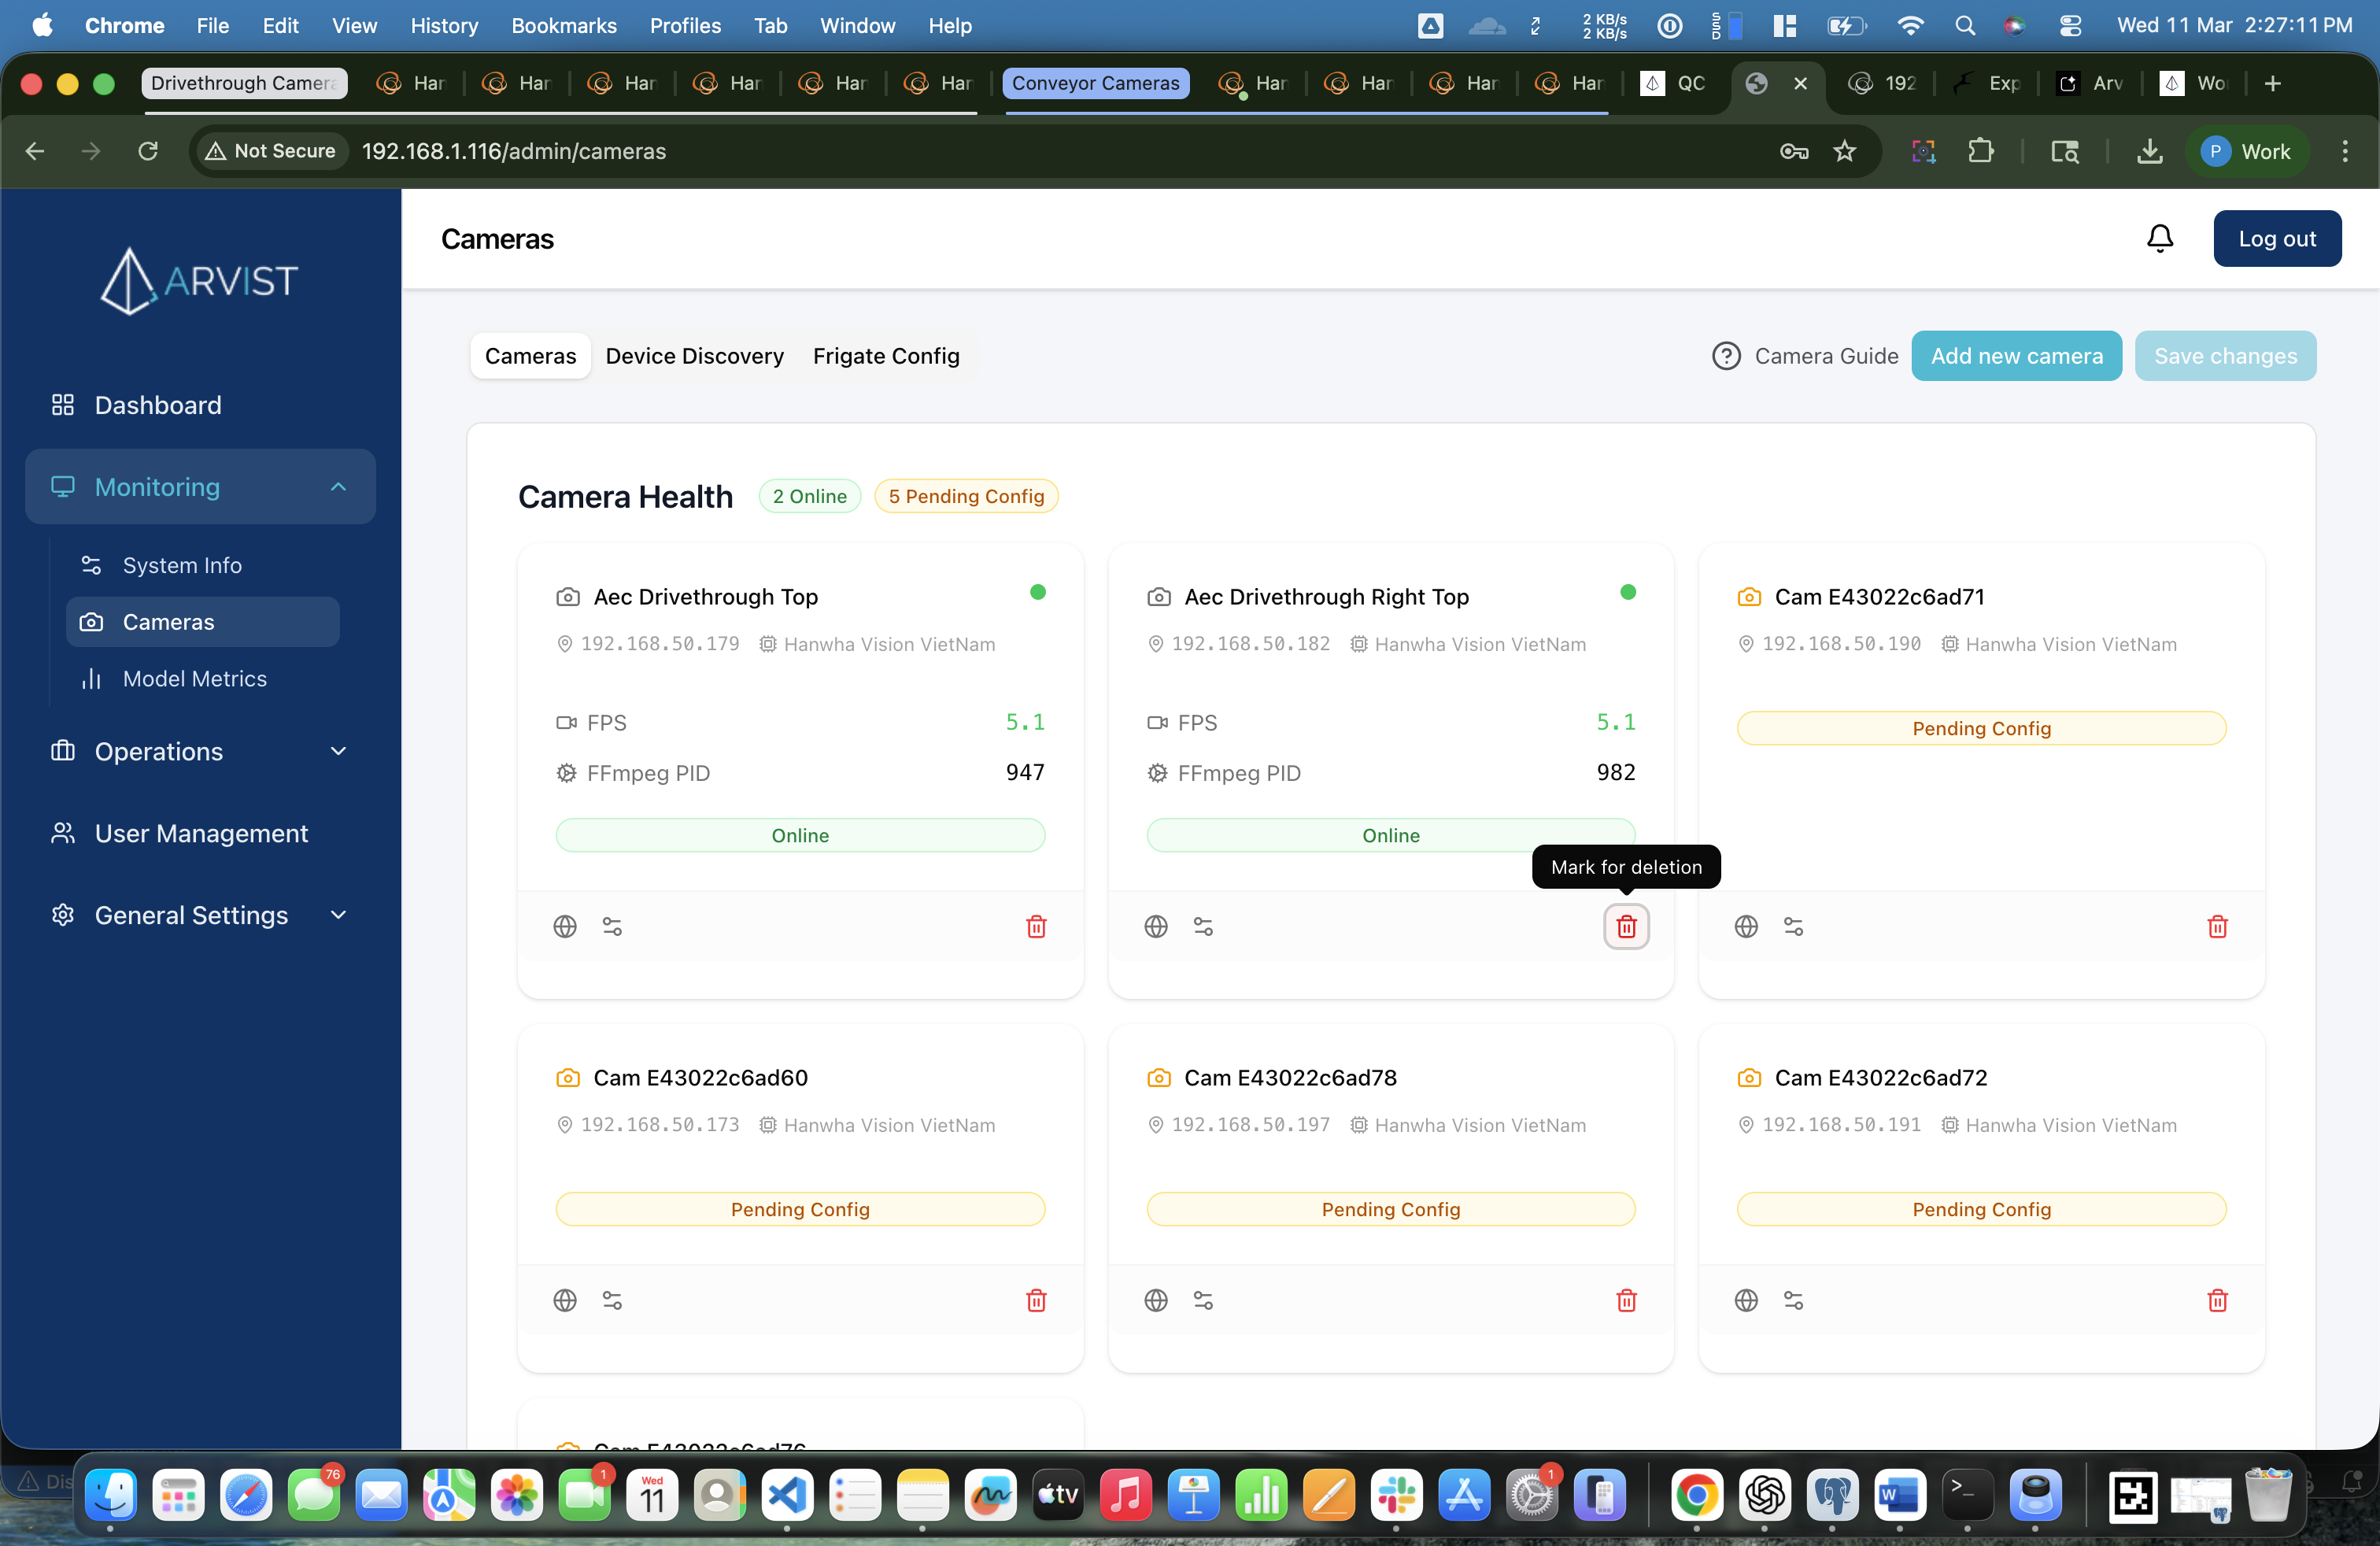
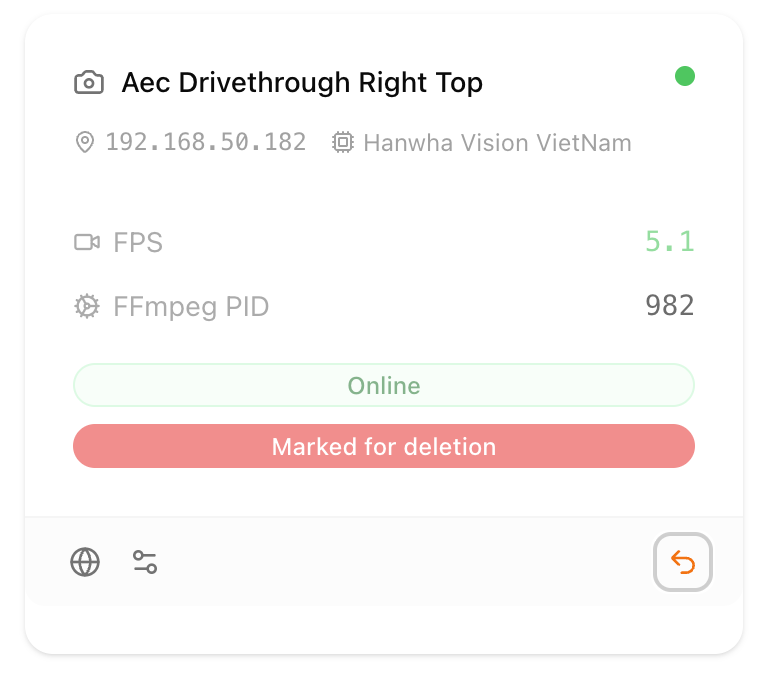
Deletions only apply after clicking Save Changes. If you accidentally mark a camera for deletion, click Undo before saving.
Quick Reference
| What you want to do | Where to go |
|---|---|
| Configure the ethernet network | Operations → Networks |
| Scan for cameras on the network | Monitoring → Cameras → Device Discovery tab |
| View/configure camera RTSP streams | Monitoring → Cameras → Cameras tab |
| Directly edit the NVR config YAML | Monitoring → Cameras → Frigate Config tab |
| Add a camera manually | Monitoring → Cameras → Add New Camera button |
| Save all camera changes | Monitoring → Cameras → Save Changes (top right) |
Full Setup Checklist
Use this checklist at every new deployment or trade show setup:
- Ethernet cable from Arvist laptop → switch
- Laptop connected to WiFi
- Start script run from desktop — IP address noted
- Logged into admin dashboard at
http://<IP>/admin - Networks page → Interfaces loaded
- Ethernet interface (e.g.
enp3s0) selected and auto-configured - All cameras plugged into the switch and powered on
- Waited 2–5 minutes for cameras to get IP addresses
- Device Discovery tab → interface selected → Scan Network run
- Cameras filtered by vendor if needed
- All cameras added to Camera Config (individually or all at once)
- Each camera opened in web UI — credentials set up, stream settings configured
- Each camera configured in Arvist — RTSP auto-generated, frame verified, camera named
- Save Changes clicked and NVR restart completed
- All cameras showing as Online in Camera Health