Site Management
The Site Management section in Arvist allows administrators to create and manage physical sites within your organization. Each site represents a distinct physical location (e.g., a warehouse, distribution center, or facility) and serves as the top-level scope for all data — cameras, zones, incidents, modules, and more are all associated with a specific site.
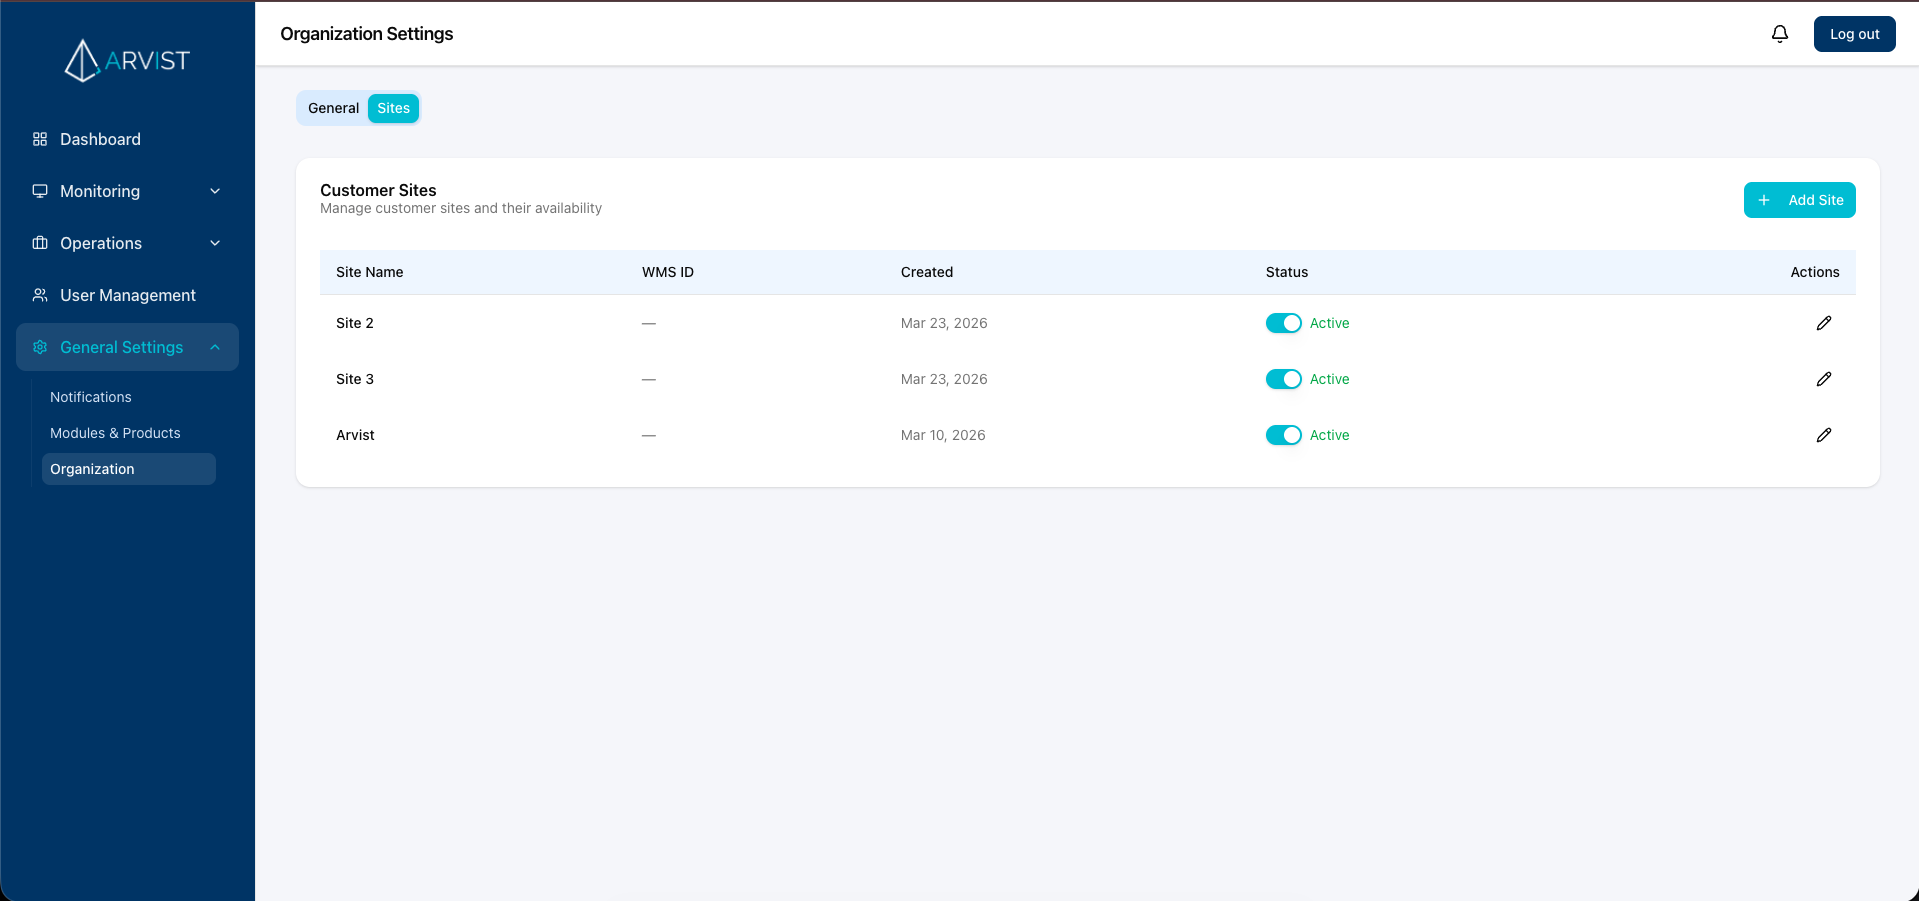
Sites List
The Sites page displays all configured sites in your organization. Each entry shows the site name, its enabled/disabled status, and any linked WMS site ID. From here, administrators can add new sites, edit existing ones, or disable sites that are no longer active.
Adding a New Site
Users with the appropriate admin permissions can create new sites from the Site Management page.
Click + Add new site in the top right corner.
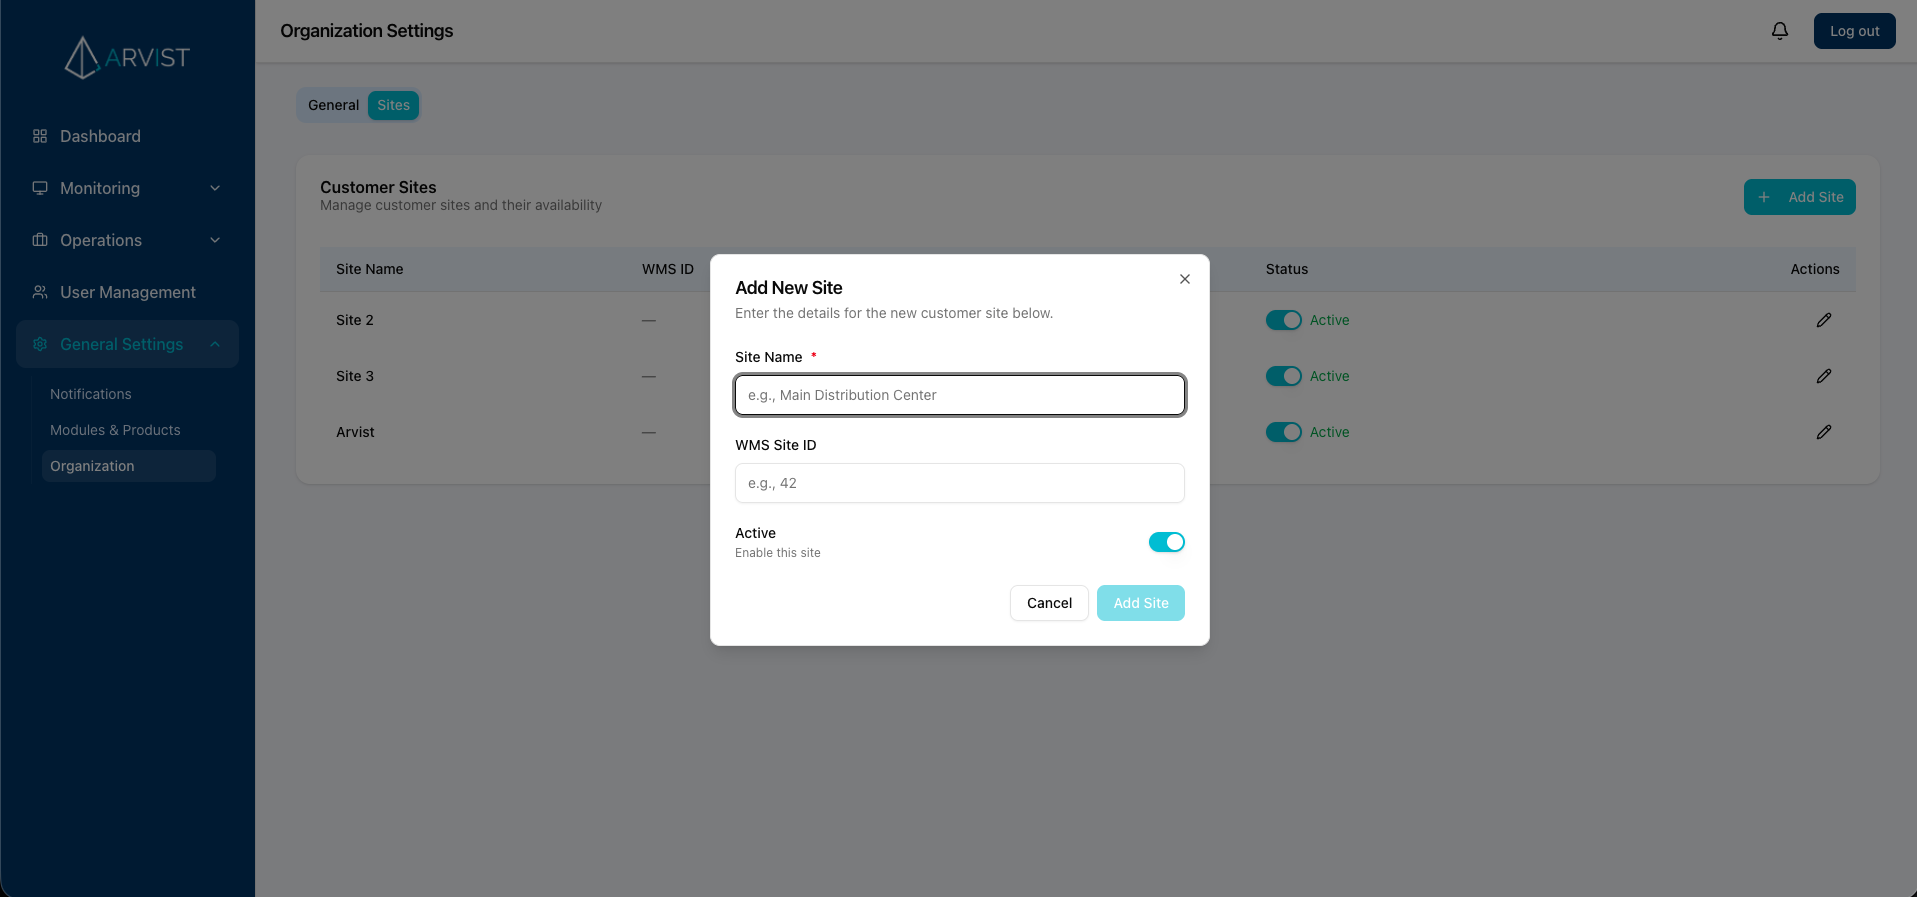
In the Add new site form, fill in the following fields:
- Site Name: Enter a descriptive name for the site (e.g., "Chicago Warehouse", "East Distribution Center").
- Enabled: Toggle whether the site is active. Enabled sites are fully operational and will appear across the platform.
- WMS Site ID (Optional): If your organization uses a Warehouse Management System (WMS) integration, enter the corresponding WMS site identifier to link this site.
After filling in the details, click Save to create the site. The new site will immediately appear in the sites list and be available for use across the platform.
Editing a Site
To update an existing site's name or settings:
- Locate the site you want to edit in the list.
- Click the edit icon (pencil) in the Actions column for that site.

The edit form contains the same fields as the creation form:
- Site Name: Update the name of the site.
- Enabled: Toggle the site's active status.
- WMS Site ID (Optional): Update or add the WMS integration identifier.
After making your changes, click Save to apply the updates.
Disabling a Site
Disabling a site removes it from active use across the platform without permanently deleting it or its associated data. This is useful when a facility is temporarily offline or undergoing reconfiguration.
To disable a site:
- Locate the site you want to disable.
- Click the edit icon in the Actions column.
- Toggle the Enabled switch to the off position.
- Click Save to apply the change.
The site will now appear as disabled in the sites list. Disabled sites are hidden from standard views across the platform but can be re-enabled at any time by repeating the steps above and toggling the Enabled switch back on.
NOTE: Disabling a site does not delete any associated data (cameras, zones, incidents, etc.). All historical data is preserved and will be accessible again if the site is re-enabled.