Modules
The Modules section in Arvist allows users to customize and manage use cases specifically tailored for warehouse environments. These modules enable or disable various detection scenarios, helping ensure safety, compliance, and operational efficiency.
Creating and Customizing Modules
1. Selecting a Use Case
To create a new module, start by selecting a use case that best fits your needs:
- Navigate to Modules under General Settings.
- Click on Create Module.
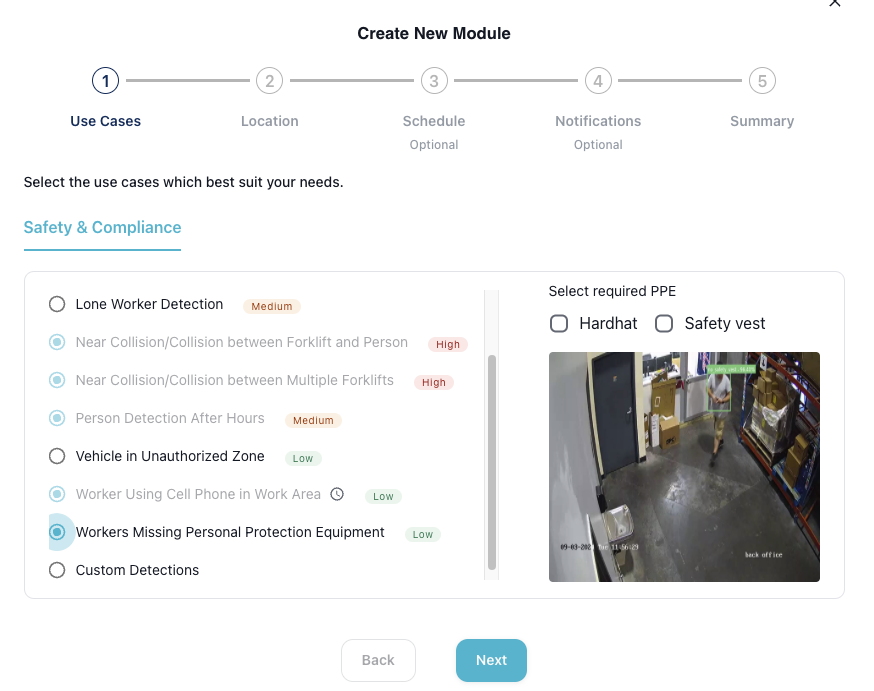
In the Use Cases step:
- Choose from predefined options such as:
- Fallen Person Detection (High severity)
- Immobile Worker in Potentail Distress (High severity)
- Lone Worker Detection (Medium severity)
- Near Collision/Collision between Forklift and Person (High severity)
- Near Collision/Collision between Multiple Forklifts (High severity)
- Object Obscuring Pathway (Medium Severity)
- Person Detection After Hours (Medium severity)
- Stop Sign Violation (Medium Severity)
- Vehicle in Unauthorized Zone (Low severity)
- Worker Using Cell Phone in Work Area (Low severity)
- Worker Missing Personal Protection Equipment (Low severity)
- This will include an option to select which PPE should be detected as missing ("No Hardhat", "No Safety Vest"). Choose one or both.
- Custom Detections for specific needs.
Click Next after selecting the appropriate use case.
Custom Detections
Custom Detections offers a way for you to track a specific object beyond our predefined options. This feature is ideal when you need to monitor specific objects or scenarios that aren't covered by the standard detection modules.
Creating a Custom Detection Module
- In the Use Cases step, select Custom Detections.
- Enter a unique, descriptive name for your custom use case (e.g., "Multiple Forklifts in Loading Zone", "Excess Pedestrians in Restricted Area").
- Click Next to proceed to object selection.
Selecting Trackable Objects
After naming your custom detection, you'll be presented with a list of trackable objects. Choose the object type that best matches your detection needs:
Available Object Types:
- Person
- Forklift
- Vehicle
Select your desired object type and click Next to continue.
Special Configuration for Person Detection
When selecting Person as your trackable object, an additional configuration option becomes available:
- Exclude equipment operators: Check this box if you want to exclude forklift and vehicle operators from detection. This is useful when you want to detect only pedestrian workers, not equipment operators.
Setting Object Count Conditions
Custom detections include a powerful conditional counting feature that allows you to specify when an incident should be created based on the number of detected objects.
After selecting your object type, you'll configure the count threshold:
-
Condition Type: Choose from the following options:
- Greater than: Trigger when the object count exceeds a specified number
- Less than: Trigger when the object count falls below a specified number
- Equal to: Trigger when the object count matches exactly a specified number
-
Count Value: Enter the threshold number (must be 1 or greater)
Examples:
- Capacity Management: Set "Person" with "Greater than 5" to alert when more than 5 people are in a confined area
- Minimum Staffing: Set "Person" with "Less than 2" to alert when fewer than 2 workers are in a required zone
- Equipment Limitation: Set "Forklift" with "Greater than 3" to alert when more than 3 forklifts are in a loading dock
- Specific Count Requirement: Set "Vehicle" with "Equal to 2" to alert when exactly 2 vehicles are present in a staging area
NOTE: The minimum count value is 1, as detection requires at least one object to be present in the frame.
Use Cases for Custom Detections
Custom detections are particularly useful for:
- Capacity monitoring: Ensuring areas don't exceed safe occupancy limits
- Zone congestion: Detecting when too many forklifts or vehicles are in a single area
- Workflow validation: Ensuring the right number of workers are present for specific tasks
- Equipment management: Monitoring equipment density in work zones
- Safety compliance: Alerting when vehicle or forklift counts exceed safe limits for pedestrian areas
TIP: Custom detections follow the same configuration workflow as standard modules, including location selection, scheduling, and notification setup. This allows for complete flexibility in creating detection scenarios tailored to your facility's unique operational and safety needs.
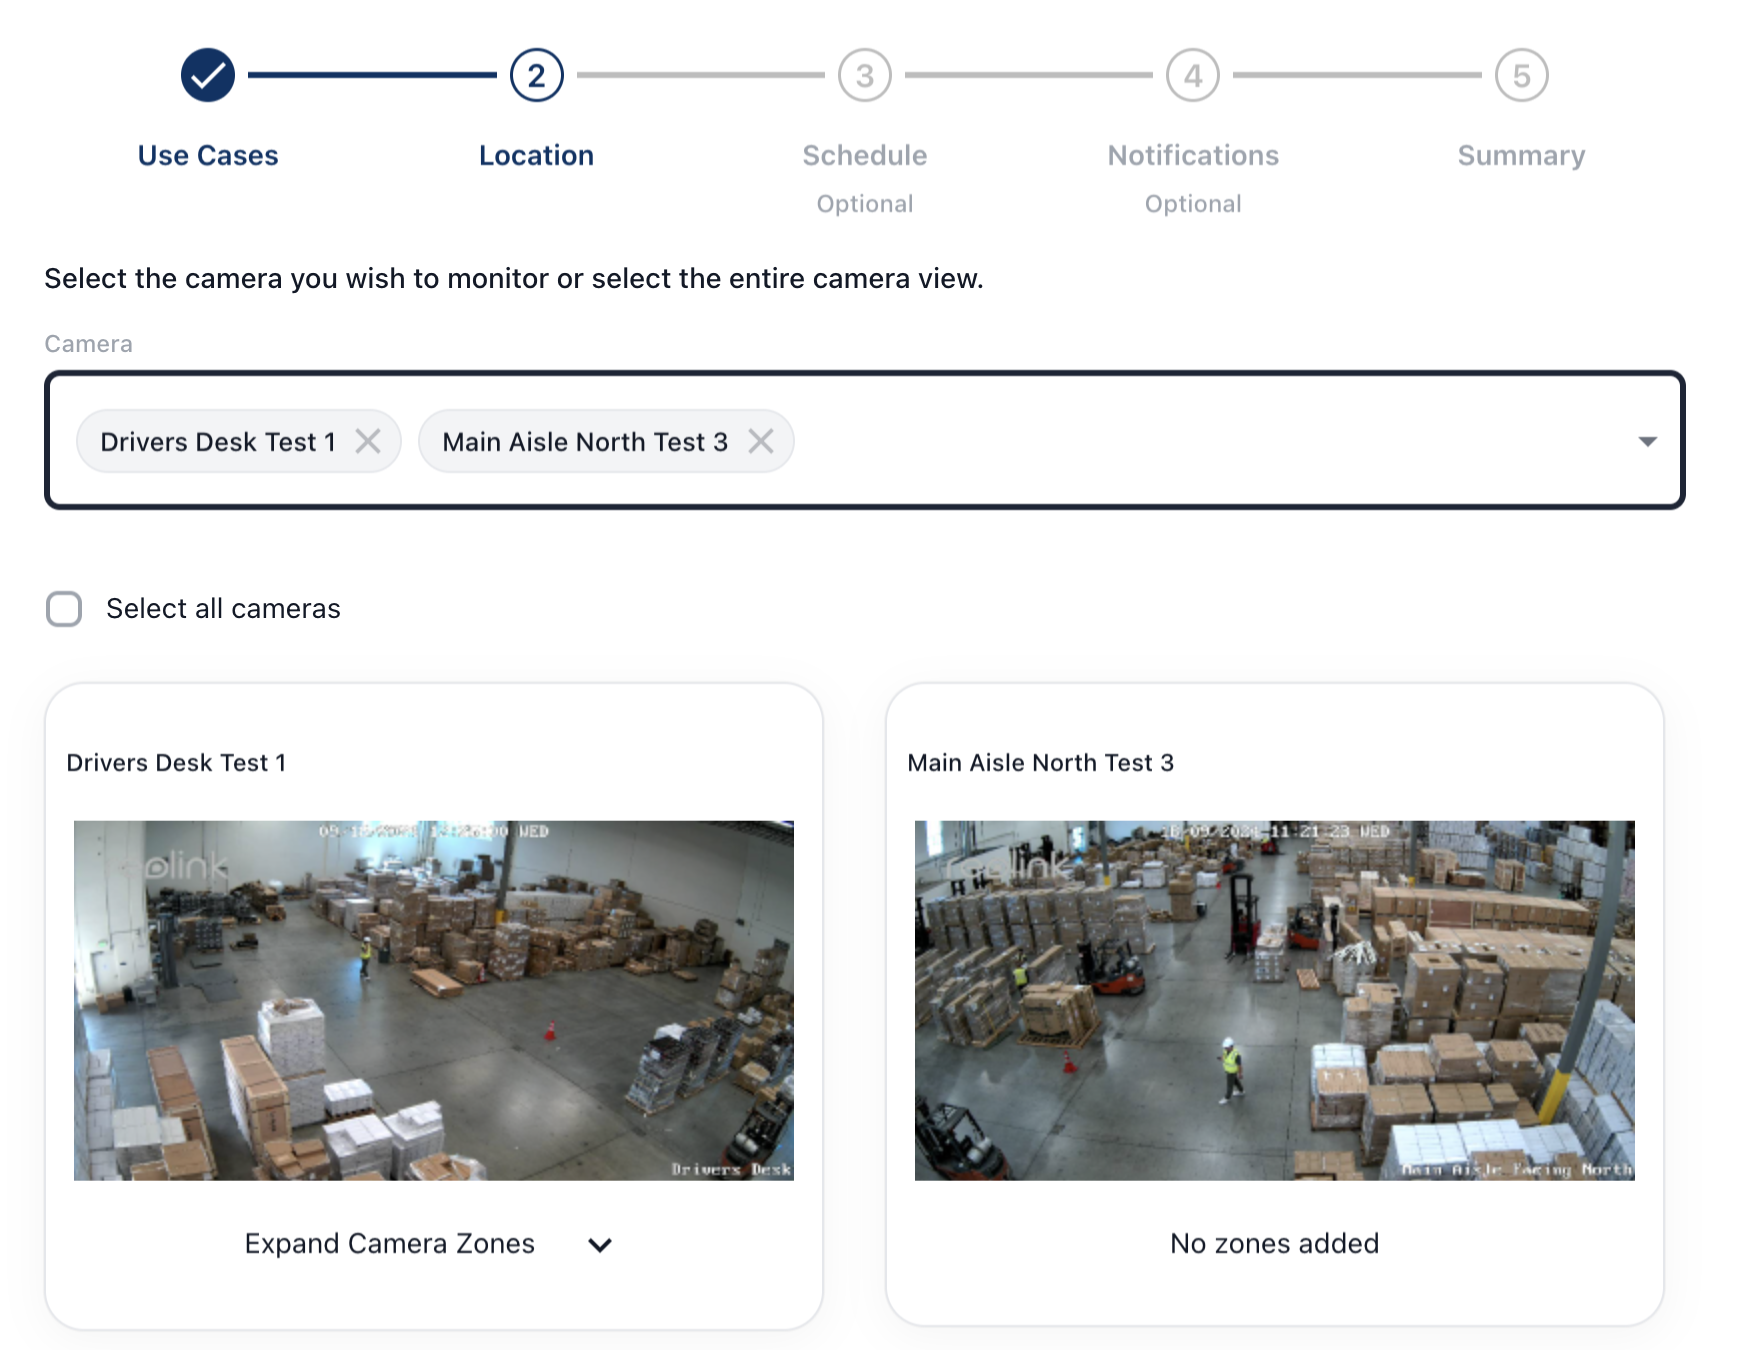
2. Configuring Location
In the Location step:
- Select any camera views from the dropdown where the module will be active.
- You can choose any number of specific camera or select all cameras with the Select all cameras checkbox.
- If specific zones in a camera are desired (and zones are created for that camera), click Expand Camera Zones and select with zones you'd like to be active for this module. You should see the zones overlayed on the camera image.
- For creating/editing zones, visit Editing Zones.
Click Next to proceed.
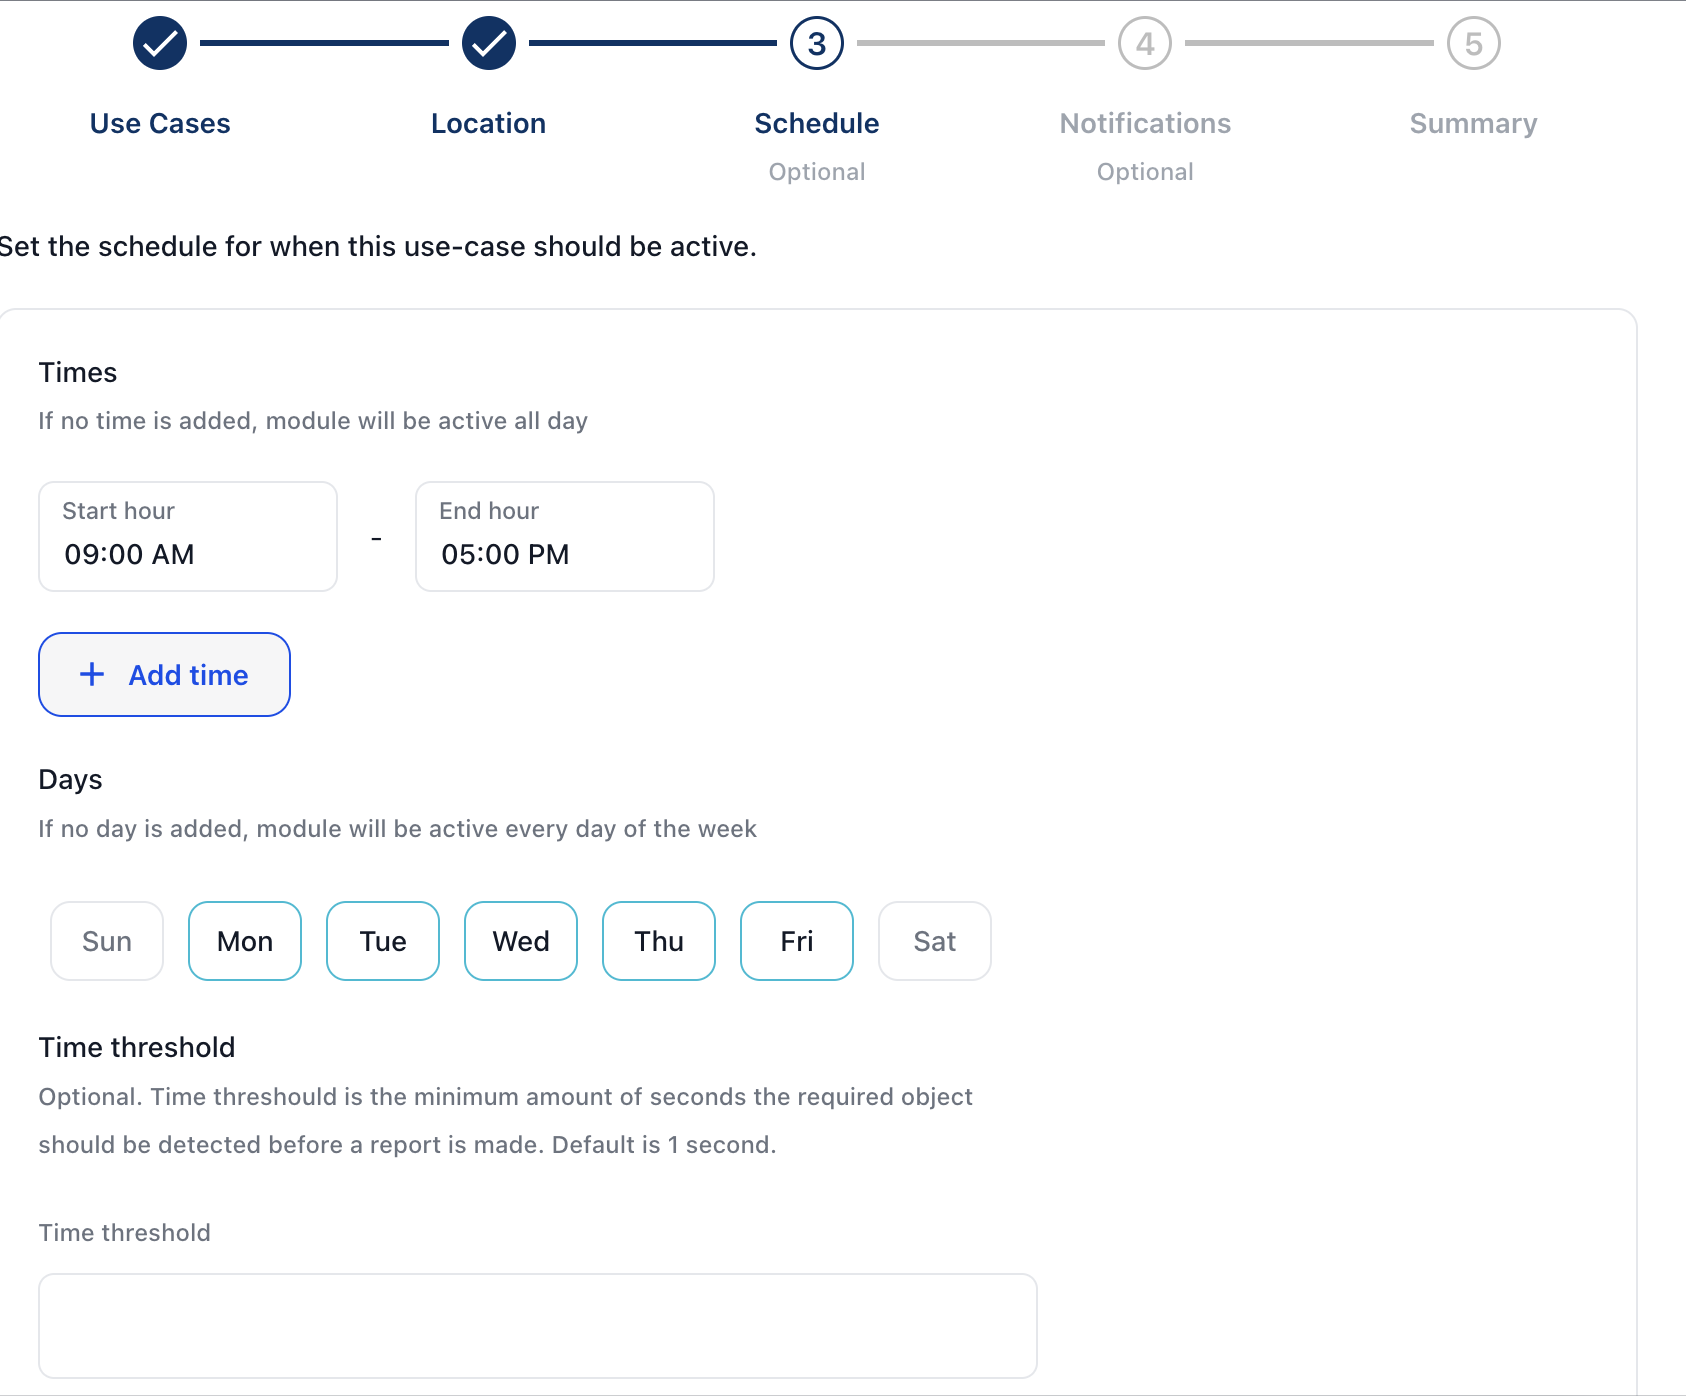
3. Setting a Schedule
In the Schedule step (optional):
- Define when the module should be active.
- Set specific times by adding start and end hours.
- After adding a time range to the inputs, click Add time to confirm the time range. You can add as many time ranges as you'd like.
- Choose the days of the week for module activation.
- Time Threshold: Set the minimum amount of time an object must be detected before an alert is generated (default is 1 second, customizable).
NOTE: If no time range is added, the module will run 24 hours. If no days of the week are selected, the module will run every day.
Click Next to proceed.
4. Adding Notification/Alert Recipients
In the Notification step (optional):
- Select any number of notification types for each user. Users must be created before this step if notifications are intended.
- For creating users, visit User Management.
- Options include email, sms, and WhatsApp.
- If Slack notifications are desired, enter the channel id for your organization to receive notifications.
NOTE: SMS will be disabled for users outside the United States. NOTE: For Slack notifications, additional configuration is required. Contact the Arvist team for more information.
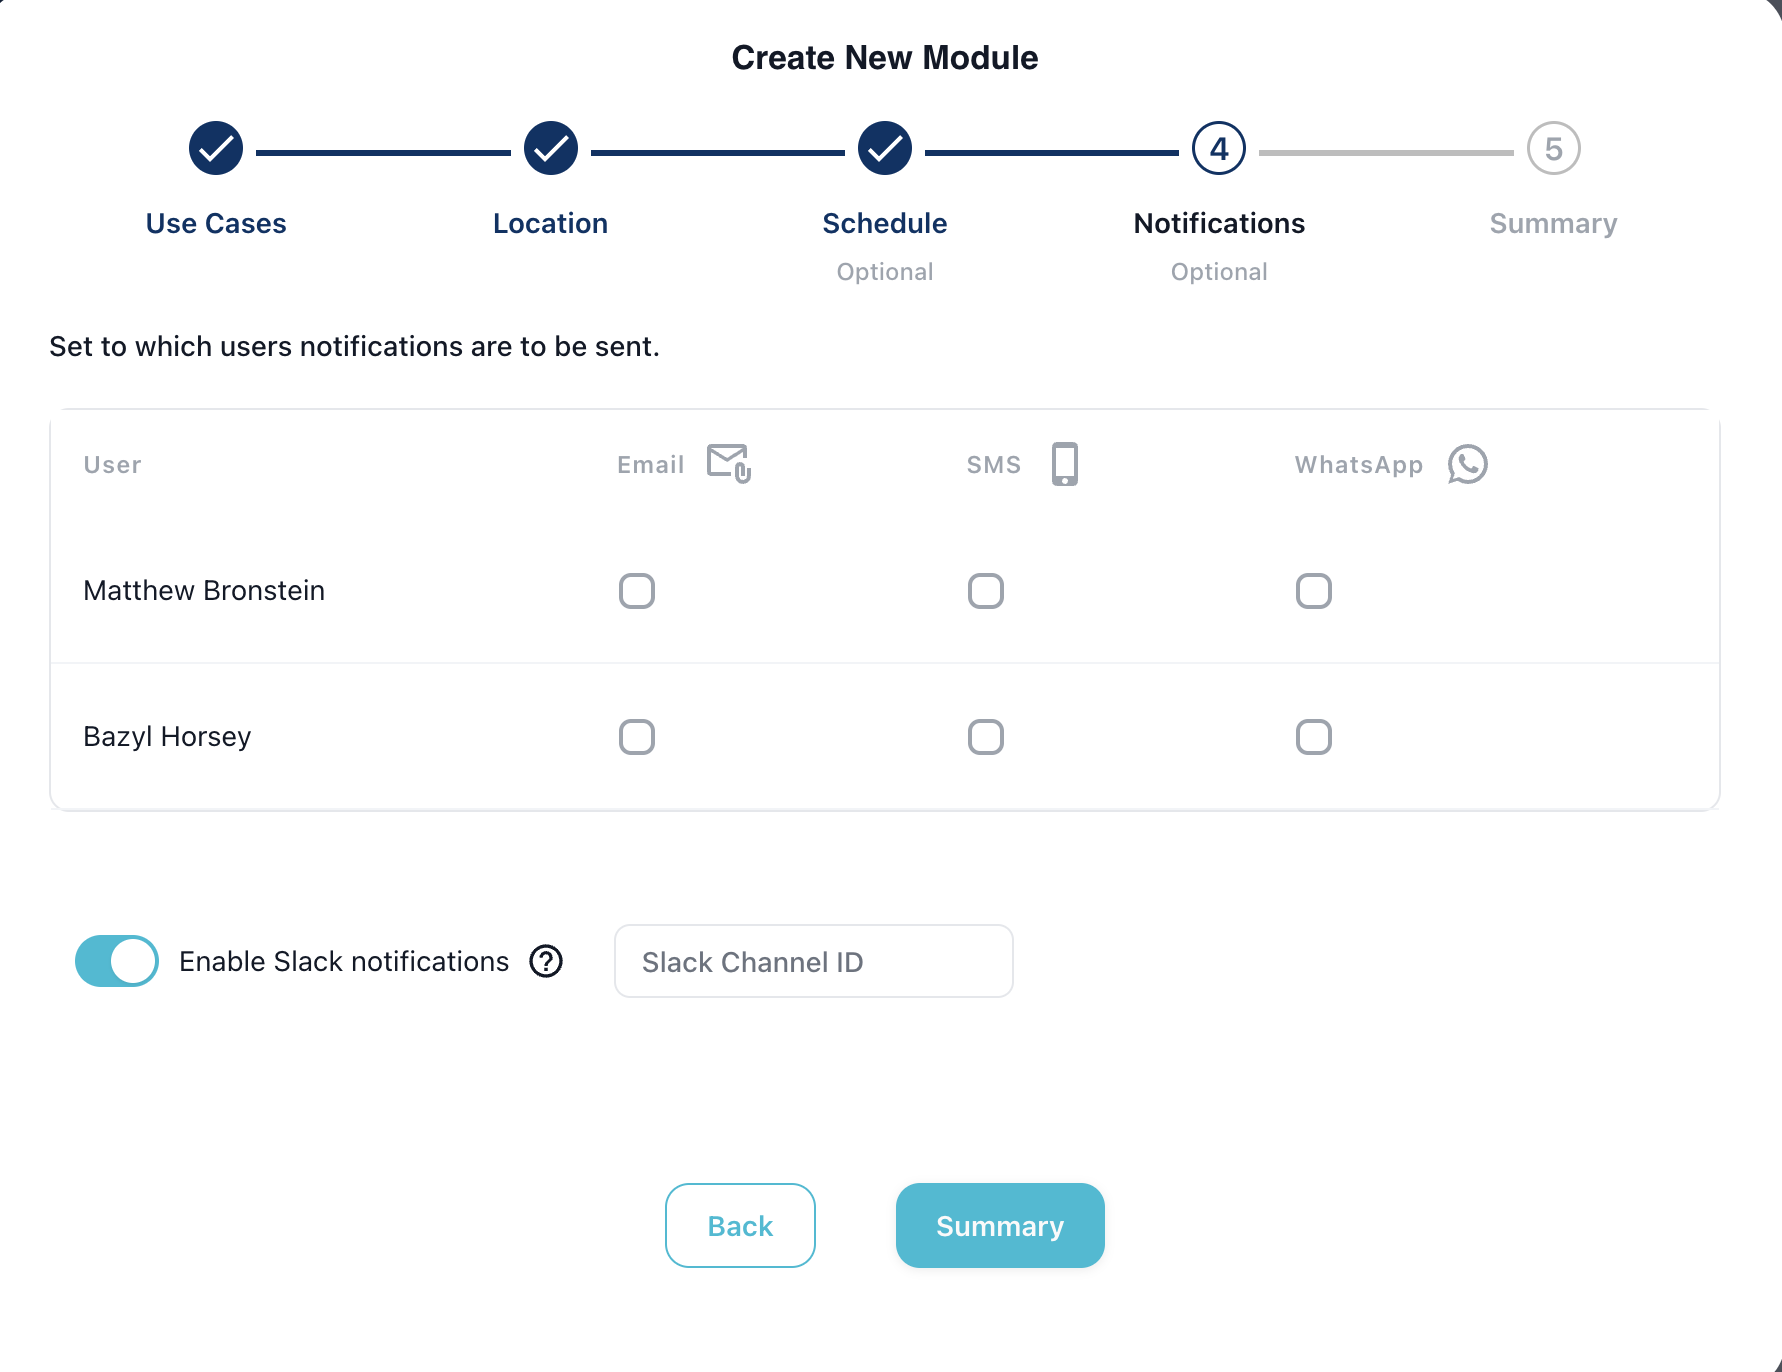
Click Summary once you have configured notifications.
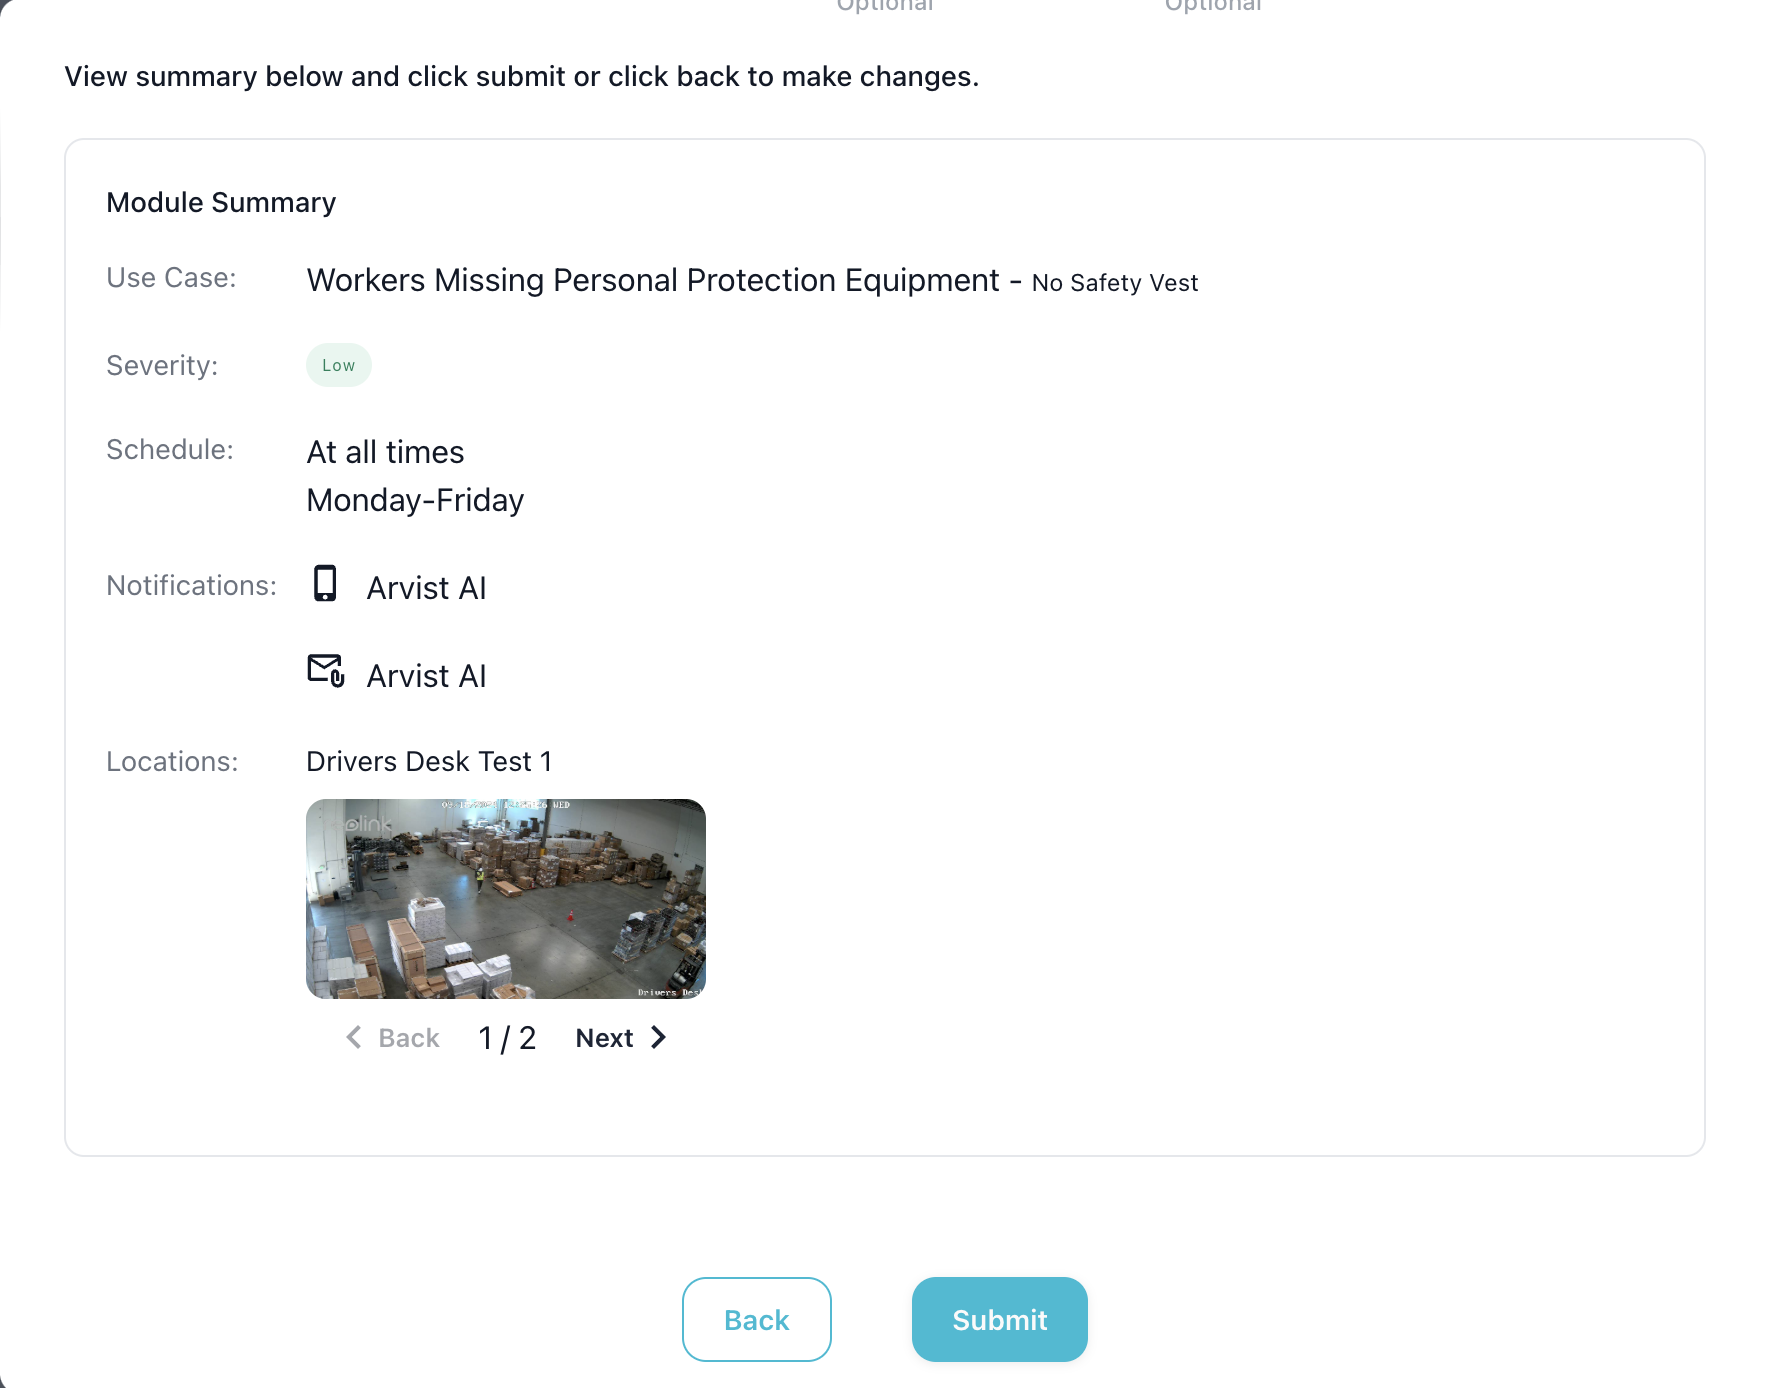
5. Reviewing and Submitting the Module
In the Module Summary step:
- Review the details of your configuration, including the use case, severity, schedule, notifications, and location.
- If everything is correct, click Submit to activate the module.
Managing Existing Modules
Once modules have been created, they will appear in the Modules list:

In the Modules list:
- Status: Toggle the switch to enable or disable a module.
- Use Case: Displays the name and severity of the use case.
- Location: Shows the camera location where the module is active.
- Schedule: Indicates when the module is active.
- Alert Recipients: Displays the recipients of alerts generated by the module.
- Actions: Use the pencil icon to edit the module settings or the trash icon to delete the module.
This overview allows users to quickly manage and adjust their detection scenarios based on changing needs.