Zones
In Arvist, zones are specific areas on a camera's field of view that you can define to focus on certain activities or objects. These zones are essential when setting up specific modules that require monitoring of particular spots within the camera's view.
Editing Zones
1. Accessing the Zone Editor
To view, create, or edit a zone:
- Navigate to Area Configuration and select the camera on which you'd like to configure zones.
- In order to configure a zone, it must be added to an area. For adding areas, visit Area Configuration.
- Select the camera feed you want to view/edit. In this example, we are editing Test 16.
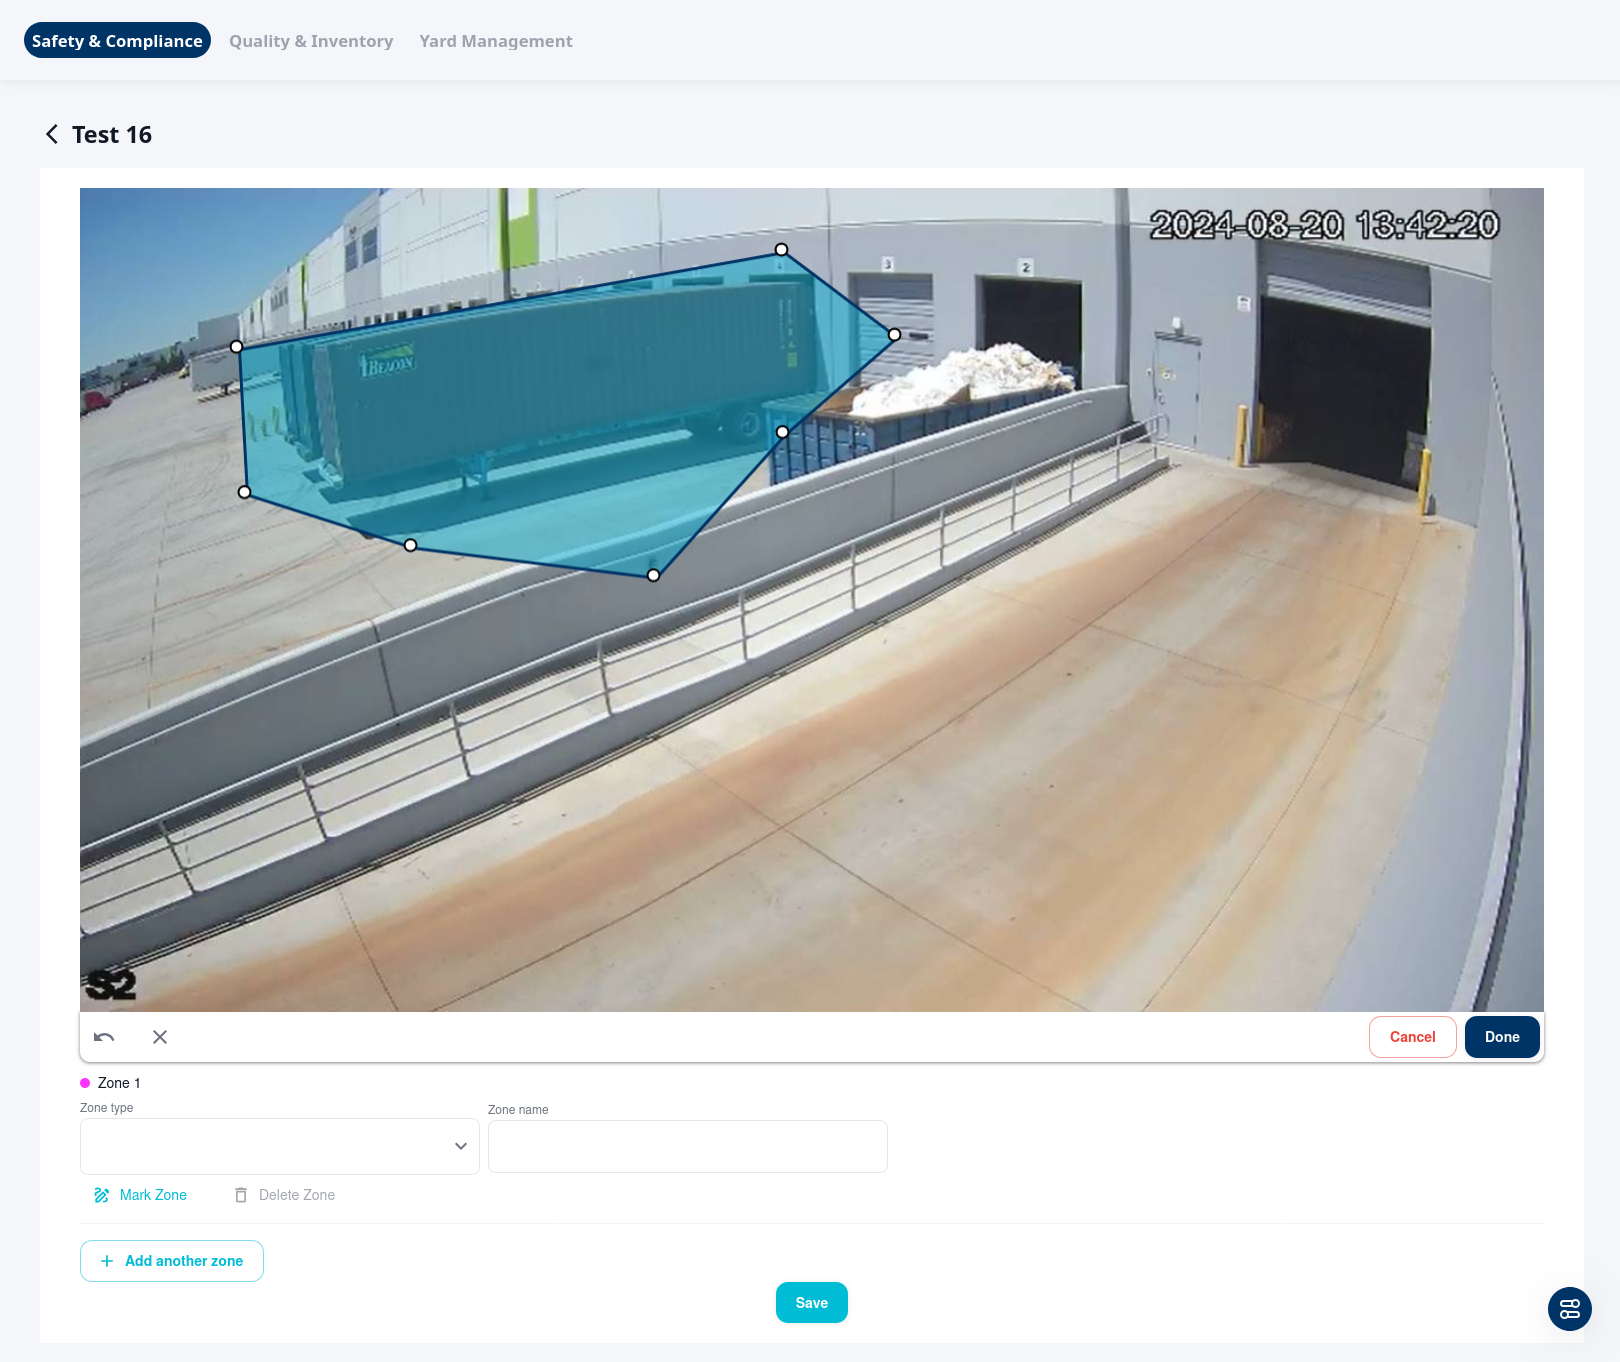
2. Zone Settings
- Zone Type: Select the type of zone from the dropdown. This could be a zone for detecting specific activities like quality station, ergonomics risk zone, or other.
- Zone Name: Give your zone a descriptive name that identifies its purpose.
-
NOTE: Zone names must be unique within each camera and must differ from the camera name. The same zone name can be reused across different cameras — this is particularly useful when tracking objects across overlapping camera views.
-
3. Marking a Zone
- After setting the zone type and name, click the "Mark Zone" button.
- Use the polygon tool to draw a zone directly on the camera's view. This zone will define the specific area where the module will operate.
- You can adjust the shape, size, and positioning of the zone by clicking and dragging the control points.
- At any point during drawing, you can edit the canvas with the icons/buttons in the toolbar just below the image:
- Curvy Back Arrow: Remove the most recently confirmed point
- X Icon: Clear the canvas of the current polygon.
- Cancel Button: Cancel the creation of current zone.
Note: An object is determined to be in the zone when the bottom center of the object's bounding box (the rectangle surrounding the object during detection) is in the zone. Keep that in mind when drawing your zones. To view object's bounding boxes, navigate to Live Camera Views and toggle on "Bounding Box"
3a. Directional Movement
Some zone types (such as Stop Sign Violation Zone) require an additional action: marking the directional movement. This is an arrow to determine the direction of expected movement of a detected object for the desired incident to be reported. For example, a forklift might drive multiple directions in the same lane. However, in order to trigger a stop sign violation, the forklift would only be moving in a single direction within the zone (the direction that faces the stop sign).
To draw a direction arrow:
- Click "Mark Directional Movement".
- Click once from the start of the direction.
- Click once more in the end direction.
You should see an arrow pointing in the direction of the expected movement.
Note: Try to be as accurate as possible with regards to the direction angle. This will determine whether the object is moving in the required direction for an incident to be reported or not.
4. Finalizing the Zone
Once you have completed your zone, click Done in the toolbar below the image.
5. Managing Multiple Zones
- You can add multiple zones by clicking on + Add another zone.
- To delete a zone, select the zone and click on Delete Zone.
6. Finalizing Your Zones
After setting up the zones:
- Review the zones and make sure they are accurately placed.
- Click Save to apply the changes.
- After returning to the Area Configuration page, the "Submit Configuration Changes" button will be enabled. This button will add the zone changes and trigger a required restart of the Arvist NVR server. This should only take about a minute or so (depending on the number of cameras and general activity on the streams).
IMPORTANT: Submitting your changes is required in order for zones to take effect. If you leave the area configuration section before clicking the button to submit your changes, all new zone configurations will be lost! Adding new zones does not constitute as leaving the area configuration section. It is recommended to create as many zones across cameras as necessary before submitting to reduce the amount of times you will have to restart the Arvist NVR server.